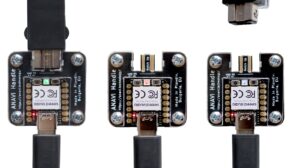
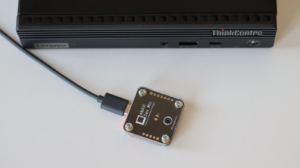
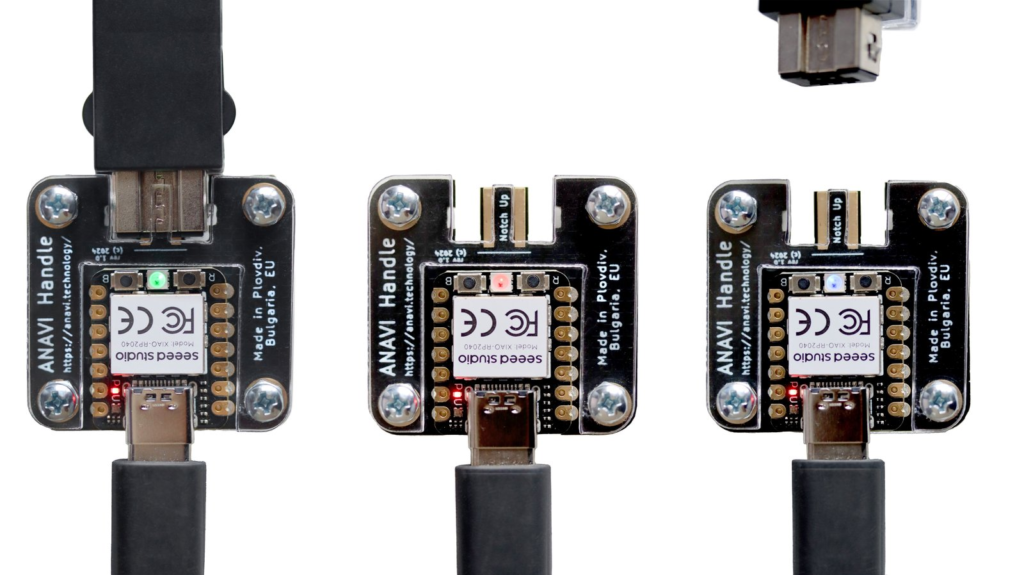
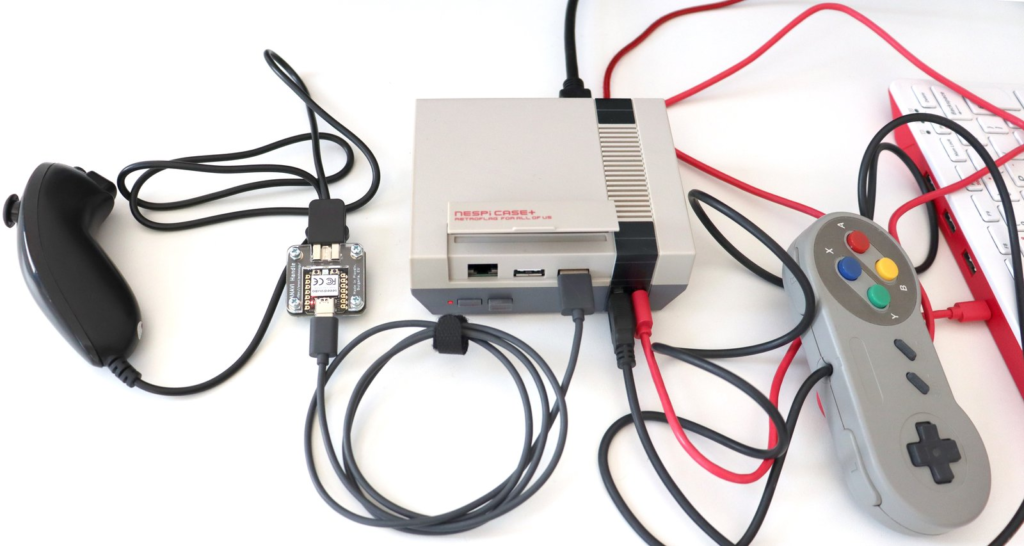
The Open Source Hardware Association (OSHWA) officially certified our new gadget ANAVI Handle in April. ANAVI Handle is a small USB-C adapter with XIAO RP2040 that allows you to use Wii Nunchuk-compatible controllers as USB HID peripherals on your personal computer. You can configure ANAVI Handle to adapt the controller as a joystick, keyboard or a mouse.
OSHWA, a prominent U.S.-based non-profit, manages the Certified Projects Directory and annually hosts the prestigious Open Hardware Summit. Their certification program ensures that a project’s interpretation of “open source hardware” aligns with the community’s standards, promoting transparency and accessibility.
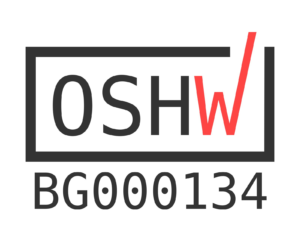
Each certified hardware version is identified by a unique identification number (UID) that includes a country code and a numerical sequence. On April 19th, ANAVI Handle version 1.0 was certified with the UID BG000134. This UID, displayed through the OSHW Certification Mark, simplifies navigation and information access for interested parties. The “BG” prefix indicates that the ANAVI Handle is from Plovdiv, Bulgaria, a city renowned as Bulgaria’s second-largest and Europe’s oldest continuously inhabited city, with over 6000 years of history.
Our projects, including the ANAVI Handle, are distinguished by our unwavering commitment to complete openness. Every aspect of our design and functionality is made accessible to all, reflecting the true spirit of the open-source community. From the KiCad-designed printed circuit board to the highly-configurable firmware powered by CircuitPython, we exclusively use free and open-source software.
The ANAVI Handle is an open-source hardware USB adapter for the Nintendo Wiimote connector. Its open-source firmware transforms the Nunchuk controller into a USB mouse, keyboard, or joystick. If you missed out on the crowdfunding phase, don’t worry—you can still snag a kit from Crowd Supply.
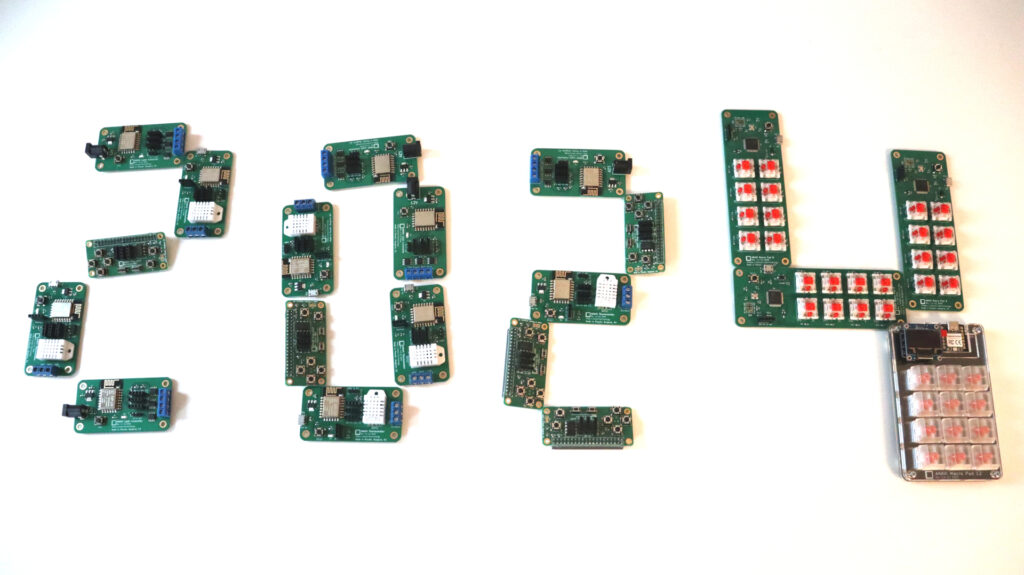
As we step into 2024, we extend our warmest wishes to all makers and engineers passionately involved in open-source software and hardware ecosystem. May the coming year be filled with groundbreaking projects, collaborative efforts, and success in all your endeavors!
2023 in Review
2023 was a significant turning point for the tech industry. It marked rise of AI and also the end of the global chip shortage, providing relief to both small and large manufacturers and paving the way for new cutting-edge devices. Among the highlights of 2023 was the very anticipated release of Raspberry Pi 5 single board computer.
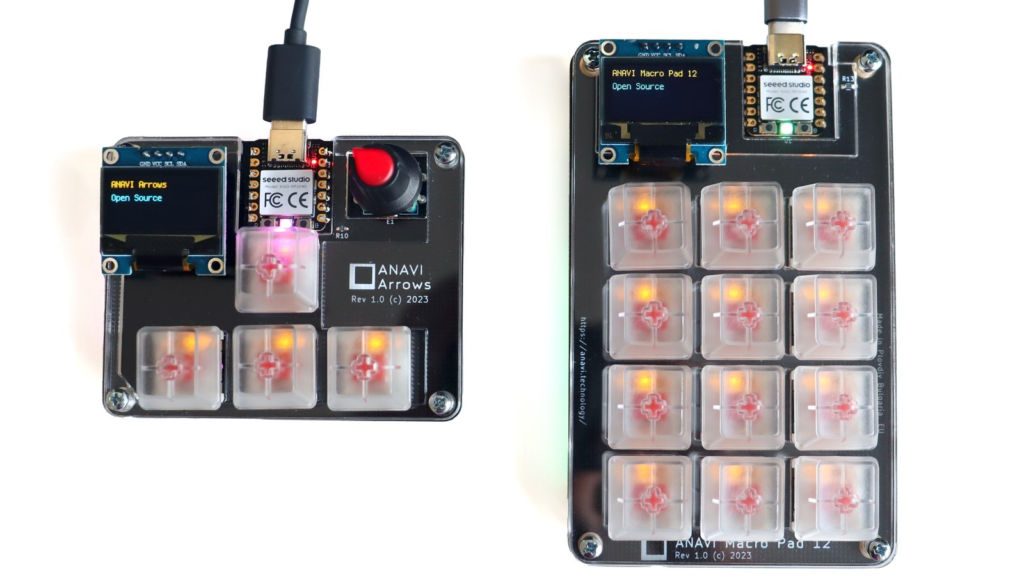
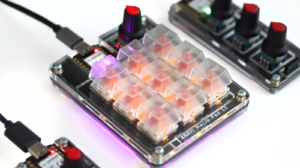
ANAVI Arrows and ANAVI Macro Pad 12
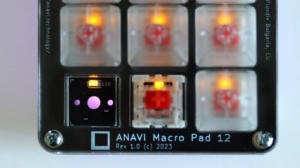
In 2023, our open source hardware lineup expanded with a couple of new mechanical keyboards ANAVI Macro Pad 12 and ANAVI Arrows. Both are OSHWA certified and support QMK and KMK. We have dedicated considerable efforts to streamline the production of our existing products, ensuring that we maintain competitive retail prices while meeting the growing demand for years to come. Despite rising production costs, we have maintained our prices without any increases.
2024 Roadmap
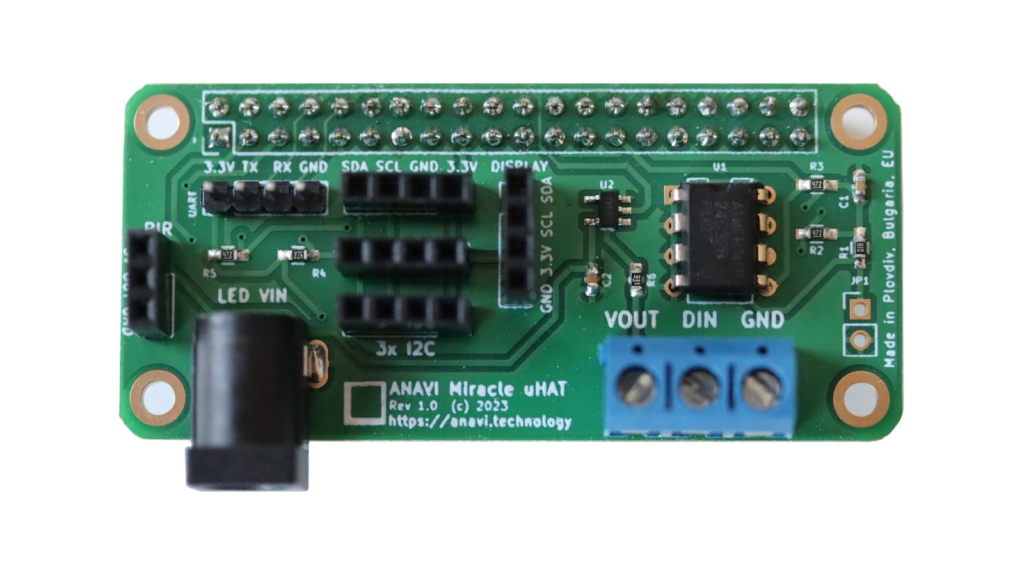
Looking ahead to 2024, we’re thrilled to unveil a range of exciting products. The ANAVI Miracle uHAT takes center stage, allowing users to conduct a symphony of color with this open source add-on board for Raspberry Pi single board computers. Featuring compatibility with addressable RGB LED strips like WS2812B, mini I2C OLED display, and sensors, it opens up a world of possibilities for dynamic and interactive projects. We hope to launch a crowdfunding campaign for ANAVI Miracle uHAT at Crowd Supply in Q1 2024.
ANAVI Miracle uHAT for Raspberry Pi
But that’s not all. Our lineup for 2024 also includes plans for USB adapter board designed for Wii Nunchuk compatible joysticks, providing a seamless gaming experience. Additionally, we’re working on a USB microphone, IoT development boards and a CO2 sensor—innovations that align with our commitment to developing practical and meaningful open-source hardware solutions. Stay tuned for more surprises, including potential additions to our collection of mechanical keyboards, as we continue to push the boundaries of what’s possible in the world of DIY electronics. Here’s to another year of collaboration, creativity, and limitless innovation in the open-source hardware community!
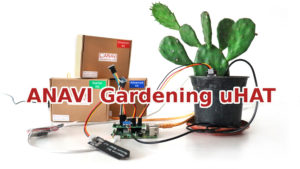
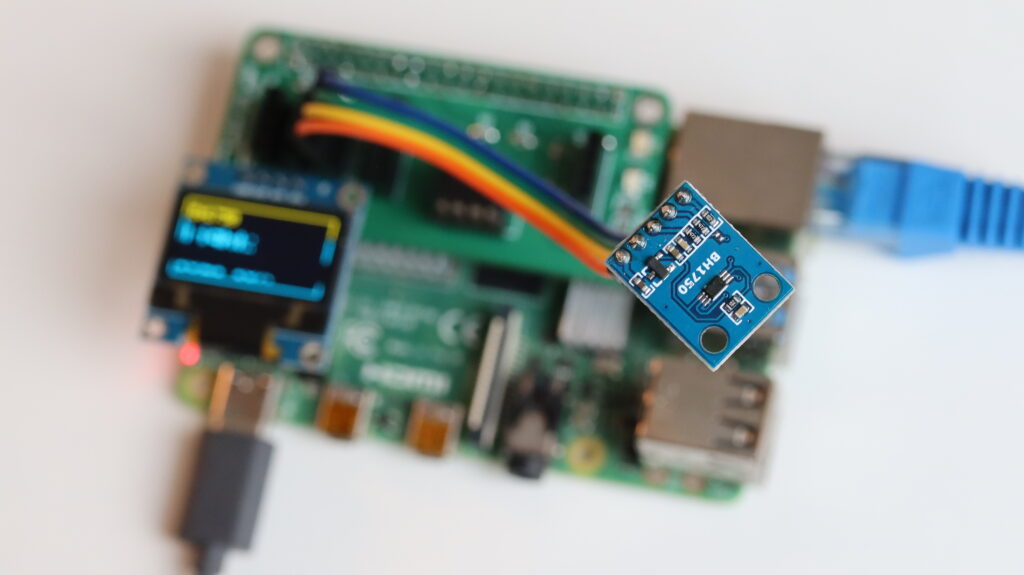
In the world of electronics and IoT, gesture recognition has emerged as a fascinating and practical technology. Whether it’s controlling your favorite gadgets with the wave of a hand or adding a touch of magic to your projects, gesture recognition sensors play a pivotal role. Among the numerous sensors available, the APDS9960 stands out as a versatile and widely used I2C sensor at a very affordable price. In this blog post, we will take you on a journey through the fascinating world of gesture recognition using the APDS9960 sensor on a Raspberry Pi and any of our popular add-on boards: ANAVI Infrared pHAT, ANAVI Light pHAT, ANAVI Gardening uHAT, ANAVI Info uHAT as well as ANAVI Miracle uHAT and ANAVI CO2 uHAT (both of which are in final development).
What is APDS9960?
APDS9960 is an I2C (Inter-Integrated Circuit) sensor produced by Broadcom (formerly Avago Technologies). It is known for its versatility and is commonly used for gesture recognition, proximity sensing, ambient light sensing, and color sensing applications. Gestures are detected at a distance of 10 to 20 cm. The sensor has built-in UV and IR filters for better recognition. Its wide range of applications makes it a favorite choice among electronics enthusiasts, engineers, and hobbyists. Ovewr the years APDS9960 has been integrated in many popular consumer electronic devices, including Samsung Galaxy S5 smartphone.
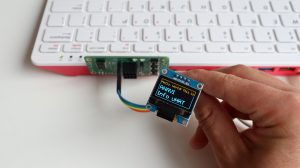
In this tutorial, we will explore how to set up gesture detection on a Raspberry Pi running the Raspberry Pi OS Linux distribution. Specifically, we will use the APDS9960 I2C sensor connected to a Raspberry Pi uHAT (add-on board) and a mini OLED SSD1306 I2C yellow-blue display.
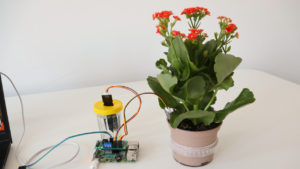
BH1750 I2C light sensor attached to ANAVI CO2 uHAT and a Raspberry Pi single board computer running GNU Linux distribution
🔌 Hardware Setup
Both APDS9960 sensor and the mini yellow-blue SSD1306 OLED display rely on the serial communication protocol I2C that allows multiple electronic devices to communicate with each other using only two wires: serial data (SDA) and serial clock (SCL). Raspberry Pi single board computers have two different I2C busses. The primary I2C bus is at GPIO 2 (physical pin 3 for SDA) and GPIO3 (physical pin 6 for SCL). These pins should be used to attach APDS9960 and the mini OLED display to the Raspberry Pi. Also APDS9960 should be connected to 3.3V and GND pins of the Raspberry Pi to be powered. This makes 4 wires in total to attach the sensor. ANAVI HATs (Hardware Attached on Top) for Raspberry Pi offer dedicated slots for I2C sensors. On ANAVI Info uHAT and ANAVI CO2 uHAT there are even dedicated slots for the mini OLED display.
Of course the OLED display is optional and as an alternative we offer a simple command-line Python3 example for APDS9960 which can function without the OLED display.
🖥️ Software Setup
The software setup is straight forward: install Raspberry Pi OS on microSD card, boot your Raspberry Pi and enable I2C using raspi-config. More details are available in the user’s manual for our HATs.
🐍 Python3 Scripts
The heart of our demonstration are scripts written in the Python 3 programming language. We’ve tailored the script to work seamlessly with Raspberry Pi OS, but it should also run smoothly on any other GNU Linux distribution. These scripts rely on popular Python3 libraries like PIL and Luma OLED. You can find the source code on GitHub for reference and further experimentation: https://github.com/AnaviTechnology/anavi-examples/tree/master/sensors/APDS-9960/python
There are two different Python 3 scripts to demonstrate APDS9960 gesture detection:
gesture-oled.py for detecting gestures and showing them on the mini OLED display as in the video
gesture.py for detecting gesture and printing them in the command-line interface (use this one if don’t have a suitable mini OLED display)
👁️ Real-Time Gesture Detection
Experience the magic as the APDS9960 sensor detects your hand movements, including swipes, taps, and more. Witness how your Raspberry Pi interprets and responds to these gestures in real-time, opening up a world of interactive possibilities. The video provides insights into potential issues you might face during setup and offers practical tips to ensure a seamless experience.
So, if you are ready to embark on this exciting journey into gesture recognition technology, grab your Raspberry Pi, APDS9960 sensor, and let’s get started!
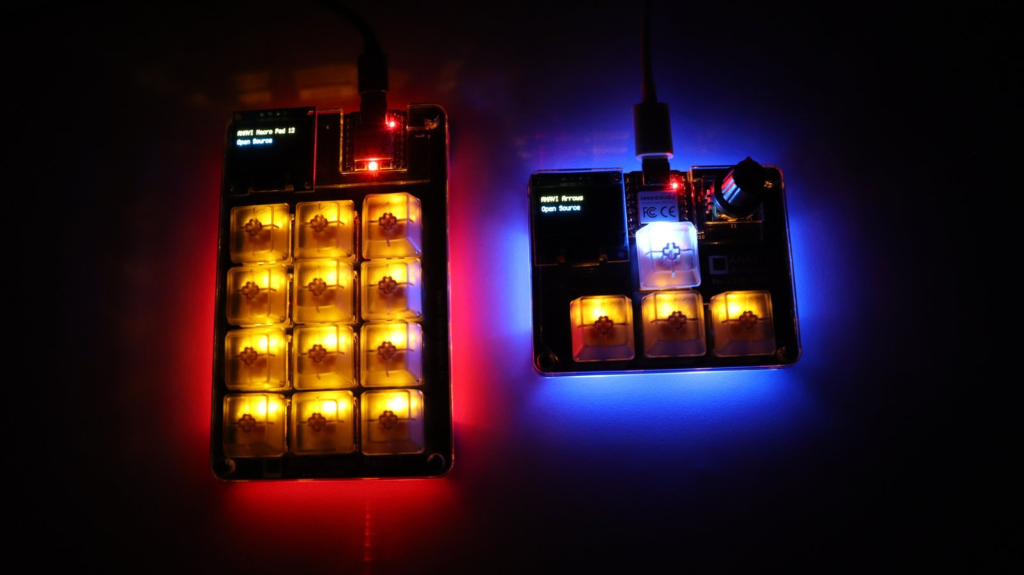
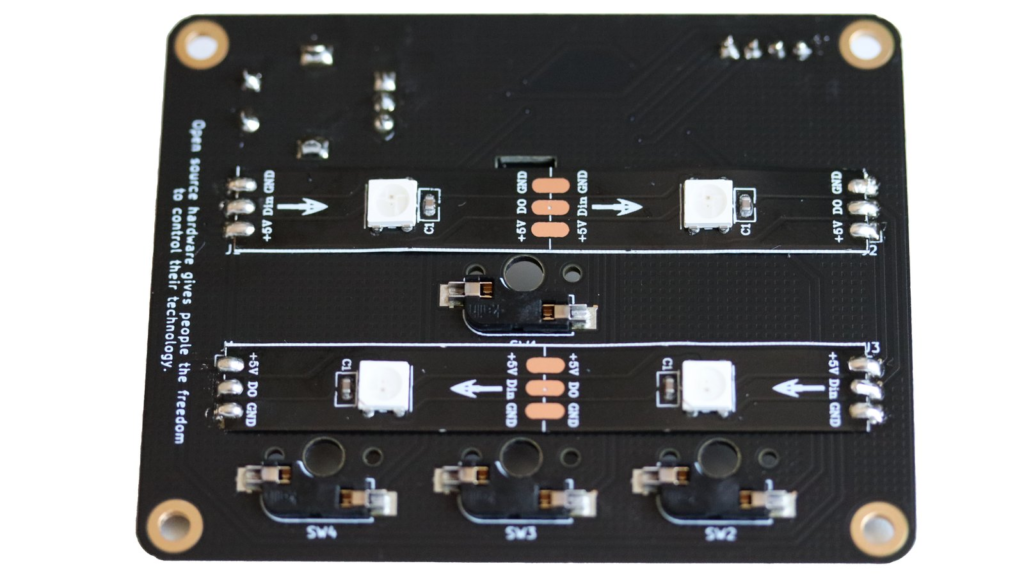
I2C (Inter-Integrated Circuit) is a popular serial communication protocol that allows multiple integrated circuits to communicate with each other over a short distance, typically limited to a few meters. Each device on the bus has a unique address, identifying it and allowing it to communicate individually. The protocol was developed by Philips (now NXP Semiconductors) in the 1980s. Over the years it has become a standard for communication between various electronic components in embedded devices. I2C can be used to connect various peripherals, such as sensors, displays and EEPROMs. The mini OLED yellw-blue displays on our compact mechanical keyboards ANAVI Macro Pad 12 and ANAVI Arrows are connected to the Raspberry Pi RP2040 microcontrollers over I2C.
ANAVI Arrows and ANAVI Macro Pad 12 are open source mechanical keyboards with mini OLED I2C displays
I2C is easy to use becase it requires only two wires for communication:
SDA (Serial Data) for transmitting and receiving data between devices
SCL (Serial Clock) for a clock signal to synchronizes the data transfer between the devices
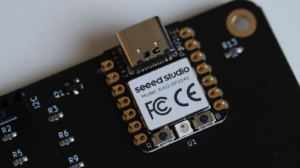
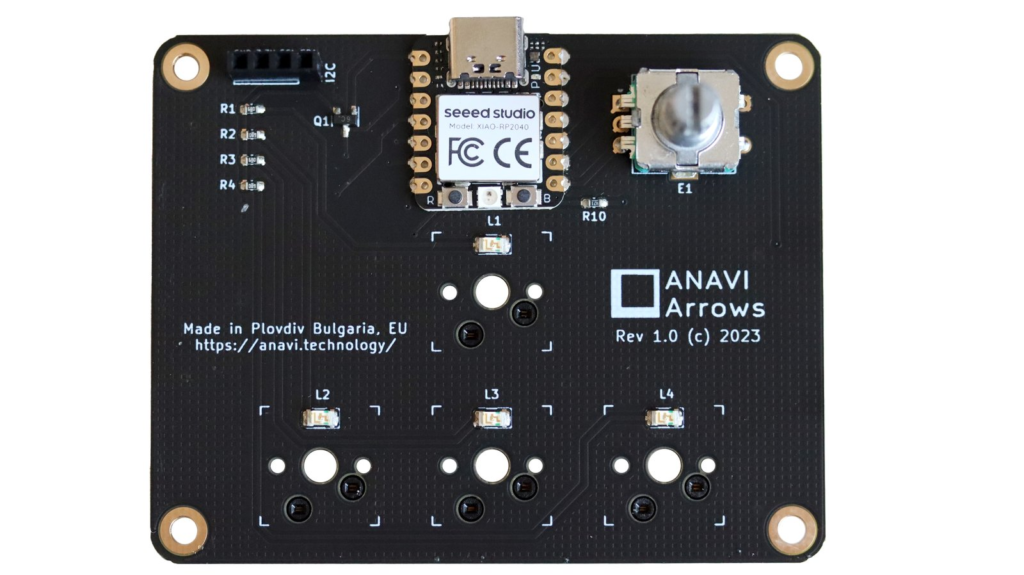
The core component of our hot-swappable mechanical keyboards ANAVI Macro Pad 12 and ANAVI Arrows is Seeed Studio XIAO RP2040 module. This is actually a tiny development board suitable for surface-mount technology (SMT) assembly and equipped with a Raspberry Pi RP2040 32-bit dual-core ARM Cortex M0+ MCU, 264 KB SRAM, 2 MB Flash memory, 11 GPIO pins and USB-C connector. The I2C interface is located on pins D4 (for SDA) and D5 (for SCL) of XIAO RP2040.
Seeed Studio XIAO RP2040 module on ANAVI Macro Pad 12 mechanical keyboard
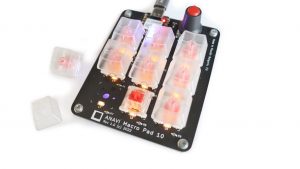
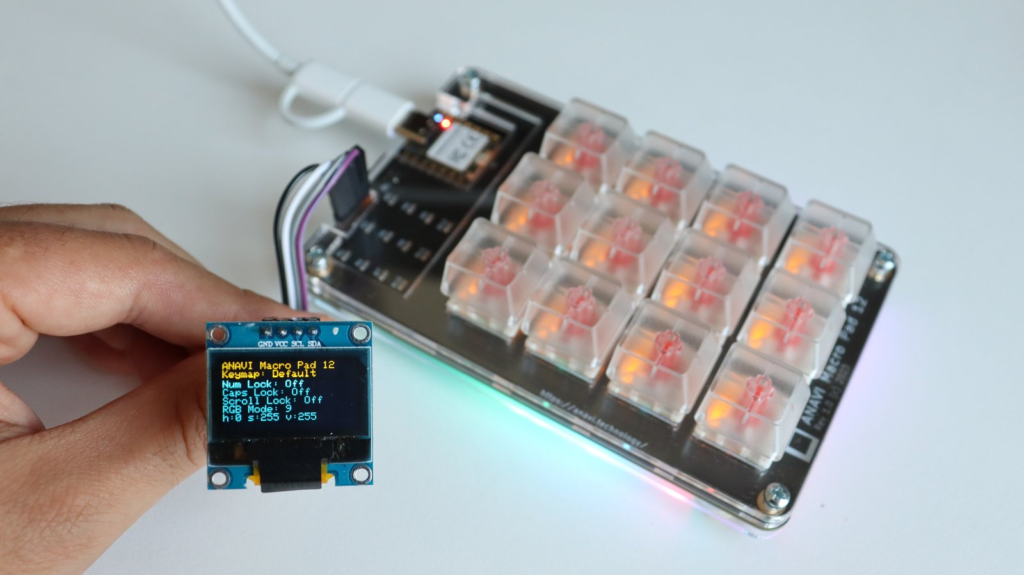
A yellow-blue mini OLED I2C display is included in all kits with ANAVI Macro Pad 12 and ANAVI Arrows. It has 4 pins: GND (ground), VCC (supply voltage), SCL, and SDA. This display relies on SSD1306, a single-chip CMOS OLED/PLED driver with controller for organic / polymer light emitting diode dot-matrix graphic display system which consists of 128 segments and 64 commons. It is the same display we include in our other mechanical keyboards like the ANAVI Macro Pad 10 and ANAVI Macro Pad 8, Internet of Things devices like the ANAVI Thermometer and ANAVI Gas Detector, tools like ANAVI Fume Extractor, and Raspberry Pi add-on boards like ANAVI Info uHAT. This versatile mini OLED display is a great fit for many projects, You can pick one up at Mouser if you need a spare.
Mini yellow-blue 0.96″ OLED display attached to ANAVI Macro Pad 12 with QMK firmware for mechanical keyboards
There is a dedicated slot for the display on the printed circuit board. Just plug the mini OLED display into it and then connect the mechanical keyboard to a computer. In every kit with ANAVI Macro Pad 12 and ANAVI Arrows, you will find four additional male-to-female jumper wires included, providing you with an exciting opportunity to get creative with your project. If you decide to design your own 3D printed case for the keyboard, these jumper wires may become handy. They grant you the flexibility to reposition the mini OLED display to a location of your choice within the case.
ANAVI Macro Pad 12 is compatible the two most popular open source firmwares for mechanical keyboards: KMK and QMK. KMK is written in CircuitPython and QMK in the C programming language. Both support OLED displays over I2C.
Out of the box ANAVI Macro Pad 12 and ANAVI Arrows come with the KMK firmware. It uses the extension Peg Oled Display based on the open source CircuitPython libraries Adafruit_CircuitPython_DisplayIO_SSD1306 and Adafruit_CircuitPython_Display_Text. This extension allows your keyboard to display images or text and even to react to the currently selected keyboard layer.
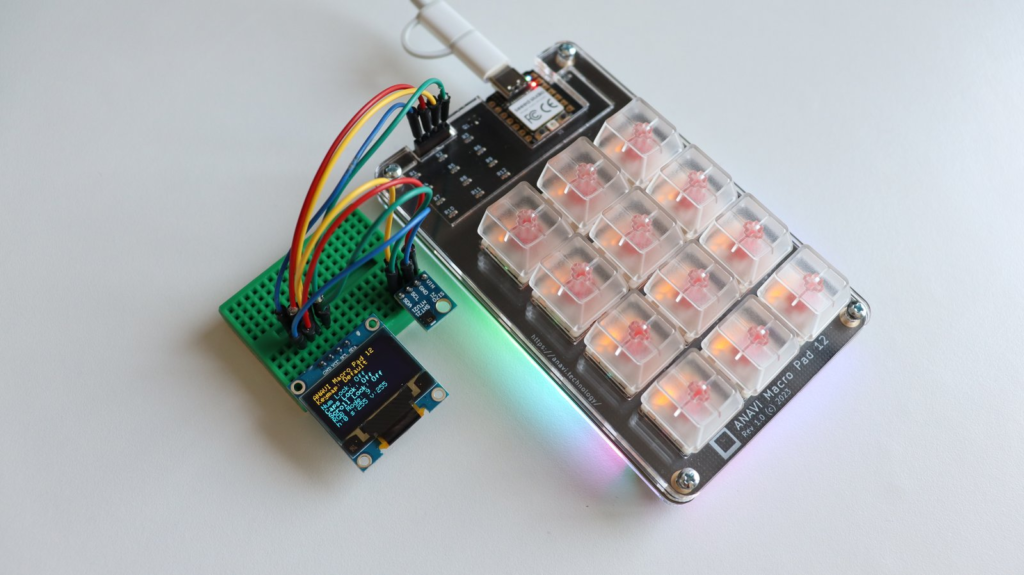
ANAVI Macro Pad 12 with a breadboard and additional I2C peripherals
Makers with advanced skills have a fantastic opportunity to extend the capabilities of the keyboard project by adding more I2C peripherals. Using a breadboard and without any soldering, makers can easily connect additional I2C peripherals, such as sensors or other modules that communicate via I2C, to the existing setup. This allows them to expand the project’s functionalities and explore various creative ideas. Those seeking a more permanent and tailored extension can even design their own custom I2C add-on printed circuit board. The mini OLED displays included in the kits work out of the box, but it is important to be aware that incorporating any other I2C devices into the keyboard will require adjusting the KMK firmware to support the additions.
Support our crowdfunding campaign and get the open source mechanical keyboards ANAVI Macro Pad 12 and ANAVI Arrows with a mini OLED display for real-time notifications and customizable graphics at your fingertips. Learn how to use I2C and unleash your creativity by extending the keyboard with additional peripherals!
Within the realm of computer keyboards, a remarkable open-source firmware called KMK has surfaced, captivating enthusiasts from all corners. KMK possesses a potent capability to revolutionize mechanical keyboards into personalized instruments, enabling users to venture into uncharted territories of customization and productivity.
KMK Open Source Mechanical Keyboard Firmware Written in CircuitPython
CircuitPython is an open-source programming language that runs on microcontrollers used in various embedded applications, including mechanical keyboards like ANAVI Macro Pad 12 and ANAVI Arrows from our crowdfunding campaign at Crowd Supply. Built upon the foundations of Python, CircuitPython is specifically crafted to cater to the requirements of resource-limited embedded devices housing microcontrollers. One of the standout merits of CircuitPython lies in its user-friendly nature and effortless adaptability, particularly beneficial for newcomers who may not possess extensive coding expertise.
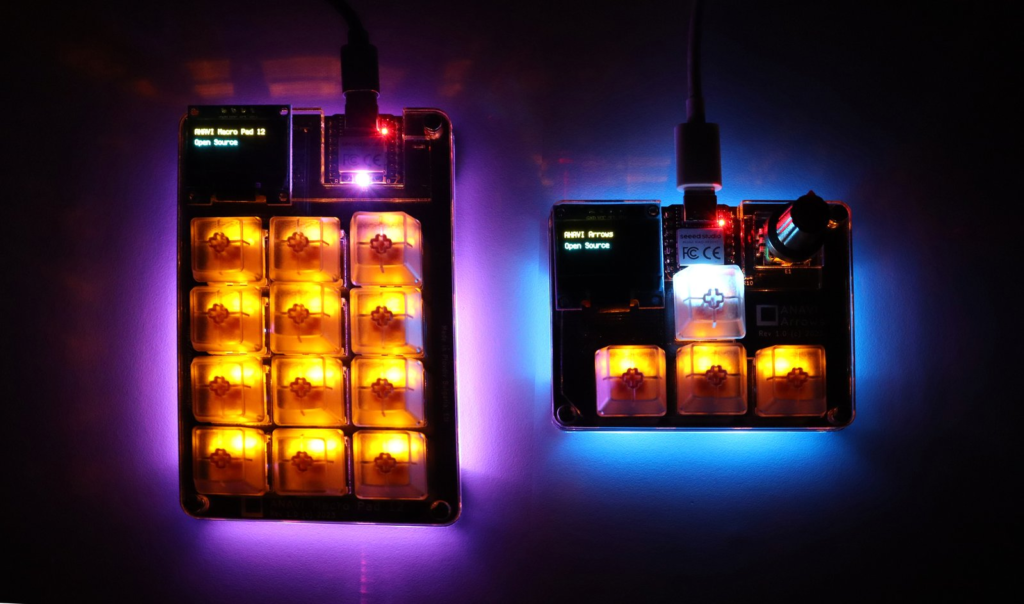
ANAVI Arrows and ANAVI Macro Pad 12 with the open source firmware KMK written in CircuitPython
The source code of KMK is readily available on GitHub, released under the GPLv3 license. The inception of KMK can be traced back to 2018. Notably, the KMK source code follows a coding style that employs the Python code formatter, known as Black, and embraces the usage of single quotes.
KMK firmware runs on Raspberry Pi RP2040 microcontoller which is in the core of Seeed Studio XIAO RP2040 module
The hardware requirements for microcontrollers to run KMK are: a minimum of 256KB of flash storage, support HID over USB and/or Bluetooth, CircuitPython version 7.0 or newer. With its impressive hardware capabilities, the Raspberry Pi RP2040 microcontroller is a perfect fit for CircuitPython and KMK. Because of this we selected Seeed Studio’s XIAO module with RP2040 for ANAVI Macro Pad 12 and ANAVI Arrows.
KMK offers many key features:
Key Mapping: Customize key assignments to suit individual preferences
Macros: Create and assign macros for automating tasks or executing commands
Layers: Define multiple virtual layers for accessing different functions or modes
LED Control: Customize backlighting and LED behavior
Rotary Encoder: Rotary encoders for various functions like volume control or scrolling.
Mini OLED Display: Compatibility with mini OLED displays, allowing users to display custom information or visuals on their keyboards
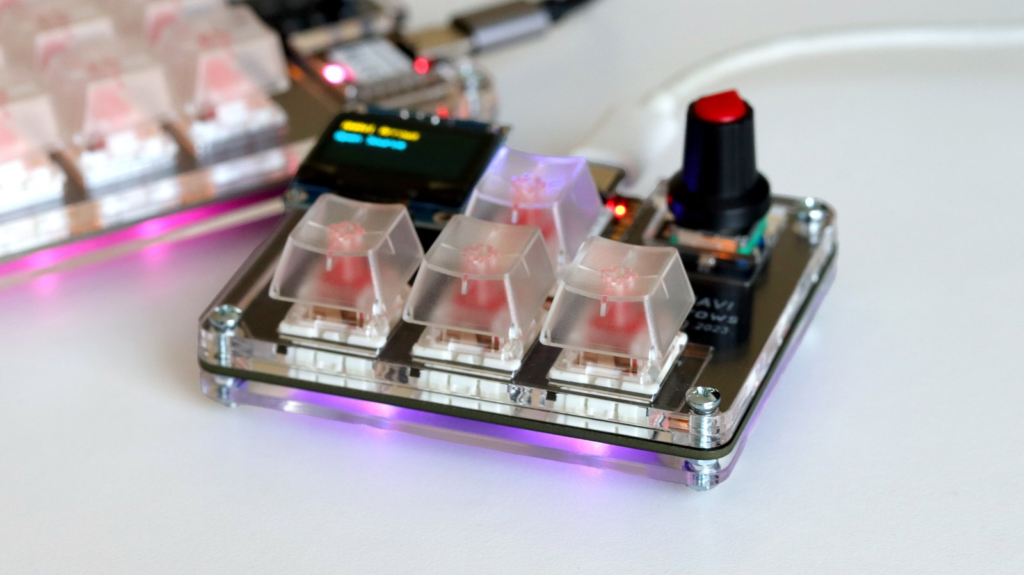
Back-light and under-light effects with KMK firmware on the mechanical keyboards ANAVI Macro Pad 12 and ANAVI Arrows
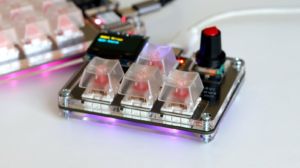
A standout feature of the ANAVI Macro Pad 12 and ANAVI Arrows is their seamless switch swapping capability, allowing you to tailor your typing experience on the go! With utmost ease and no need for soldering, thanks to the convenient hot-swappable sockets integrated into the printed circuit board, anyone can effortlessly remove a switch from its socket and replace it with another compatible switch.
This revolutionary feature provides several benefits to keyboard enthusiasts and users who like to customize their typing experience. It allows for easy experimentation with different switch types, enabling users to find the switch that suits their preferences best. It also simplifies switch replacement, making it more convenient to replace a faulty switch or try out different switches without needing specialized soldering equipment or skills.
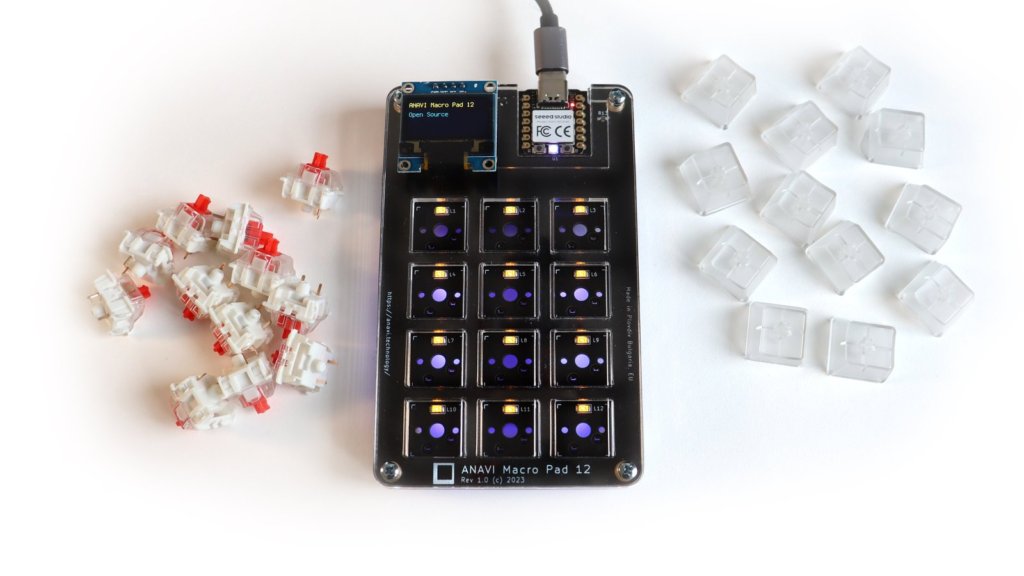
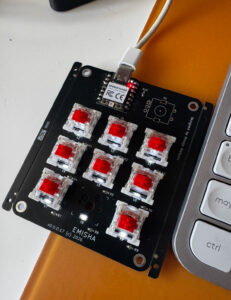
Basically the whole key is like a sandwich: hot-swappable socket, mechanical switch and a keycap. All kits with ANAVI Macro Pad 12 and ANAVI Arrows include Gateron red mechanical switches. However thanks to the hot-swappable sockets you can experiment with various options of clicky, tactile and linear Cherry MX compatible mechanical switches from different brands with various tech specs and colors: red, blue, brown, green, silver, etc.
The printed circuit boards of ANAVI Macro Pad 12 and ANAVI Arrows are designed with Kailh hot-swap sockets on the back. These sockets are for surface-mount technology (SMT) assembly. To provide backlight on the front of the printed circuit boards there is a separate LED under each mechanical switch. We decided to make both of these keyboards with north-facing switches, aka the LED on each key is on the top (north) part of the switch. Furthermore, there are WS2812B addressable LEDs on the back. All these LEDs combined with the translucent keycaps included in the kit create awesome light effects when the keyboard is turned on. The open source firmware KMK allows fine tuning of the lights.
Although, as you can see in the video it is possible to hand-solder the sockets, this is appropriate only for a prototype. For manufacturing the keyboards ordered from the crowdfunding campaign we have hired a trusted local factory and they will do a professional lead-free assembly of all components. Using these hot-swappable sockets and SMT LEDs there is no need of manual hand soldering of any mechanical switches. This significantly simplifies and speeds up the manufacturing process. The end result is better quality and lower price.
Our crowdfunding campaign has a very modest goal of just $1. It will help us make the keyboards in my hometown Plovdiv, Bulgaria, EU thanks to the trusted supply chain we have established throughout the years. Order ANAVI Macro Pad 12 or ANAVI Arrows to get a cool mechanical keyboard and help us bring these entirely open source hardware projects to life!
Both ANAVI Macro Pad 12 and ANAVI Arrows feature high-quality gold-plated circuit boards designed with the free and open source software KiCad. These compact keyboards are driven by the Seeed Studio XIAO RP2040 with Raspberry Pi RP2040 microcontroller, ensuring top-notch performance. Equipped with a USB-C connector and a charming mini yellow-blue OLED display, they combine functionality with visual appeal. Thanks to the popular open-source KMK firmware written in CircuitPython, personalizing keyboard layouts and macros becomes a breeze.
ANAVI Arrows
Import your typing experience with our bright and shiny compact mechanical keyboards, made in Plovdiv, Bulgaria, EU. Support our crowdfunding campaign and help us bring these unique and high-quality open source keyboards to life.
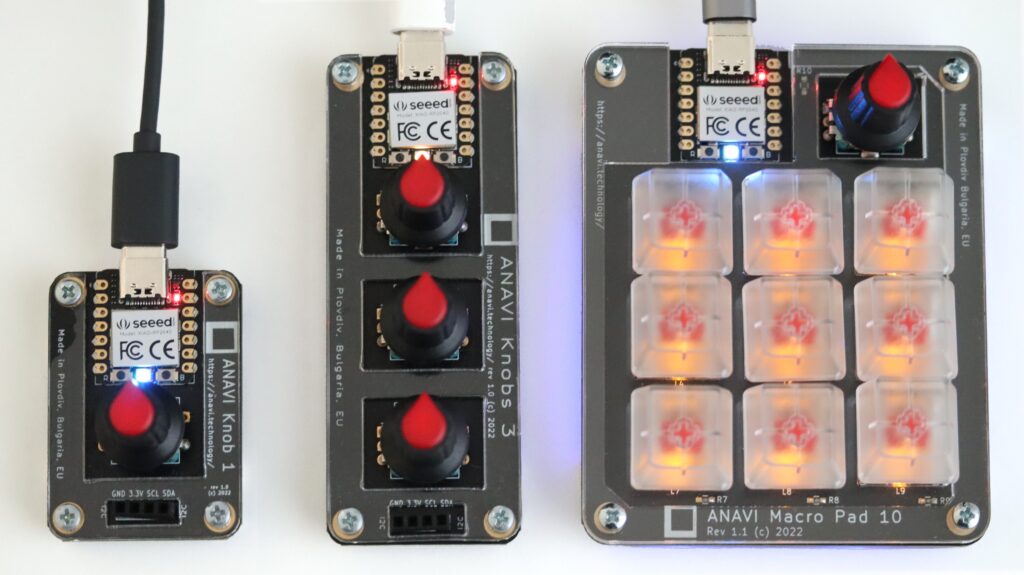
There are two different options for mechanical keyboard open source firmware for ANAVI Macro Pad 10, Knobs 3, and Knob 1: KMK and QMK. Both of which have been getting upgrades recently!
KMK is a feature-rich and beginner-friendly open source firmware for mechanical keyboards, written in CircuitPython, which comes preloaded on the Macro Pad 10 and Knobs 1 and 3. The source code is available on GitHub under the GPLv3 license. So… if you have code suggestions to make it better, just open a GitHub pull request. This is exactly what Stefan Misch recently did, by improving the encoder resolution.
ANAVI Macro Pad 10, ANAVI Knobs 3 and ANAVI Knob 1
Huge thanks to Stefan for his valuable contribution to the upstream of KMK! If you own Macro Pad 10, Knobs 3, and Knob 1, please consider upgrading the KMK firmware on your mini mechanical keyboard to get his fix.
In other news: the GitHub pull request that adds support for ANAVI Knobs 3 was finally merged in QMK! QMK stands for Quantum Mechanical Keyboard. It is probably the most popular firmware for mechanical keyboards and supports literally hundreds of devices, including ANAVI Macro Pad 8 and our other mechanical keyboards. The source code is available under GPLv2 license and written in C. Initial support for the Raspberry Pi RP2040 microcontroller in QMK was added in September 2022. We started the porting efforts in October, and shortly after that, patches for ANAVI Macro Pad 10 and Knob 1 were merged. However, it took almost 6 months to merge the GitHub pull request for ANAVI Knobs 3. The long wait is over: now all of our mini mechanical keyboards are supported by QMK!
ANAVI Knobs 3
The community is very important and makes all the difference in any open source project. Thank you for supporting and improving our open source hardware mechanical keyboards!
As part of the certification program, OSHWA ensures that the definition of “open source hardware” used by a specific project (in our case in these 3 mini mechanical keyboards) matches the community’s definition of open source hardware. They provide a unique identification number (UID) for each version of the certified open hardware device based on the country code and a number. So now we have:
The prefix BG is the country code for Bulgaria, because all these mini mechanical keyboards are made in my hometown of Plovdiv, Bulgaria. As truly and entirely open source projects, we also go one step further. Only free and open source software has been used to design the printed circuit board, the stickers, the firmware, and the documentation. In previous updates we explained how we use KiCad for designing the printed circuit boards and the open source firmware QMK and KMK written in CircuitPython.