I2C stands for Inter-Integrated Circuit, pronounced eye-squared-C, and alternatively known as IIC. It is a synchronous, multi-controller/multi-target (controller/target), packet switched, single-ended, serial communication bus. This protocol is suitable for devices wired at short distances, no more than 2-3m. We use I2C in pretty much all our open source products: Internet of Things, mechanical keyboards and Raspberry Pi HATs.

I2C was originally developed in 1982 by Philips. While that makes it 40 years old, it is still a very convenient and widely used bus. There are many I2C sensors and peripherals. It is in pretty much every smartphone, embedded electronics, microcontroller, personal computer and of course Raspberry Pi.

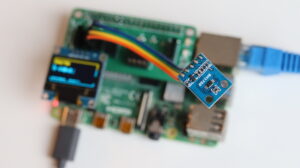
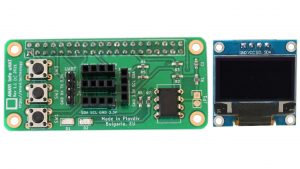
Actually, since the introduction of the famous 40-pin header in 2014, Raspberry Pi single board computers have not one but two I2C buses! We use them both on ANAVI Info uHAT and our other HATs. Th first I2C bus is on pins 3 and 5. On the ANAVI Info uHAT, it is used for the three I2C slots for sensors and the 4th dedicated slot for the mini OLED display.

The second I2C bus is on pins 27 and 28 of the Raspberry Pi and is reserved exclusively for attaching an ID EEPROM. The ID EEPROM contains a software description of the hardware so the operating system on your Raspberry Pi can automatically identify the add-on board.

The I2C bus consists of two signals: SDA (Serial Data) is a data signal, SCL (Serial Clock) is a clock signal. I2C modules also need power, so the dedicated I2C connectors on the ANAVI Info uHAT and our other open source hardware provide two additional pins for VCC and GND. Typically, the VCC for the I2C connectors on our add-on boards for Raspberry Pi are 3.3V.
The I2C bus drivers are “open drain”, which means they can only pull the corresponding signal line at low level. They cannot drive it high. To restore the signal to high when no device is asserting it low, a pull-up resistor has to be added to each signal line. For example, on the ANAVI Info uHAT, we have 4.7K pull-up resistors R4 and R5 connected to SDA and SCL.
Resistor selection varies depending on the devices attached to the bus. In some specific use cases, further adjustment of the resistance value might be required. For systems with lots of devices or longer wires, smaller resistors are better.
How to Enable I2C on Raspberry Pi OS
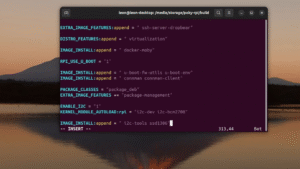
Raspberry Pi OS, previously known as Raspbian, is the default and recommended Linux distribution for all models and versions of the Raspberry Pi single board computer. By default, I2C is not enabled. There are several ways to enable it, but probably the easiest is using the command-line tool raspi-config to perform few basic commands:
- Open a terminal or login remotely via SSH to your Raspberry Pi and type in the following command:
sudo raspi-config - Select
Interfacing Options > I2Cand enable it - Reboot the board
More details are available in the user’s manual for the ANAVI Info uHAT.
I2C Addresses
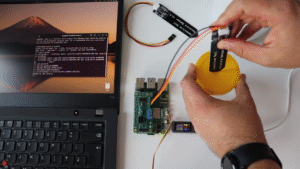
Each I2C device must have a unique address. The I2C reference design has a 7-bit address space, although rarely it might be used with a 10-bit extension. The 7-bit addresses range from 0 to 127 (0 to 0x7F hexadecimal). This is a limitation because it is not possible to have two I2C devices with the same address on the same I2C bus. For example, the I2C address on the mini OLED display included in all ANAVI Info uHAT kits is 0x3C. From the software side, this address is used in the example Python 3 script to access the display.

For Linux distributions, including Raspberry Pi OS, there is a package with a heterogeneous set of I2C tools called i2c-tools. To install it on Raspberry Pi OS, open a terminal and execute: sudo apt install -y i2c-tools. Once you have it installed, you can list attached I2C devices by their addresses with i2cdetect. For example, if the HTU21 temperature and humidity sensor module is attached to the Raspberry Pi, the output will be:
pi@raspberrypi:~ $ sudo i2cdetect -y 1
     0  1  2  3  4  5  6  7  8  9  a  b  c  d  e  f
00:                         -- -- -- -- -- -- -- --
10: -- -- -- -- -- -- -- -- -- -- -- -- -- -- -- --
20: -- -- -- -- -- -- -- -- -- -- -- -- -- -- -- --
30: -- -- -- -- -- -- -- -- -- -- -- -- -- -- -- --
40: 40 -- -- -- -- -- -- -- -- -- -- -- -- -- -- --
50: -- -- -- -- -- -- -- -- -- -- -- -- -- -- -- --
60: -- -- -- -- -- -- -- -- -- -- -- -- -- -- -- --
70: -- -- -- -- -- -- -- --
I2C Sensors and Peripherals
I2C Sensors and Peripherals
ANAVI Info uHAT officially supports the following I2C devices:
- Mini OLED SSD1306 0.96″ display
- HTU21D sensor for temperature and humidity
- BH1750 sensor for light
- BMP180 sensor for barometric pressure
Some of the other popular I2C sensor modules in maker community include:
- APDS-9960 sensor for RGB color and gesture detection
- BME680 for temperature, humidity, pressure and gas sensor
- MCP9808 for temperature
- MPL115A2 for barometric pressure
- ADT7410 for temperature
- MPU-6050 for triple axis acccelerometer and gyroscope
Which is your favorite I2C device? Join the discussion and let us know on Twitter!