Update Home Assistant

Home Assistant is a popular open source platform for home automation. The installation is still tricky and a bit annoying but the nowadays updates are straight-forward and super easy. This article and short video tutorial provide the exact steps how to update Home Assistant operating system and core following the best practices.

How to update Home Assistant?

Updates bring new features, bug fixes and security improvements. Home Assistant is a platform focused on privacy. There are regular updates. If are following the blog posts and the social media accounts you can often read news about critical security updates. It is recommended to install them as soon as possible.

Step 1: backup the existing Home Assistant installation by creating a snapshot of the whole system. From the left menu go to Supervisor. Click the Snapshots tab. Select full snapshot for type and optionally set a name. Click the CREATE button. Wait for a moment until the snapshot is ready.

Step 2: read the releases notes for breaking changes coming with the latest stable version. From the left menu go to Supervisor. Click RELEASE NOTES for any available updates. Check all release notes between the version you are running at the moment and the one you are upgrading to. Use the search function in your web browser to locate the chapter for Breaking Changes.

Step 3: check your configuration. This can be done with Check Home Assistant Configuration add-on. If you don’t have it please first install as shown in the video.

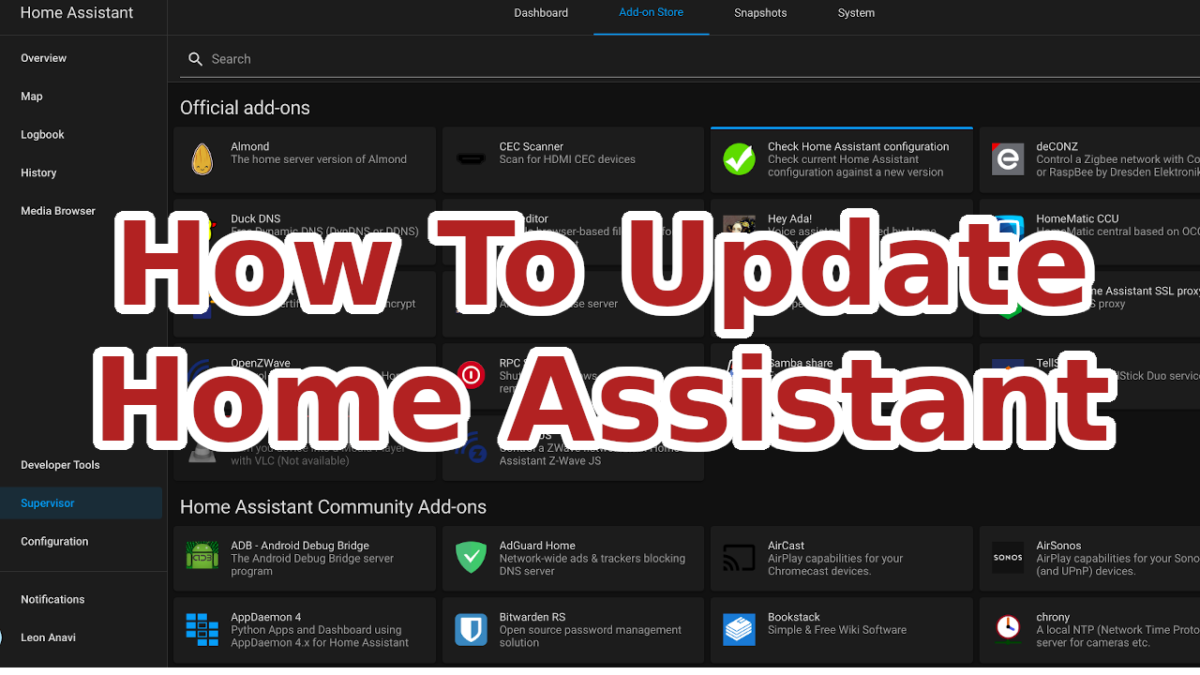
From the left menu go to Supervisor. Select tab Add-on Store. Search for Check Home Assistant configuration. It is an official add-on. Click INSTALL.

After successful installation, click START. Go to tab Log, periodically click the REFRESH button and observe the log output. On Raspberry Pi the check takes about 10 minutes so don’t hold your breath and patiently wait the check to finish. If there are no errors proceed to the next step.

Step 4: Apply an update for the operating system if such is available. From the left menu go to Supervisor. Click UPDATE.

The Home Assistant Operating System is a minimal image that runs containers and comes with Supervisor to manage Home Assistant Core and add-ons. Once you hit the update button in the web interface, depending on your system and Internet connection speed, it will take a while until the update downloads and installs. Just wait patiently. As part of the update Home Assistant will restart so you will temporary lose connection to it.

Step 5: Update Home Assistant Core. After ensuring that you are running the latest stable version of Home Assistant Operating System proceed with updating Home Assistant Core. From the web interface hit the update button and patiently wait. It will again take a while depending on your system’s hardware and Internet connection. As part of the update Home Assistant will restart so you will temporary lose connection to it. After that you will be asked to login again. Congratulations, this the whole update procedure from the user interface. As promised is straight-forward and easy!

One more thing, if are an advanced user and for one reason or another you don’t like graphical user interfaces, it is also possible to update Home Assistant through the command-line interface. Just run in a terminal: ha core update.

If you have any questions or feedback please leave a comment. Subscribe to my YouTube channel and have a look at the open source hardware we offer.

You may also like

Integrating ESPHome Device to Home Assistant

ESPHome is an open source firmware for your ESP8266 or ESP32 devices with simple and yet powerful configuration files that allows you to control them remotely through the open source IoT platform Home Assistant and/or other home automation systems.

In this tutorial you will learn how to add a device with ESPHome in Home Assistant. The open source hardware ANAVI Light Controller with 12V RGB LED strip is used for the demonstration.

Upload ESPHome

You can either do this through the command line or alternatively, you can do it through Home Assistant ESPHome add-on.

Depending on the device you may need to edit an existing ESPHome configuration file or to create new from scratch. An example for ANAVI Light Controller is available at GitHub. Remember to set your WiFi credentials and device password in it as well as to enable the API. After flashing ESPHome to the device it is important to write down the address and the port. Both are printed in the serial output after booting the device.

After flashing ESPHome to the device it is important to write down the address and the port. Both are printed in the serial output after booting the device.

Home Assistant Integration

Open the web interface of Home Assistant. From the left side menu select Configuration and after that click Integrations. Click the button in the right lower corner with label Add Integration. From the menu select ESPHome. Enter connection settings for your ESPHome device. Set the address for host and port both of which were obtained on the first step. Click SUBMIT. Enter the password from the ESPHome configuration file. Click FINISH to complete adding the device.

After successfully adding the ESPHome device to Home Assistant it will appear in the overview section. For more details have a look at the video.

ANAVI Light Controller and 12V RGB LED strip controlled with ESPHome and Home Assistant from mobile application on Android smartphone

You may also like

Select Language in Home Assistant

Select language in Home Assistant

Home Assistant is an advanced open source IoT and home automation platform. The user-friendly web user interface supports multiple languages.

  1. Open a web browser and log into Home Assistant.
  2. Go to you user profile by clicking your user account initials at the bottom of the sidebar.
  3. Select a language from the drop-down menu.
  4. The new language will be applied immediately.

Out of the box Home Assistant supports multiple languages including English, Spanish, French, German, Russian and many more. Home Assistant is an open source project and this allows adding translations and support for more languages in future.

You may also like

Remote HVAC Control with ANAVI Infrared pHAT


Morten Mathiasen,  a highly skilled professional with 25 years of experience in software development and teaching, implemented an open source solution for HVAC control with Raspberry Pi, HTU21D temperature and humidity I2C sensor module as well as our open source hardware ANAVI Infrared pHAT. He recently shared details in a Crowd Supply Field Report.

Raspberry Pi 4 with ANAVI Infrared pHAT and HTU21D I2C sensor module

To save energy and to reduce global warming in his vacation house, Morten turns off the Panasonic HVAC system when his family is not there. Unfortunately, as a result next time when he arrives at the vacation house, it is too cold in the winter and too hot in the summer. It then takes up to 24 hours to get a comfortable temperature in the house.

Controlling the Panasonic HVAC through infrared signals and Home Assistant thanks to ANAVI Infrared pHAT and a Raspberry Pi

To solve this problem, Morten wrote in the C programming language a Home Assistant-based system that uses a Raspberry Pi with ANAVI Infrared pHAT to make an internet-connected remote control. Now, he can turn on the system remotely 24 hours before arriving to ensure a comfortable temperature.

Morten shared the source code under MIT License in GitHub. Give a star to the GitHub repo and spread the word about his fascinating open source project!

You may also like

ANAVI Fume Extractor

ANAVI Fume Extractor is a smart, open source, solder smoke absorber. It is powered by ESP8266 with WiFi, 80 mm fan and supports various peripherals: mini OLED display, MQ-135 analog gas sensor for air quality, sensors for temperature, humidity, barometric pressure and light. The filters are replaceable.

Soldering fumes are dangerous, keep them away with ANAVI Fume Extractor

Furthermore out the box the open source firmware of ANAVI Fume Extractor works with the popular IoT platform Home Assistant over the protocol MQTT. This means you can gather sensor data and control the fume extractor remotely using your smartphone, tablet or personal computer!

Turning on and off ANAVI Fume Extractor from a smartphone using Home Assistant

After more than 10 months of development we launched a crowd funding campaign at Crowd Supply! We are ready for manufacturing in Plovdiv, Bulgaria and now we need your support. We hope you’ll jump in and help us bring this entirely open source project to life!

ANAVI Fume Extractor is a must-have tool for any maker!

You may also like

Let’s Build Together smart LEGO Rainbow with Home Assistant

Recently the famous toy manufacturer LEGO announced a competition to build a rainbow as a symbol of hope. Although the challenge is targeted primary for kids, there are no age restrictions so veterans can also join.

#LetsBuildTogether ​a smart LEGO rainbow with WS2812B LED strip and control it from Home Assistant

This was a great opportunity to have some fun and to add an addressable LED strip which through ANAVI Miracle Controller can be controlled remotely via web interface or moble application of the popular open source home automation platform Home Assistant.

Front view of the LEGO rainbow with a WS2812B LED strip on the first row

To build something similar you will need:

A LEGO rainbow shining at night thanks to ANAVI Miracle Controller and WS2812B LED strip

Although ANAVI Miracle Controller supports 2 addressable LED strips, for this particular use case only one is used so during the initial configuration set the number of LEDs of the other LED strip to 0. This way only one LED strip will be automatically discovered by Home Assistant over the machine to machine protocol MQTT.

A look of our LEGO rainbow from the top

For more details how to enable Home Assistant discovery over MQTT have a look at our other step by step video tutorials for assembly guide, WS2811 12V LEDs as well as for NeoPixels.

You may also like

Holiday Lights with Home Assistant, ANAVI Miracle Controller, and Olimex WS2811 LED Ropes

This YouTube video demonstrates do-it-yourself (DIY) holiday lights to celebrate Christmas or Halloween using ANAVI Miracle Controller, Olimex WS2811 LED ropes and the popular open source home automation platform Home Assistant!

ANAVI Miracle Controller and Olimex LED-Ropes-10 managed from Home Assistant app for Android

All kits of ANAVI Miracle Controller come with WS2812B LED strip, however the board is also compatible with other addressable LED strips. In a previous update we covered Adafruit NeoPixels and now we are focussed on Olimex WS2811 LED Rope.

ANAVI Miracle Controller with mini OLED display and a couple of Olimex LED-ROPE-10

Required Hardware

  • ANAVI Miracle Controller
  • 5V power supply
  • Two Olimex LED-ROPE-10
  • Raspberry Pi (recommended 3 or newer) with Home Assistant

Olimex is a well-known company in the maker community and I am lucky because their headquarter is my hometown Plovdiv, Bulgaria.

Olimex offers addressable, water proof, sealed with resin RGB WS2811 ropes with various number of LEDs. For this video I used a couple of Olimex LED-ROPE-10. The rope is waterproof so it is suitable for both indoor and outdoor installations. It works with power supply in the range from 3.3V to 5.5V and has a dedicated WS2811 driver for each LED.

The typical color code for Olimex LED-ROPE-10:

  • Olimex rope RED wire – VCC (3.3V-5.5V)
  • Olimex rope GREEN/BLUE (varies) wire – GND
  • Olimex rope WHITE wire – DATA

Each RGB LED in Olimex rope draws approximately 50mA at 5V with red, green, and blue at full brightness. Olimex LED-ROPE-10 has only 10 RGB LEDs with makes approximately 500mA and it is OK to power it through ANAVI Miracle Controller. For installation will longer ropes with bigger consumption wire the VCC and GND lines directly to the power supply.

When using Olimex LED ropes, set ANAVI Miracle Controller to 5V input and use an appropriate 5V center positive power supply!

For Olimex LED-Ropes-10 set ANAVI Miracle Controller to 5V and use appropriate 5V power supply
Wiring of a couple of Olimex LED-ROPE-10 to ANAVI Miracle Controller

NOTE: The color codes of other addressable LED strips, including WS2812B LED strip from all kits, are different!

Due to differences in color codes this wiring is valid only for Olimex LED ropes. Be careful and check the proper wiring as well input voltage requirements if you are using a different type of addressable LED strip or rope.

Software

Home Assistant must be installed on an appropriate device. If you haven’t installed it already, a single board computer like Raspberry Pi (version 3 or newer) is the perfect fit!

MQTT broker is also required and must be installed. You can install Mosquitto from Home Assistant add-on store. Integrate the MQTT broker in Home Assistant and enable discovery. The exact steps have been covered in a previous blog post about ANAVI Miracle Controller and Adafruit NeoPixels.

Please, ensure you are running the latest version of the open source firmware for ANAVI Miracle Controller. It is available at GitHub. You can flash it through Arduino IDE following these steps.

After completing the initial installation and integration in Home Assistant, you can easily control the holiday lights from your personal computer, smartphone or tablet. You can either install the official mobile app on your smartphone or use the web interface from any modern HTML5 web browser (Google Chrome, Mozilla Firefox, etc). Furthermore, with Home Assistant you can create automation and trigger automatically the holiday lights depending on various events.

You may also like

ANAVI Fume Extractor Is Coming Soon…

Stay safe while soldering with ANAVI Fume Extractor

ANAVI Fume Extractor is an entirely open source smart solder smoke absorber certified by the Open Source Hardware Association (OSHWA) with UID  BG000060. ANAVI Fume Extractor is powered by a Wi-Fi development board with ESP8266, 80mm fan and a replaceable carbon filter. It has a dedicated slots for a mini OLED I²C display and MQ-135 gas sensor module as well as slots up to 3 additional I²C sensor modules. Furthermore, there are UART pins for easy flashing of custom software and an extra GPIO for connecting external peripherals.

ANAVI Fume Extractor

We are preparing a crowdfunding campaign to support low-volume manufacturing in Plovdiv, Bulgaria. Learn more about ANAVI Fume Extractor and subscribe for updates at Crowd Supply.

You may also like

Improved Arduino Sketch for ANAVI Light Controller

How often do you get software or firmware updates for a 2-year-old device? Probably not very often. This is not the case for ANAVI Light Controller! We have a major update of its Arduino sketch for you.

ANAVI Light Controller

ANAVI Light Controller open source hardware WiFi device for controlling a 12V RGB LED strip. It was brought to life through a crowdfunding campaign at Crowd in 2018. Now is January 2020, so this makes it ~2 years old! A lot of things have changed during this time. ANAVI Light Controller has been certified by Open Source Hardware Association (OSHA) and it now on sale at our distributors: Crowd Supply, Pi Supply and neven.cz.

Terminals for connecting 12V RGB LED strip to ANAVI Light Controller

Recently we made a major improvements to the default firmware available as an Arduino sketch at GitHub:

  • Support Home Assistant automatic discovery over MQTT
  • Turn on LED D1 on ANAVI Light Controller if the device is not connected to local WiFi network and needs initial configuration
  • Wait for a few seconds while LED D1 is blinking immediately after turning on ANAVI Light Controller to allow reset by keeping SW1 pressed
  • Append the last 5 characters of the machine ID to the WiFi Access Point (AP) to simplify the identification of the ANAVI Light Controller during the initial setup
  • Support MQTT messages with large payload for reporting back the current state of the RGB LED strips on topic stat/dev-id/color
  • Add DEBUG macros, disabled by default, if enabled additional debug information will be printed in the serial monitor
Changing colors of 12V RGB LED strip through Home Assistant using ANAVI Light Controller

You can either compile and upload the new version through Arduino IDE or just grab the binary from GitHub and flash it on your ANAVI Light Controller.

To learn more how ANAVI Light Controller works out the box with the popular open source platform Home Assistant read our previous article. It reveals the exact steps the setup MQTT Broker in Home Assistant and after that to automatically discover ANAVI Light Controller.

ANAVI Light Controller is suitable for low-cost 12V analog (non-addressable) LED strips. If you need a WiFi development board for controlling digital (addressable) LED strips at 5V or 12V have a look at our other open source product ANAVI Miracle Controller.

You may also like

Adafruit NeoPixels and Home Assistant

Adafruit NeoPixels are rings, strips and other printed circuit boards with addressable RGB LED strips. It this video tutorial you will learn how to use NeoPixels with the popular open source home automation platform Home Assistant without any coding!

Yes, that’s correct! Let’s get started with Adafruit NeoPixel Ring and NeoPixel Stick in Home Assistant without any coding, just a few simple configurations.

The key for this tutorial is ANAVI Miracle Controller. An ESP8266-powered, open source, Wi-Fi dev board to control two 5V or two 12V LED strips. It supports popular LEDs including Neopixel, WS2811, WS2812B, TM1809, etc. Furthermore ANAVI Miracle Controller has dedicated slots for mini OLED display and up to 3 additional sensor modules. Right now we are running a crowdfunding campaign at Crowd Supply to fund mass production of ANAVI Miracle Controller.

Adafruit NeoPixels work at 5V so set the jumper on ANAVI Miracle Controller to 5V and use an appropriate 5V power supply.

Required Hardware

  • Adafruit NeoPixel Ring
  • Adafruit NeoPixel Stick
  • 6 male to male jumper wires
  • 5V DC power supply
  • ANAVI Miracle Controller
  • Personal computer, for example Raspberry Pi

Step By Step Installation

  • Install Home Assistant through Hass.io on the personal computer (it is recommended to use Raspberry Pi 3 or 4).
  • Install Mosquitto MQTT broker from Hass.io add-on store, configure username and password as well as Access Control Lists (ACL).
  • From Configure > Integrations add new MQTT integration and click Enable discovery. It is mandatory to enable discovery!
  • Solder male to male jumper wires to Adafruit NeoPixel Ring and NeoPixel Stick.
  • Connect NeoPixel Stick DIN to LED1, GND to GND and 5VDC to VOUT on ANAVI Miracle Controller. Connect NeoPixel Ring Data Input to LED2, GND to GND and 5V DC Power to VOUT on ANAVI Miracle Controller.
  • Set the jumper of ANAVI Miracle Controller to 5V and use appropriate power supply to turn on the board.
  • Configure ANAVI Miracle Controller to connect to your local WiFi network, set LED type to NEOPIXEL, number of LEDs for LED1 to 8 and number of LEDs for LED2 to 12.
  • In Home Assistant web interface, a couple of new devices will be automatically added under the names ANAVI Miracle Controller LED1 and ANAVI Miracle Controller LED2. Set different effects and colors for each Adafruit NeoPixels.

How Does It Work?

ANAVI Miracle Controller combines open source hardware with free and open source software. It has been certified by the Open Source Hardware Association under UID BG000050. After initial configuration the default firmware of ANAVI Miracle Controller, available as an Arduino sketch in GitHub, connects to the WiFi network and the MQTT broker. It sends a retained MQTT message with JSON payload containing description of the device. Home Assistant, thanks to the MQTT integration with enabled discovery, automatically receives the message and recognizes the device as MQTT Light component. As a result out of the box ANAVI Miracle Controller appears in the Home Assistant GUI.

You may also like