Earlier this week the crowdfunding campaign for ANAVI Fume Extractor at Crowd Supply ended successfully! 83 backers from 16 countries all around the world ordered kits. With their generous help ANAVI Fume Extractor will go from prototype to mass-manufactured do-it-yourself kit for makers.
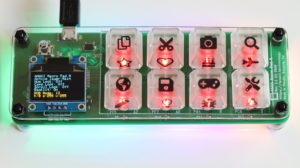
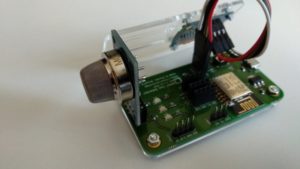
The printed circuit board of ANAVI Fume Extractor
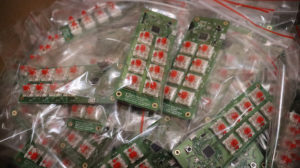
We have already sourced most of the mechanical parts for the kits, so we proceed with manufacturing of the printed circuit boards in a small local factory in Plovdiv, Bulgaria. This is a long and time-consuming process. . The PCBs are expected by the end of July. After that the local factory has a scheduled summer vacation in weeks 32 and 33 so the assembly is planned for the end of August, and it will be done on several batches.
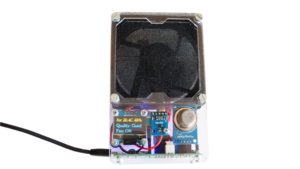
ANAVI Fume Extractor developer kit
Each ANAVI Fume Extractor kit will be flashed with the default open source firmware, packaged carefully and provided to the Crowd Supply team. They will ship the kits to their owners. The estimated shipping date remains Oct 29, 2020.
The whole world is gong through difficult times right now. Due to the COVID-19 outbreak the local factory is working with reduced capacity, so we will keep backers updated with the progress. So far everything is OK. Fingers crossed we will be able to carry on at the same pace.
To avoid any risks for backers, we have an agreement with Crowd Supply that they will keep all funds until ANAVI Technology Ltd provides them the kits. This way in the unexpected case of a complete inability to deliver, Crowd Supply will offer backers full refunds.
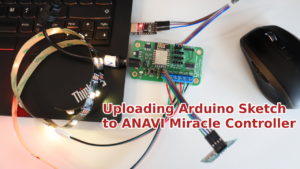
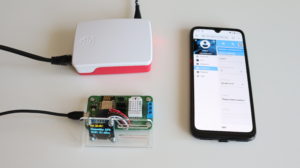
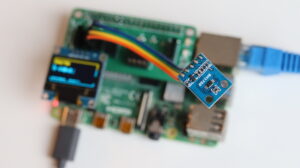
ANAVI Miracle Controller connected with USB to UART cable to a personal computer
Esptool is a free and open source ESP8266 and ESP32 serial bootloader command-line utility. The source code is available at GitHub under GPLv2 license. It is written in Python therefore it is universal and runs on Microsoft Windows, Mac OS and any GNU/Linux distribution (Ubuntu, Debian, Linux Mint, Fedora, CentOS, OpenSUSE, etc). We have already cover it for our other projects in a previous blog post. Today we will focus on ANAVI Miracle Controller although in general the steps are the same.
Installation
As of today, esptool works fine with Python 2.7 or Python 3. Python 2 has been deprecated since January 1, 2020 therefore it is recommended to use esptool with Python 3.
The easiest way to install the latest stable version of esptool is from pypi via pip. The pre-requirements are to have Python and pip installed. Open a terminal and execute the following command:
pip install esptool
Using write_flash argument esptool flashes pre-compiled binary to devices with ESP8266 or ESP32. Here are the exact steps:
NOTE: As of the moment the latest stable version is anavi-miracle-controller-sw-100-20200527.bin. Over the time other version may be released so please make sure you are using the latest and replace the file name accordingly in the command above!
Pretty much the same approach can be used to flash the pre-compiled firmware to any of our dev boards with ESP8266, like ANAVI Fume Extractor, ANAVI Thermometer, ANAVI Gas Detector, etc. Apart from flashing firmware to ESP8266 and ESP32 devices, esptool has a lot of other advanced features which I encourage you to explore. Have a look at the video tutorial and run esptool.py -h to learn more.
Last but not least, huge thanks to the contributors of the open source firmware of ANAVI Miracle Controller: Per Cederqvist, CODeRUS and Daniel Landau. Community always must be priority for any open source project and it is great to see more people involved with ANAVI Miracle Controller!
The crowdfunding campaign for ANAVI Fume Extractor in Crowd Supply has been very successfully so far so we have already contacted suppliers and started sourcing various components. Most of the mechanical parts have already been delivered and we can have a closer look at them.
As some of you know, we will make and assemble the printed circuit boards in my beautify hometown of Plovdiv, Bulgaria. One of our goals is to support local manufacturing and if possible purchase parts from local factories and suppliers even when their prices are not the best. Of course, ANAVI Fume Extractor contains a lot of parts and some are so specific that nobody manufactures them locally. Because of this the project also relies on trusted suppliers from the US, the UK, Germany, Poland and China.
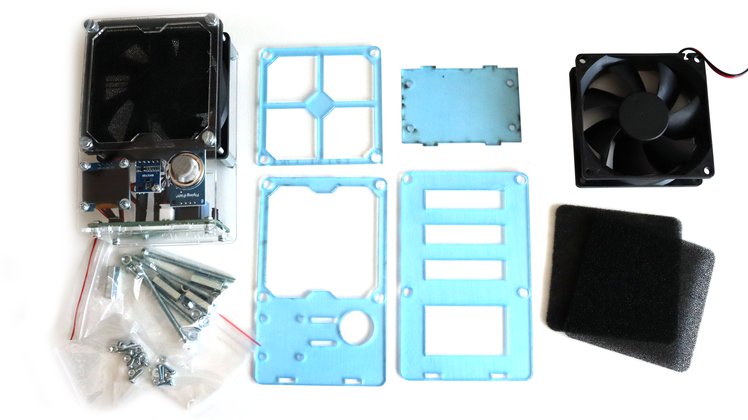
Parts for ANAVI Fume Extractor
Transparent Acrylic Enclosures
Each kit of ANAVI Fume Extractor contains 4 transparent acrylic enclosures. They have been designed with the free and open source tool OpenSCAD. The source and the schematics are available in GitHub. For the laser cutting I rely on a local Bulgarian company from Stara Zagora.
There are protective films on both sides of each acrylic enclosure. You must carefully remove them before assembly your do-it-yourself kit with ANAVI Fume Extractor.
Screws, Nuts and Stand-offs
20mm M4 stands-offs
ANAVI Fume Extractor contains various screws, nuts and washers for attaching the printed circuit board, the fan, the display and the sensor modules. The most difficult-to-source part is the 20mm M4 metal stand-off. Each kit contains 4 of them. We couldn’t find anyone in Bulgaria making stand-offs with the required size, so through a local supplier we imported the “abstandsbolzen” from Germany.
80mm Fan
80mm 5V DC fan
The key part of ANAVI Fume Extractor is the 80mm 5V/0.25A brushless DC fan. This type of a fan is primarily used in personal computers which makes it relatively quite and compact. Unfortunately, this is another part that nowadays nobody makes in Bulgaria so we are importing it from China.
Packaging
All kits will come in an eco friendly recyclable cardboard box made in another Bulgarian town Lyaskovets. Although we do our best to reduce plastic packaging as much as I can, some small plastic bags made in Veliko Tarnovo, Bulgaria are still required to store the components in the kit. The stickers will be printed in Plovdiv.
Cardboard box with ANAVI Fume Extractor Advanced Kit
The next step is the manufacturing of the printed circuit boards. Numerous components from various suppliers all around the world have to be assembled on the PCB. We will make it in a small local factory in my hometown of Plovdiv, Bulgaria. The manufacturing is scheduled to start right after the end of the campaign when we know the exact quantities.
This step by step tutorial explains how to install and configure the free and open source video conference software Jitsi Meet on Raspberry Pi with 64-bit Ubuntu Server 20.04. Although the Jitsi Meet installation is simple, the network configuration is not.
This tutorial is only for 64-bit Raspberry Pi models and versions, for example Raspberry Pi 4 or 3. It is recommended to use Raspberry Pi 4 with 4GB or more. Please note that Raspberry Pi 0, 2 and other older versions are 32-bit and this tutorial is NOT suitable for them.
Setup Network
To successfully run self-hosted Jitsi Meet on your Raspberry Pi at home and allow your friends and family to access it from anywhere you need to make several network configurations.
The network setup depends on your WiFi router and although the steps in general are the same they vary depending on the router model and version:
Dynamic DNS (DDNS) – the public IP of your WiFi router is provided by your ISP (Internet Service Provider) and in general may change over time. To avoid service downtime and hassle to remember IP address, it is highly recommended to setup DDNS. Some ASUS routers, like RT-AC68U, have this advanced service built-in. Alternatively you can use one of the many free or low-cost DDNS services.
SSL (Secure Sockets Layer) certificate – for secure communication over HTTPS. It is highly recommended to get a free certificate from the automated and open certificate authority Let’s Encrypt. You can do this through your WiFi router (if it supports it), manually or during the installation of Jitsi Meet.
Port Forwarding – two ports must be forwarded from the Raspberry Pi on which Jitsi Meet is running to the Internet through the configurations of the WiFi router. By default these ports are: 443/TCP for the HTTPS server and 10000/UDP for the video bridge of Jitsi Meet.
Install Jitsi Meet
Download and add Jitsi GPG key to the list of trusted keys. Once added you can remove the downloaded file.
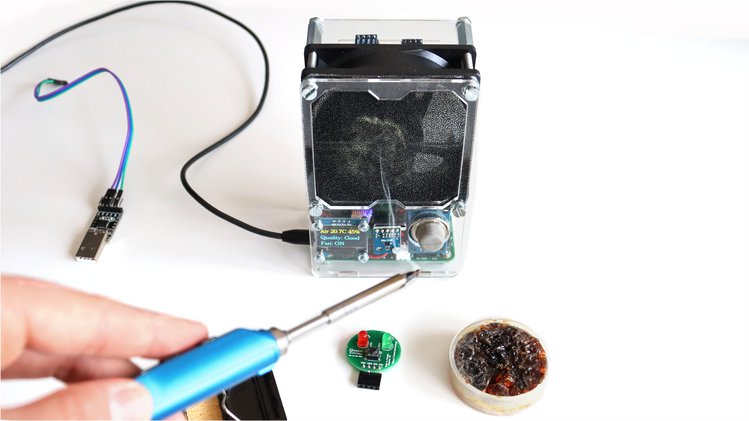
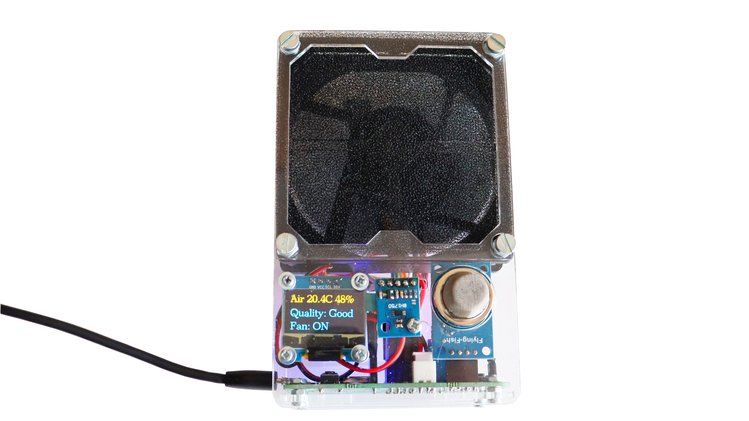
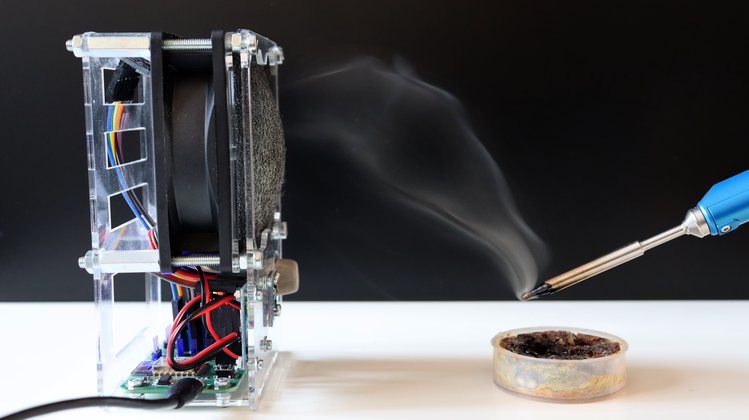
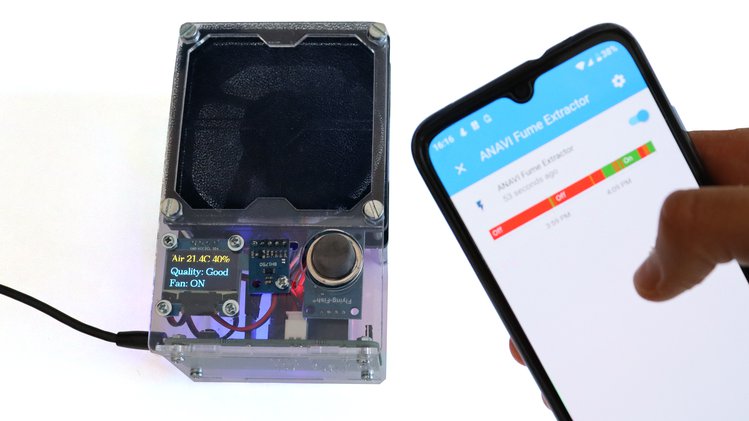
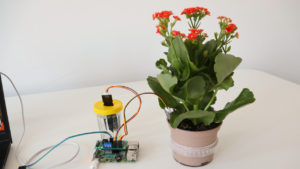
ANAVI Fume Extractor is a smart, open source, solder smoke absorber. It is powered by ESP8266 with WiFi, 80 mm fan and supports various peripherals: mini OLED display, MQ-135 analog gas sensor for air quality, sensors for temperature, humidity, barometric pressure and light. The filters are replaceable.
Soldering fumes are dangerous, keep them away with ANAVI Fume Extractor
Furthermore out the box the open source firmware of ANAVI Fume Extractor works with the popular IoT platform Home Assistant over the protocol MQTT. This means you can gather sensor data and control the fume extractor remotely using your smartphone, tablet or personal computer!
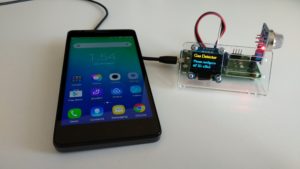
Turning on and off ANAVI Fume Extractor from a smartphone using Home Assistant
After more than 10 months of development we launched a crowd funding campaign at Crowd Supply! We are ready for manufacturing in Plovdiv, Bulgaria and now we need your support. We hope you’ll jump in and help us bring this entirely open source project to life!
ANAVI Fume Extractor is a must-have tool for any maker!
MicroPython allows you to run Python on constrained embedded devices, including our favorite ESP8266 and ESP32. It is a full Python compiler and runtime.
You can use MicroPython on the whole range of our boards with ESP8266 like ANAVI Thermometer, ANAVI Gas Detector, ANAVI Light Controller, ANAVI Miracle Controller, ANAVI Fume Extractor, etc.
How to Install MicroPython?
Follow the steps below to install MicroPython on ANAVI Thermometer or any other of our open source hardware development boards with ESP8266:
ioBroker is an open source Internet of Things platform written in JavaScript and using Node.js for the back-end. It is perfect to run on single board computers such as Raspberry Pi. The project started in 2014. The source code is hosted in GitHub and the core is available under MIT license. The creators and maintainers of ioBroker are from Germany and the project is very popular among the German open source community interested in home automation.
In this article you will learn how to get started with ioBroker by installing it on a Raspberry Pi and after that how to measure temperature and humidity from the built-in DHT22 sensor on ANAVI Thermometer through the machine-to-machine protocol MQTT.
ioBroker Installation Guide
Step by step video tutorial for installing ioBroker on Raspberry Pi
Only two steps are required to install ioBroker on GNU/Linux distributions, including on a Raspberry Pi with Raspbian:
After successfully installing ioBroker, open the web interface and complete the initial setup as explained in the video.
Monitoring Temperature and Humidity from DHT22 in ioBroker via MQTT
Integrating ANAVI Thermometer with DHT22 temperature and humidity sensor in ioBroker
ANAVI Thermometer is an open source hardware, Wi-Fi development board for measuring temperature that’s powered by an ESP8266 processor. It comes with a built-in DHT22/AM2302 temperature and humidity sensor and has slots for a mini OLED display, waterproof DS18B20 temperature sensor, and empty slots for up to three additional I2C sensor modules. Out of the box, the open source firmware of ANAVI Thermometer, works with Home Assistant specification for automatic discovery and MQTT messages with JSON payload.
Although ioBroker is an alternative open source IoT platform, through an adapter it supports the Home Assistant specification. The process for using ANAVI Thermometer in ioBroker is straight-forward thanks to the adapters MQTT Client/Broker and HASS-MQTT.
Adapter MQTT Client/Broker can be configured either as MQTT broker or as a client mode and use an external broker. In the particular demonstration in the video the instance of ioBroker adapter MQTT Client/Broker has been configured as a broker, without username/password and with disabled publish check-boxes from the MQTT Settings tab.
Adapter HASS-MQTT is required to support the Home Assistant MQTT specification. It have to be installed separately and bound to the instance of adapter MQTT Client/Broker as shown in the video. Get the HASS-MQTT adapter from: https://github.com/smarthomefans/ioBroker.hass-mqtt
ANAVI Themometer reporting temperature and humidity to the open source IoT JavaScript platform ioBroker
After turning on the instances of both adapters in Home Assistant, ANAVI Thermometer must be configured to connect to the same MQTT broker. After that ANAVI Thermometer will be automatically detected and the data from DHT22 as well as from any other attached supported sensors will be automatically reported to ioBroker. You just need to configure how to display it in your preferred graphical user interface (ioBroker offers several of them). In the video I used the ioBroker visualisation adapter which requires activation through an unique key. The activation requires registration with a email and is not shown in the video. Adapter visualisation if free for personal use. The other adapters, MQTT Client/Broker and HASS-MQTT are free and open source without any limitations.
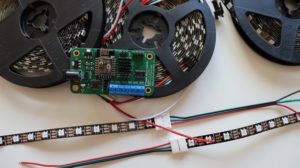
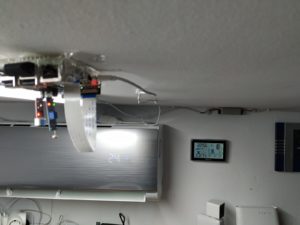
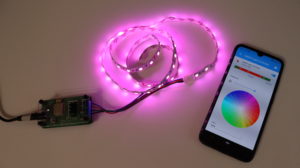
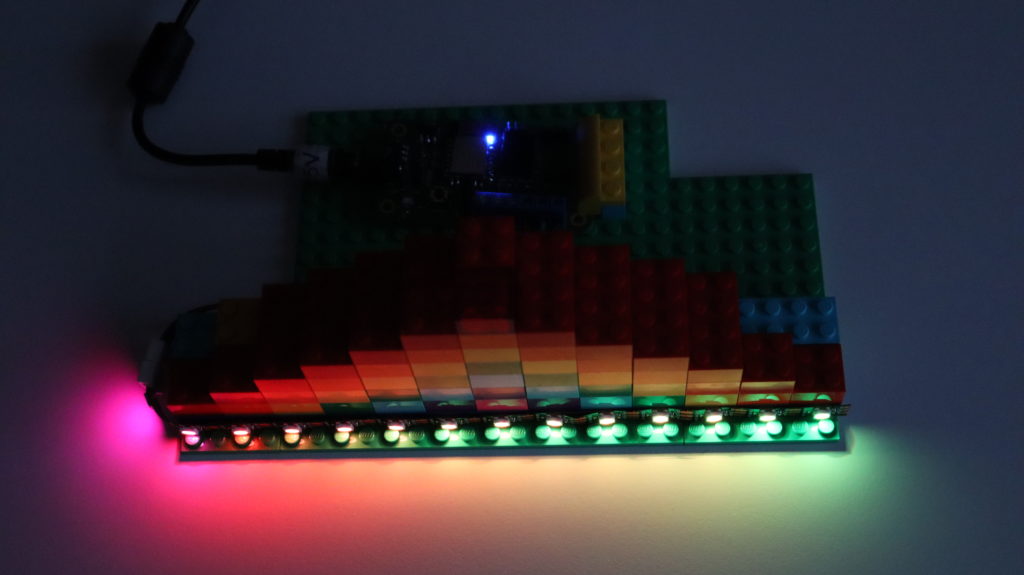
#LetsBuildTogether a smart LEGO rainbow with WS2812B LED strip and control it from Home Assistant
This was a great opportunity to have some fun and to add an addressable LED strip which through ANAVI Miracle Controller can be controlled remotely via web interface or moble application of the popular open source home automation platform Home Assistant.
Front view of the LEGO rainbow with a WS2812B LED strip on the first row
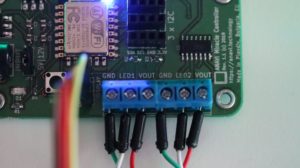
WS2812B LED strip with appropriate connector with a choke resistor
5V power supply
Instance of Home Assistant, for example running on Raspberry Pi or another single board computer
A LEGO rainbow shining at night thanks to ANAVI Miracle Controller and WS2812B LED strip
Although ANAVI Miracle Controller supports 2 addressable LED strips, for this particular use case only one is used so during the initial configuration set the number of LEDs of the other LED strip to 0. This way only one LED strip will be automatically discovered by Home Assistant over the machine to machine protocol MQTT.
A look of our LEGO rainbow from the top
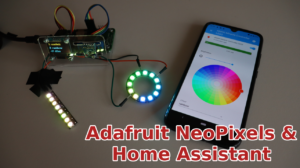
For more details how to enable Home Assistant discovery over MQTT have a look at our other step by step video tutorials for assembly guide, WS2811 12V LEDs as well as for NeoPixels.
Esptool is a free and open source ESP8266 and ESP32 serial bootloader command-line utility. The source code is available at GitHub under GPLv2 license. It is written in Python therefore it is universal and runs on Microsoft Windows, Mac OS and any GNU/Linux distribution (Ubuntu, Debian, Linux Mint, Fedora, CentOS, OpenSUSE, etc).
Installation
As of today esptool works fine with Python 2.7 or Python 3. Python 2 has been deprecated since January 1, 2020 therefore it is recommended to use esptool with Python 3.
The easier way to install the latest stable version of esptool is from pypi via pip. Open a terminal and execute the following command:
pip install esptool
Flashing Firmware
Using write_flash argument esptool flashed pre-compiled binary to devices with ESP8266 or ESP32. Here are the exact steps:
Download an appropriate binary for your ESP8266/ESP32 device.
Connect your device to a computer. For example, for ANAVI Thermometer, ANAVI Gas Detector, ANAVI Light Controller and ANAVI Miracle Controller you must use UART to USB debug cable.
Turn on the device in boot mode. For example, on ANAVI Thermometer, ANAVI Gas Detector, ANAVI Light Controller and ANAVI Miracle Controller, press and hold the RESET button and plug the power supply.
All ANAVI Internet of Things with ESP8266/ESP32 combine free and open source software with open source hardware. The firmware is built using Arduino IDE and a pre-compiled binary file is available at GitHub. Follow the links below to identify your ANAVI device and download appropriate binary for the latest stable firmware:
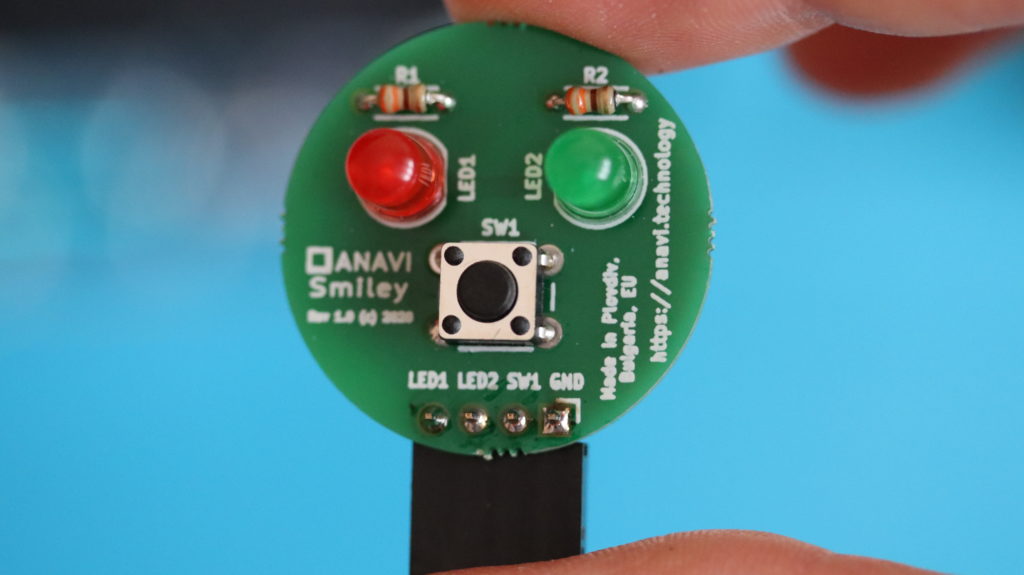
ANAVI Smiley is a simple open source hardware add-on board for Raspberry Pi. It is compatible with any Raspberry Pi model or version. ANAVI Smiley has educational purposes: it is useful for learning how to solder and how to program. The simplicity of the board makes the kit appropriate for beginner. Example application written in Python shows how to use it.
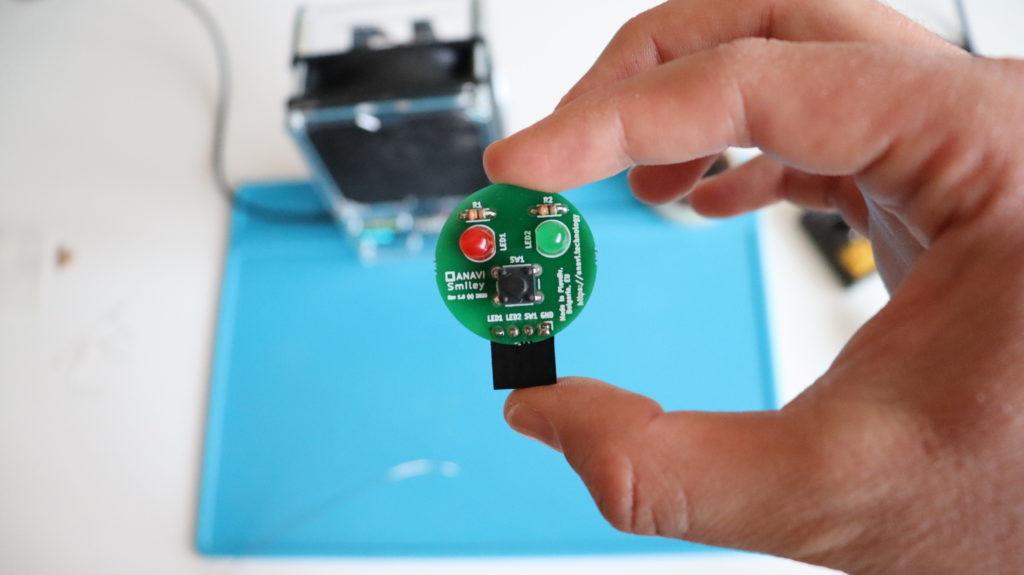
Closer look at ANAVI Smiley after soldering the kit
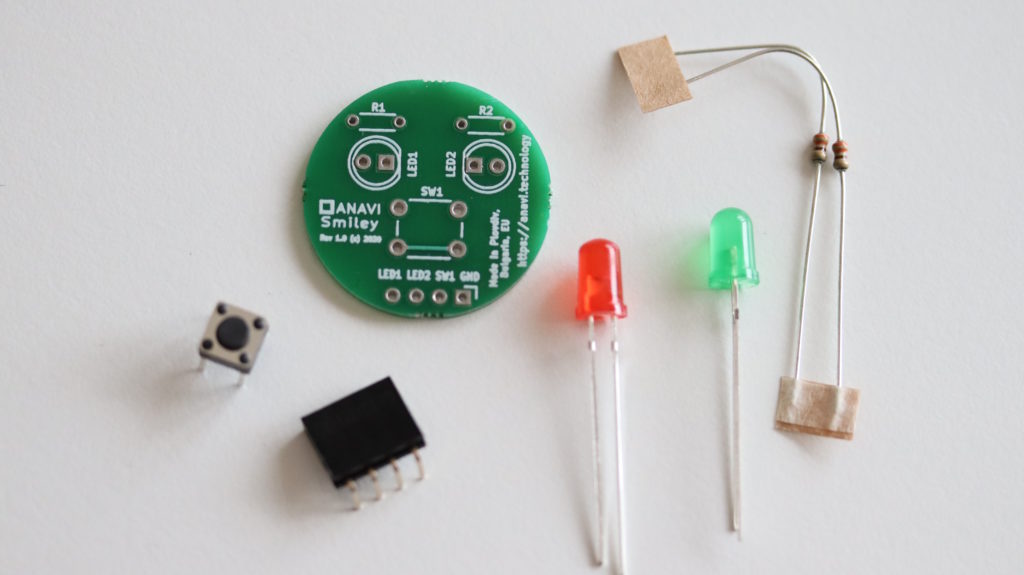
ANAVI Smiley combines open source hardware with free and open source software. It has been certified by the Open Source Hardware Association under UID BG000061. ANAVI Smiley is available as a soldering kit with through-hole components:
Printed Circuit Board (PCB)
2 LEDs
2 resistors
Tactile button
Female connector
ANAVI Smiley soldering kit with all components
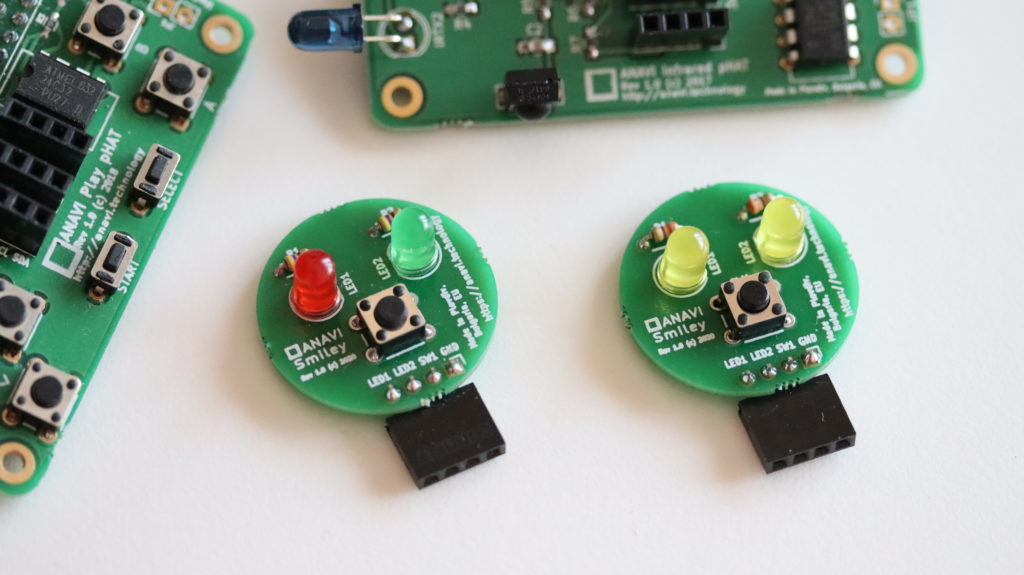
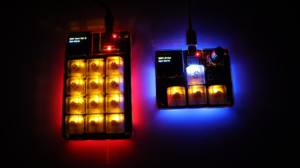
The color of the LEDs may vary. The primary kit includes with one green and another red LED, but there is also a kit with 2 yellow LEDs.
ANAVI Smiley with red and green LED as well another unit with 2 yellow LEDs
Have a look at the video for the exact steps how to solder ANAVI Smiley and to use it with Raspberry Pi.
A photo of ANAVI Smiley a moment after the kit has been assembled.
The short leg of the LED must go to ground (GND), aka the hole marked with a square on the printed circuit board. It is recommended to solder 4-pin connector on the opposite side, as shown on the picture. This way ANAVI Smiley will fit better on the 40-pin header of Raspberry Pi.
Python3 script to use ANAVI Smiley on a Raspberry Pi is available at GitHub. It relies on gpiozero to control the LEDs and to read the state of the button. Gpiozero is a simple and convenient Python interface to GPIO devices with Raspberry Pi, started by Ben Nuttall and Dave Jones.
Please note that SW1 button on the PCB doesn’t have a resistor, therefore your application must use the internal pull-up resistor present on each Raspberry Pi GPIO, for example with gpiozero in Python and pin 26:
btn = Button(26, pull_up = True, bounce_time=0.1)
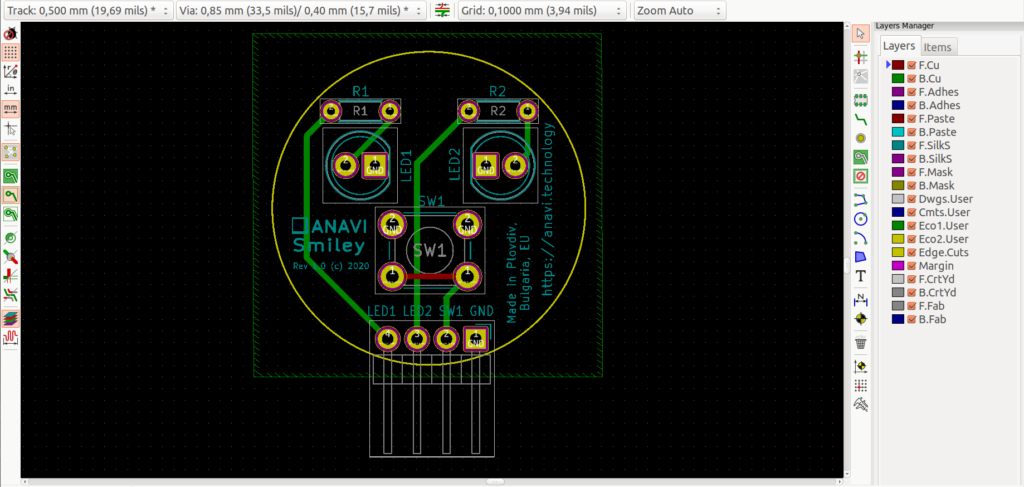
ANAVI Smiley PCB in KiCad
ANAVI Smiley has been designed with the free and open source software tool KiCad. The whole KiCad project is also in GitHub. The two layer printed circuit board is made in Plovdiv, Bulgaria.