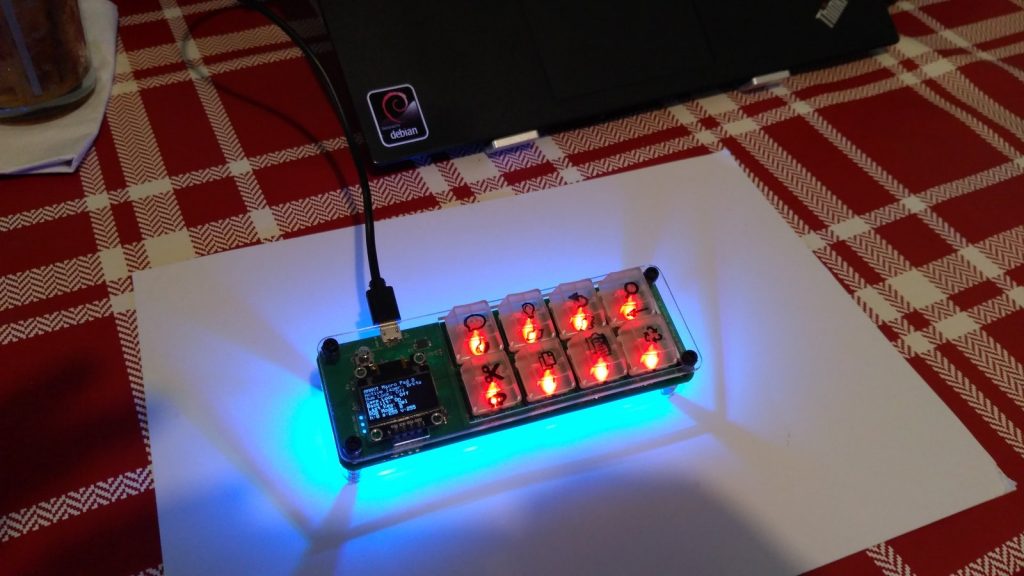
Many thanks to Efthimios Iosfidis, an open source engineer, maker and developer from Greece. Efthimis added a QMK keymap with VisualStudio shortcuts for ANAVI Macro Pad 8.
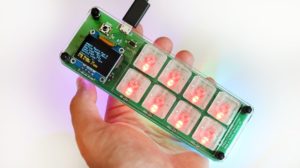
ANAVI Macro Pad 8
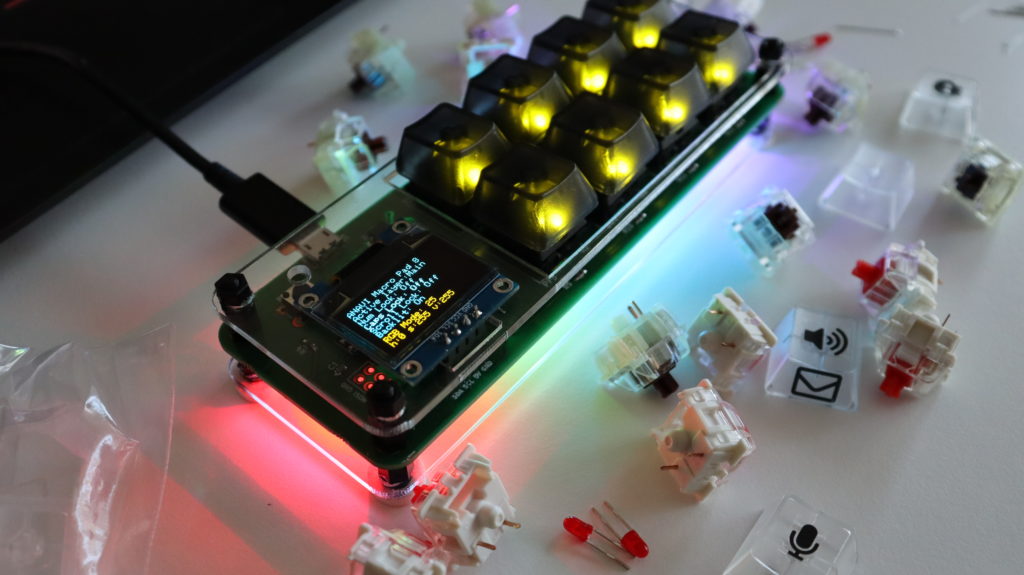
Furthermore Efthimis modifed the hardware a little bit and raised the keypad 15 degrees from the back side with metal stand-offs. As you can see on the photos the result is pretty cool!
By the way, “field report” is a program by Crowd Supply to highlight talented creators by publishing their projects, spreading the word among the community and also giving a $25 Crowd Supply credit. So if you are using any of our open source hardware products available at Crowd Supply don’t think twice and submit a Crowd Supply Field Report now 🙂
Recently, we added a brand new keymap for ANAVI Macro Pad 8 for Git users. Git is a free and open source distributed version control system started by the famous Linus Torvalds, the creator of Linux kernel. Nowadays, there are many offerings of Git repositories as a service by GitHub, GitLab, Bitbucket, etc.
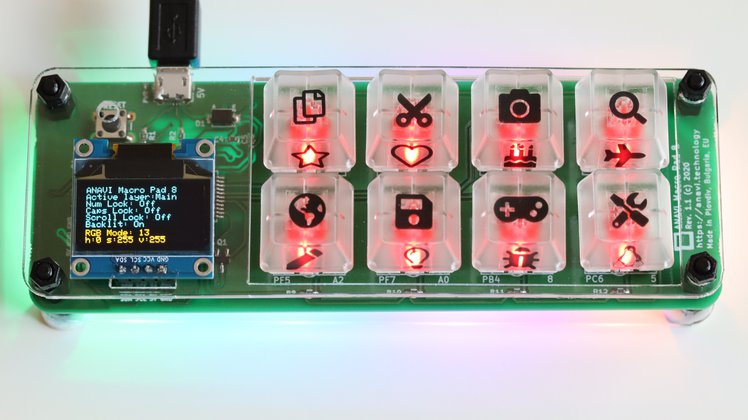
The Keys
The Git keymap for ANAVI Macro Pad 8 contains the following shortcuts for Git. On the first row from left to right:
git status
git log
git pull
git push
On the second row from left to right:
git diff
git add
git commit
FN key to switch to the 2nd layout and control lights
ANAVI Macro Pad 8
How It Works?
From technical point of view for developers this Git keymap demonstrates a couple of interesting features of QMK firmware:
Using SEND_STRING in the Git keymap increases the total firmware size. This is dangerous because Microchip ATmega32U4, the microcontroller on ANAVI Macro Pad 8, may not have enough free space for it. If the firmware exceeds the size limit any attempts to flash it will fail with a similar error message:
The firmware is too large! 28866/28672 (194 bytes over)
If you run in such a use case, the easiest way to reduce the size of QMK firmware in a keymap for ANAVI Macro Pad 8 is to cut some of the default RGB lighting animations and effects. For example, as in the Git keymap, you can create config.h file in the keymap directory that overwrites the main config.h with a reduced number of supported RGB lighting animations and effects:
We have already covered in details how to install QMK firmware and how to flash a keymap from the command line in a previous blog post and in the user’s manual. Here is it in a nutshell for the Git keymap. Connect ANAVI Macro Pad 8 to a computer with USB to microUSB cable follow the steps below:
Execute the following command to compile QMK and the Git keymap for ANAVI Macro Pad 8:
qmk compile -kb anavi/macropad8 -km git
Execute the following command in a terminal to flash the git keymap:
qmk flash -kb anavi/macropad8 -km git
Press the RESET button on ANAVI Macro Pad 8 when asked:
Detecting USB port, reset your controller now.....
Wait until the firmware flashes successfully:
avrdude done. Thank you.
ANAVI Macro Pad 8 is available at our distributors Crowd Supply and Mouser. We are constantly trying to improve this open source project and we are interested in finding more distributors around the world. If you have any questions please do not hesitate to contact us.
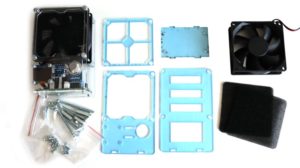
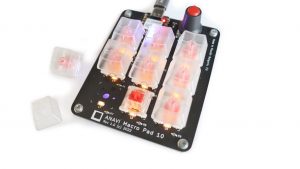
In a previous update we shared the exact steps how to assemble ANAVI Macro Pad 8 Developer Kit. Now let’s have a look at the Maker Kit.
ANAVI Macro Pad 8 Maker Kit Soldering and Assembly Video Tutorial
The maker kit provides the printed circuit board (PCB) and an addressable LED strip. There are also some nice stickers. Other accessories have to be purchased separately. You can use any mechanical switches compatible with Cherry MX plate footprint and 3mm LEDs.
ANAVI Macro Pad 8 Maker Kit Unboxing
Furthermore with the maker kit you can perform a hot-swap upgrade of ANAVI Macro 8. It requires a very specific procedure which was explained in a previous article. If you have this in mind don’t solder anything and have a look at the other video tutorial.
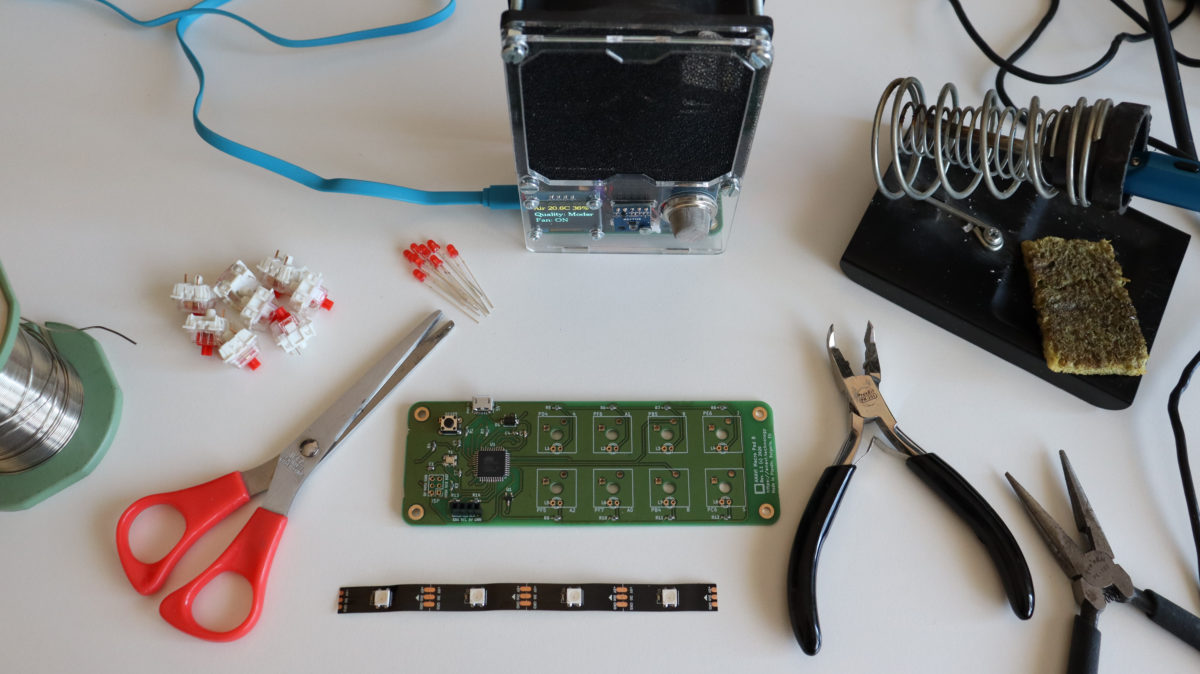
Required tools for soldering of ANAVI Macro Pad 8 Maker Kit
The assembly of ANAVI Macro Pad 8 Maker Kit requires soldering and advanced skills. The following tools are required:
Soldering iron
Scissors
Optionally: screwdriver, tweezers and a keycap puller
It is also a good idea to stay safe and get a smoke absorber while soldering, for example our open source ANAVI Fume Extractor.
Please have a look at the video and follow the steps below if you have ANAVI Macro Pad 8 Maker Kit.
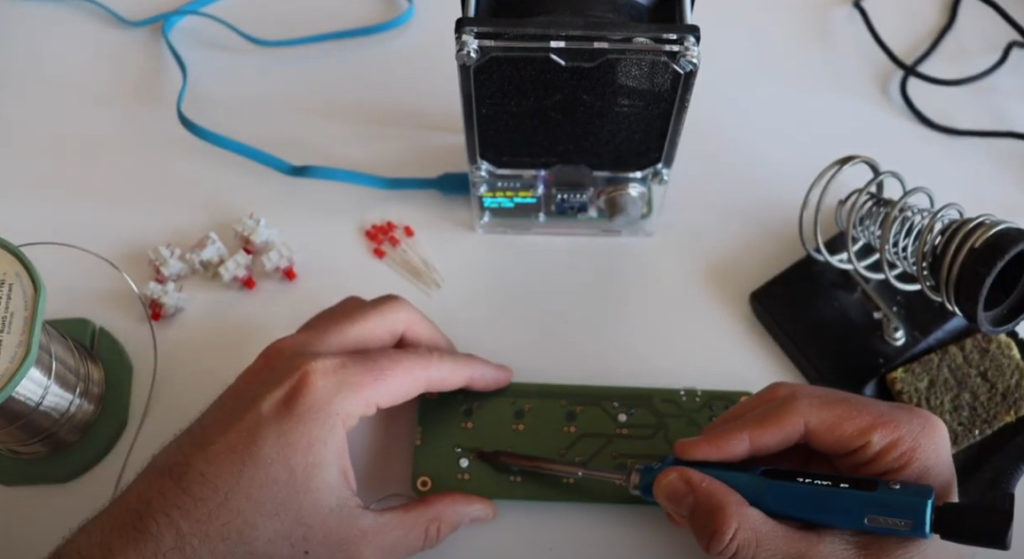
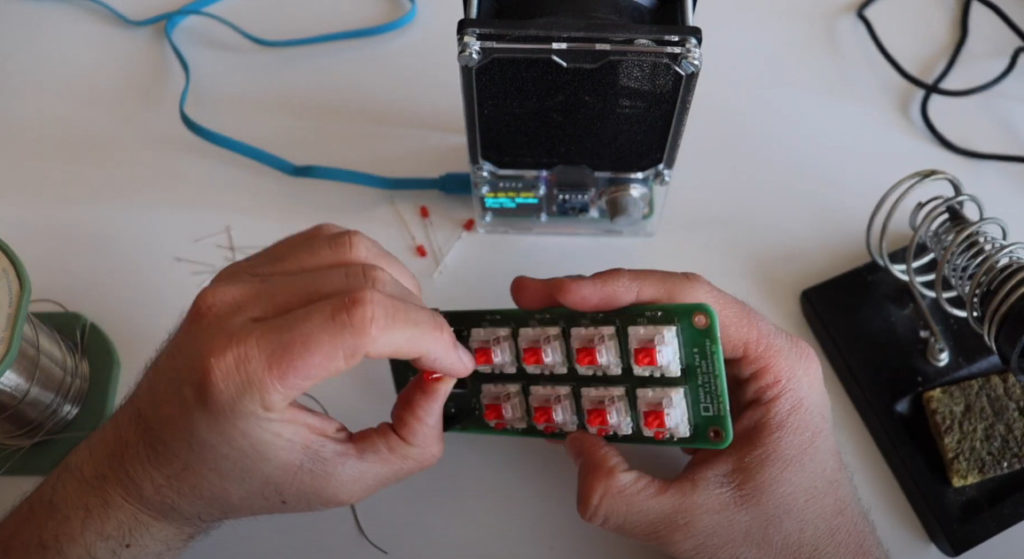
Solder mechanical switches to the PCB
Any type of mechanical switch compatible with Cherry MX plate footprint is suitable for ANAVI Macro Pad 8. The developer kit comes with Gateron mechanical switches. The maker kit allow you to use different brand and color.
Choosing the most appropriate switch for your needs and taste is a matter of personal preference. There are many different brands and colors. For example, the blue mechanical switches are more noisy which could be sometimes fun but also annoying during daily work. The red switches are fast and not very noisy therefore they are often proffered by gamers.
There are two pins on each mechanical switch that must be soldered to the printed circuit board. That makes 16 pins in total. The position of the each pin is very specific and the switch goes into the PCB. One of the pins is for the signal coming from the Microchip ATmega32U4 microcontroller, the other pin is for ground.
Solder 3mm LED
This step is actually optional depending on the the type of the mechanical switch. Some mechanical switches may not have a hole in the plastic enclosure for a 3mm LED.
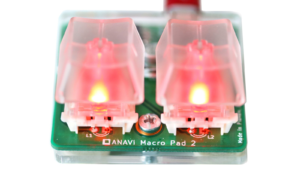
Each 3mm LED for through-hole soldering has 2 legs. The longer leg is the positive terminal, also known as anode. The shorter leg is negative and also known as cathode.
The shorter leg that indicates the negative terminal must go into the square hole of the PCB. ANAVI Macro Pad 8 has 8 mechanical switches therefore 8 LEDs are required. If you want you can use different color of the LEDs. You can even mix colors.
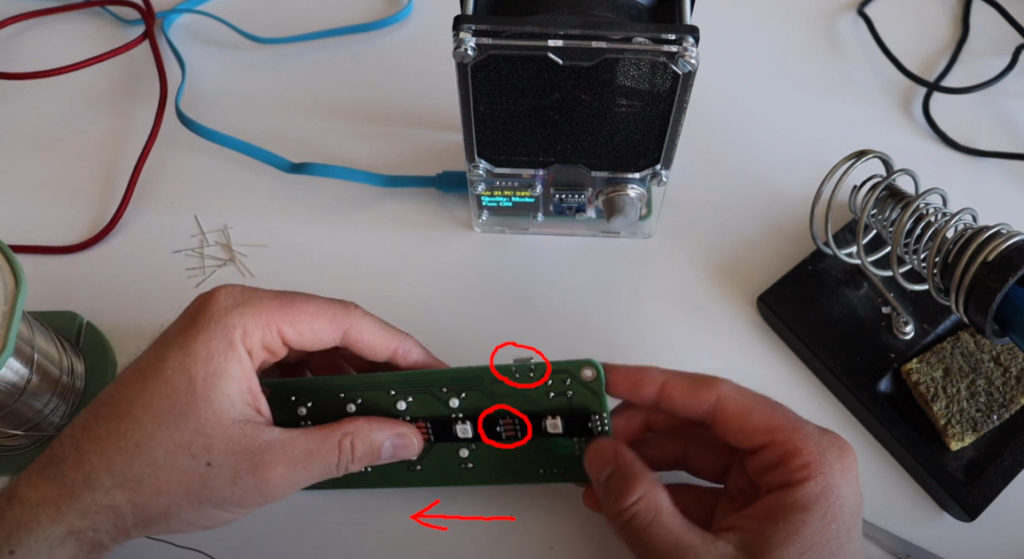
Solder WS2812B addressable LED strip to the back of the PCB
Using scissors cut a little bit from both ends of the LED strip to make sure it will stretched when placed on the board. However it is tricky, be careful and make sure enough from the pads are available to make a good contact after soldering them.
It is very important to properly set the direction of the WS2812B LED strip. On the LED strip you will notice small arrows indicating the direction. They should point from the microUSB connector towards the other end of the PCB as shown in the video.
If you have successfully completed these 3 steps your ANAVI Macro Pad 8 should look just like a developer kit having all accessories soldered. Therefore the next steps are the same as for both the developer and the maker kit. Explore them at our previous blog post as well as in the user’s manual.
Thank you for using ANAVI Macro Pad 8 and for supporting this entirely open source project!
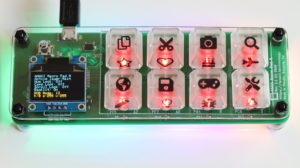
Out of the box, all kits of ANAVI Macro Pad 8 are powered by the popular open source QMK firmware.
ANAVI Macro Pad 8
QMK stands for Quantum Mechanical Keyboard and it is an open source community centered around developing various computer input devices. The project is hosted in GitHub. More than 1700 developers contributed to this open source firmware over the years. QMK supports more than 2000 keyboards and keypads brands.
Although QMK is very powerful and flexible, it might be a challenge to get used to it if you haven’t used it before. Over the next weeks and months, as part of efforts for increasing the documentation related to ANAVI Macro Pad 8, we will be rolling out updates related to QMK.
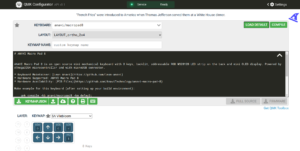
QMK Configurator loaded in a web browser with the default keymap for ANAVI Macro Pad 8
QMK offers several options to select, customize and flash a keymap for your keyboard:
Command-line interface – advanced but not very user friendly
QMK Toolbox – application for MacOS and Windows users
QMK Configurator – an online tool used for easily creating firmware files for keyboards supported by QMK.
You can use QMK on MS Windows, MacOS and GNU/Linux distributions. To get started with the QMK firmware please explore this tutorial from the official documentation and install all required software suitable for the operating system on your PC.
KiCad – free software suite for electronic design automation which as used to design ANAVI Macro Pad 8,
Kodi – for the free and open source media player application,
OBS – for the popular open source video recording and live streaming software,
Zoom – for the popular video communication software.
Over the time we plan to extend the list with keymaps for other popular software applications. Please feel free to submit your favorite keymaps for ANAVI Macro Pad 8 to the QMK repository in GitHub!
Compile QMK for ANAVI Macro Pad 8
After installing QMK software on your computer, from the command line you can compile QMK firmware with the default keymap for ANAVI Macro Pad 8 using the following command:
qmk compile -kb anavi/macropad8 -km default
Flash QMK on ANAVI Macro Pad 8
Follow the steps below to flash the compiled QMK firmware to ANAVI Macro Pad 8:
Connect ANAVI Macro Pad 8 to your personal computer with USB to micro USB cable
Execute the following command in a terminal to flash the default keymap:
qmk flash -kb anavi/macropad8 -km default
Press the RESET button on ANAVI Macro Pad 8 when asked:
Detecting USB port, reset your controller now.....
Wait until the firmware flashes successfully:
avrdude done. Thank you.
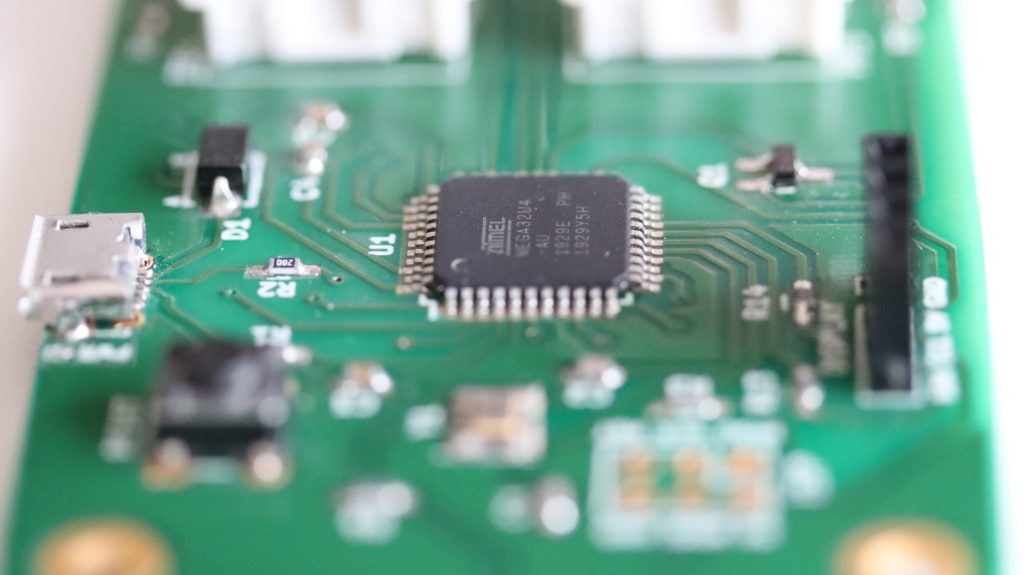
The heart of ANAVI Macro Pad 8 is Microchip ATmega32U4. It is an 8-bit microcontroller part of the AVR family. QMK relies on avrdude as the utility to download, upload and manipulate the firmware of these microcontroller.
Microchip ATmega32u4 on ANAVI Macro Pad 8
ANAVI Macro Pad 8 is available at our distributors Crowd Supply and Mouser. Please contact us if you are interested in wholesale orders or if you prefer shipping directly from the EU.
Please have a look at the video and follow the steps below to assemble ANAVI Macro Pad 8 Developer kit. Although you can do it with your bare hands, simple tools like a screwdriver, tweezers and a keycap puller might be useful.
ANAVI Macro Pad 8 developer kit comes with 8 Gateron mechanical switches and red leds. If you prefer another type of switches or color of the LEDs, please have a look at the Maker kit which requires soldering but allows to use different Cherry MX compatible switches or even make a hot-swap upgrade.
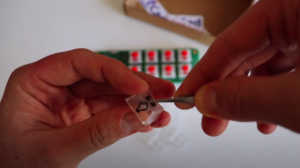
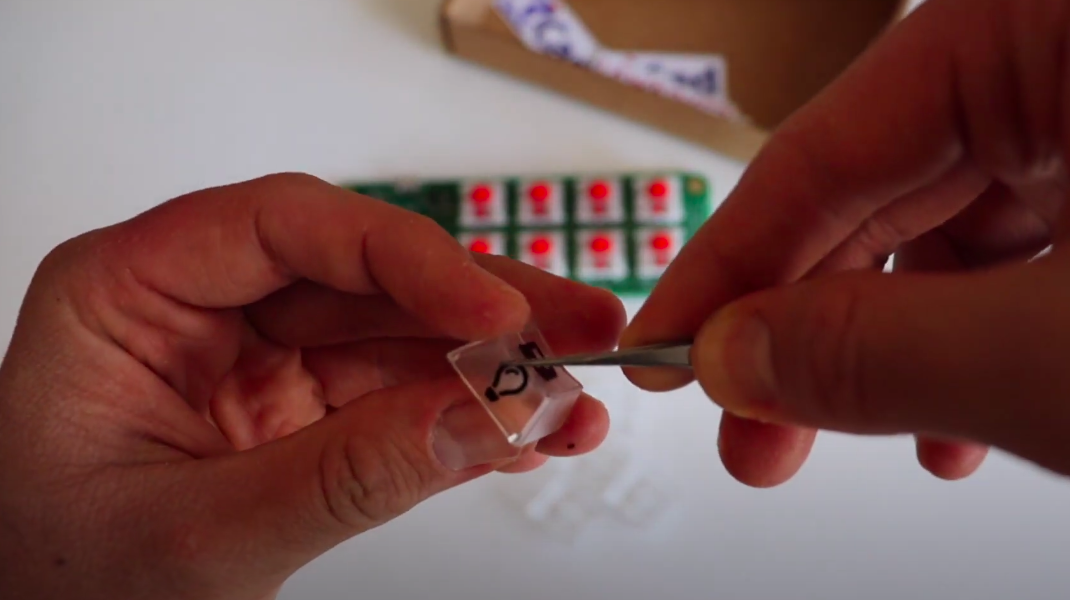
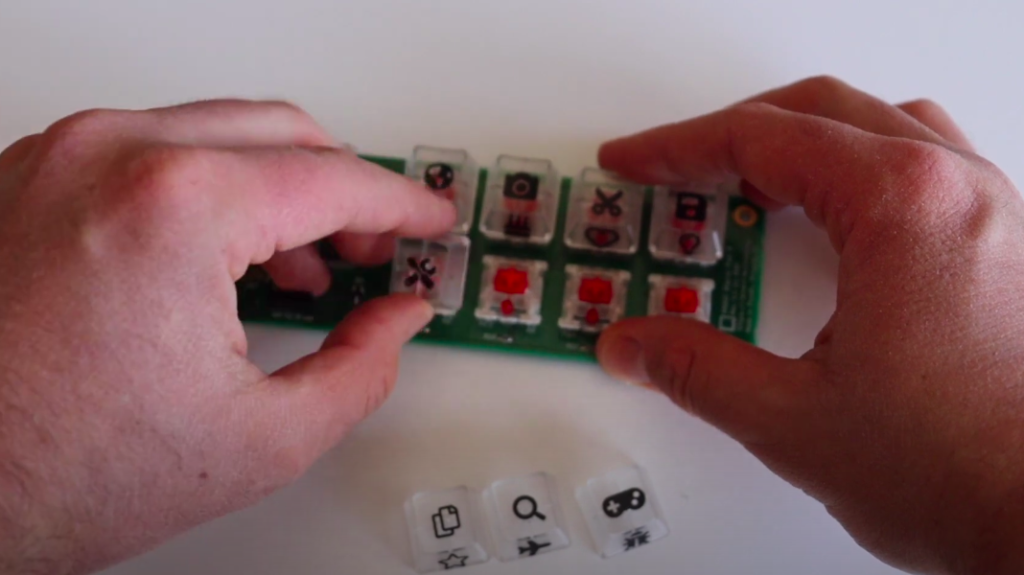
Step 1: Stickers
The first step optional. Each kit includes a set stickers. Feel free to add them to the translucent keycaps included in ANAVI Macro Pad 8 developer kit. You can do it with your bare hand or eventually with the help of tweezers.
You can place a sticker on the top or on the side of the keycap. If you like retro electronics you may find some similarities in this approach to the famous keyboard of the best selling personal computer of the 20th century Commodore 64.
ANAVI Macro Pad 8 is powered by the popular open source firmware QMK which allows you to create various layouts. You can make a keymap with 2 or more layouts. A sticker on the side of the keycap might be useful as a visual aid to indicate the additional function of the key.
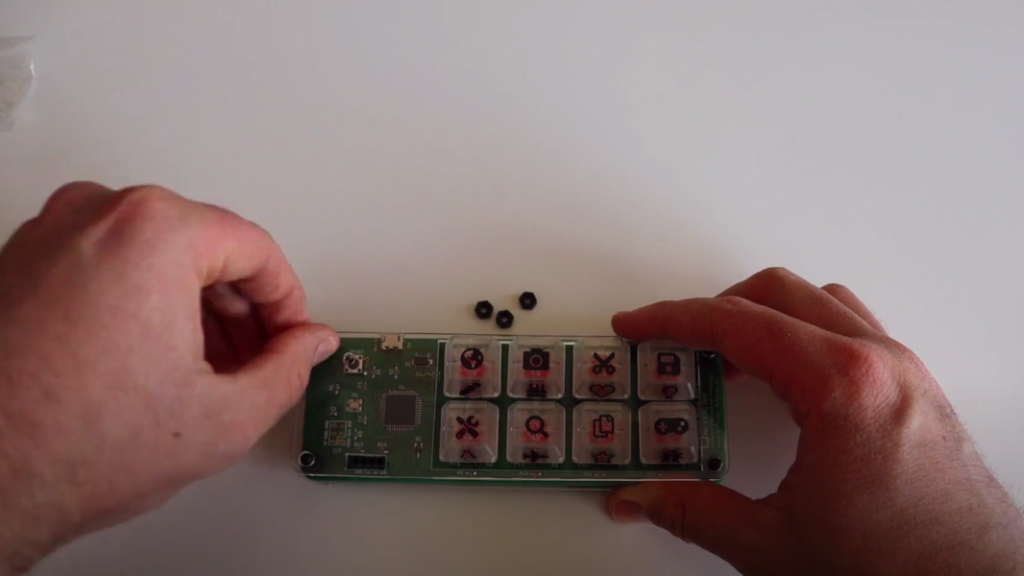
Step 2: Keycaps
Place all keycaps on 8 mechanical switches of ANAVI Macro Pad 8. You can easily do this with your bare hands. It takes just a few seconds.
As you can see in the video a keycap puller might be useful if you make a mistake and want to pull off a keycap and place it on another location.
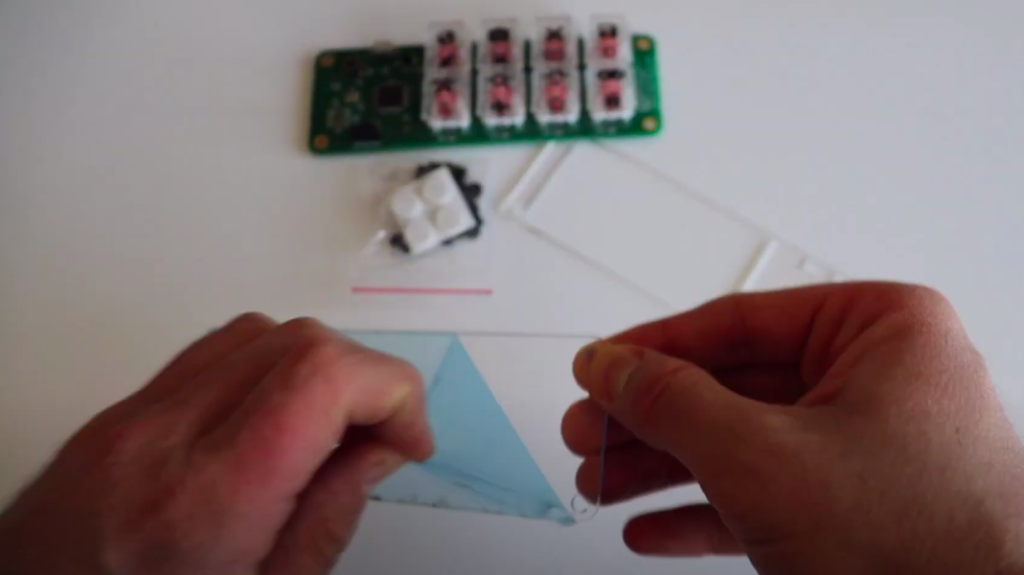
Step 3: Peel Off Protective Films from the Acrylic Enclosure
Peel off the protective films from both sides of the two laser cut transparent acrylic parts. The removal of the protective films is quite annoying but once you get rid of them, the acrylic enclosure will be crystal clear and fully transparent.
Step 4: Assemble the Acrylic Enclosure
Assemble the acrylic enclosures. In the cardboard box you also will find M3 black plastic screws, nuts and standoffs. Although you can assemble them with your bare hands a screw driver might be handy.
First place 4 of stand-offs with screws to the bottom acrylic part. After that place ANAVI Macro Pad 8 on top of them. The printed circuit board has 4 mounting holes for this purpose.
Add the rest of stand-offs on top of ANAVI Macro Pad 8 to secure the printed circuit board to the bottom part as shown in the video. Place the top acrylic part and fasten it with the 4 M3 nuts. Finally add the silicon protective pads on the screws on the bottom.
Step 5: Mini OLED Display
Step number 5 is optional. The default open source QMK firmware for ANAVI Macro Pad 8 support mini OLED display connected over the communication bus I2C.
By default mini display in yellow-blue 0.96″ I2C OLED. It comes with 4 jumper wires which might be useful for debugging purposes or if you plan to make a custom 3D printed case. However for the default acrylic enclosure the wires are not needed.
Peel off the protected film and place the mini OLED display as shown in the video to ANAVI Macro Pad 8. Pay attention to the labels that indicated the pin connectors of the display. They must match the labels on the keyboard.
Step 6: Turn On ANAVI Macro Pad 8
Gently plug a USB to microUSB cable to connect ANAVI Macro Pad 8 to a personal computer. Please be careful with the microUSB connector because a harsh bending of the USB cable may damage the microUSB connector.
Thanks to the QMK firmware ANAVI Macro Pad 8 will be detected as human interface device and should work out of the box. Furthermore with QMK you have the freedom to fully customize each key.
ANAVI Macro Pad 8
Please note that a USB to microUSB cable is not included in any of the kits. Reuse a cable from an old electronic device or purchase a cable according to your taste. Make sure that the cable supports both power and data transfer over USB.
Thank you for supporting and using our open source kits. Stay tuned for more updates, including details for soldering ANAVI Macro Pad 8 Maker kit.
Recently we shipped ANAVI Macro Pad 8 kits to Crowd Supply warehouse. Crowd Supply team will start shipping them to you soon to backers of the crowdfunding campaign. Furthermore kits will be available on sale at both Crowd Supply and Mouser.
A fully loaded courier truck with huge quantity of ANAVI Macro Pad 8 kits travelling to the warehouse
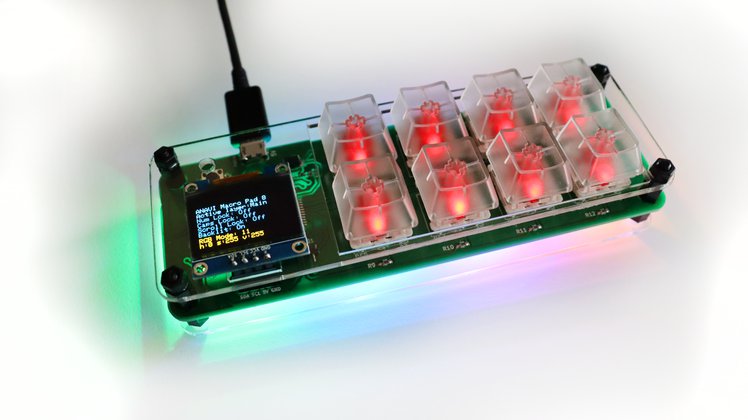
ANAVI Macro Pad 8 is an open source, custom-programmable, mini 8-key mechanical keyboard. Fully compatible and running the popular Quantum Mechanical Keyboard (QMK) open source firmware.
ANAVI Macro Pad 8 – the open source hardware 8% (8-key) mechanical keyboard
ANAVI Macro Pad 8 is made in Plovdiv, Bulgaria, EU. Here we write with a Cyrillic alphabet so if you are wondering what is the strange looking text on the parcel’s red labels – it is the word for fragile in Bulgarian 🙂
Fragile in both English and Bulgarian
Keep in mind ANAVI Macro Pad 8 is indeed fragile and please be gentle with the mini OLED display while assembling your kit.
USB to microUSB cable is not included in any of the kits. Pick a cable that suits you best or recycle a cable, for example from an old smartphone. Please be careful when plugging the cable and make sure it doesn’t bend as this may damage the microUSB connector on ANAVI Macro Pad 8.
Huge thanks to all people who supported the project by placing an order during the crowdfunding period at Crowd Supply. If you missed the crowdfunding campaign you can still order ANAVI Macro Pad 8 from our distributors right now!
ANAVI Macro Pad 8 is an open source, programmable, eight-key keypad with backlighting, underlighting, and OLED screen. Following the successful crowdfunding campaign we manufactured the printed circuit boards in a small local factory in Plovdiv, Bulgaria, EU. We would like to explain in detail the whole manufacturing process.
The fabrication includes a procedure called panelization which groups together a number of PCBs on a larger board called a “panel”. In the case of ANAVI Macro Pad 8 the “panel” contains 3 boards. All of them are gold plated through electrolytic nickel-gold process. Gold is very expensive, especially at the moment, but it is still worth it. Gold-plated PCBs have excellent quality with high hardness, wear and oxidation resistance.
A panel with 3 printed circuit boards for ANAVI Macro Pad 8
Sourcing parts in the COVID-19 time is a challenge but we work with trusted and reliable suppliers. We bought Microchip ATmega32U4 microcontrollers from Mouser. They arrived from the warehouse in Texas, USA. Each microcontroller is with TQFP-44 package that requires surface mount technology (SMT). The local factory has already assembled them alongside with all other SMT components.
The assembly of Gateron red mechanical switches and the red 3mm LEDs for all developer kits requires through-hole technology, a.k.a. manual soldering. This is a time consuming process. To simplify the work and to keep the mechanical switches on their places we created this plate that matches the size of the panels.
There are special holes on each mechanical switch for the 3mm LED. After soldering all of them, the leads of the LEDs have to be cut from the back side of the panel.
After all these steps, testing and packaging the developer kit will not require any soldering. However, people who enjoy soldering like me can order a maker kit and experiment with various mechanical switches and 3mm LEDs with different colors. Furthermore, the maker kit allows to perform a hot-swap upgrade as explained in the previous post.
After burning a the same bootloader as in Arduino Leonardo, flashing the open source QMK firmware and testing our mechanical keyboards are ready for packaging!
ANAVI Macro Pad 8 Developer KitANAVI Macro Pad 8 Maker Kit
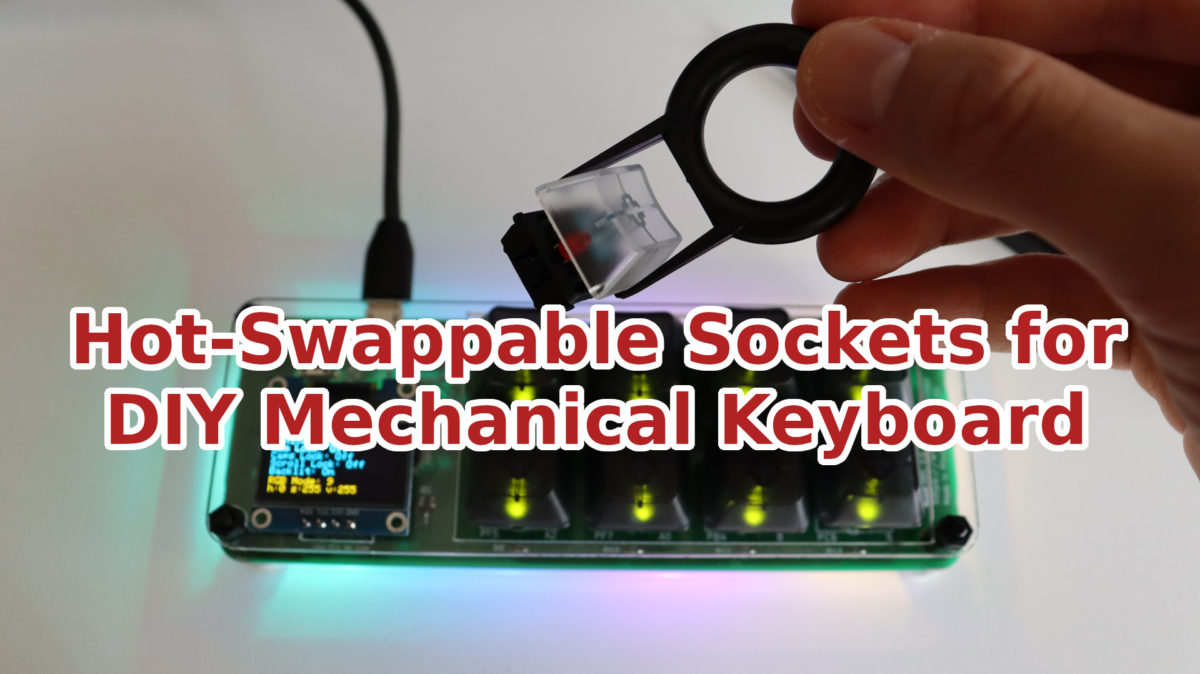
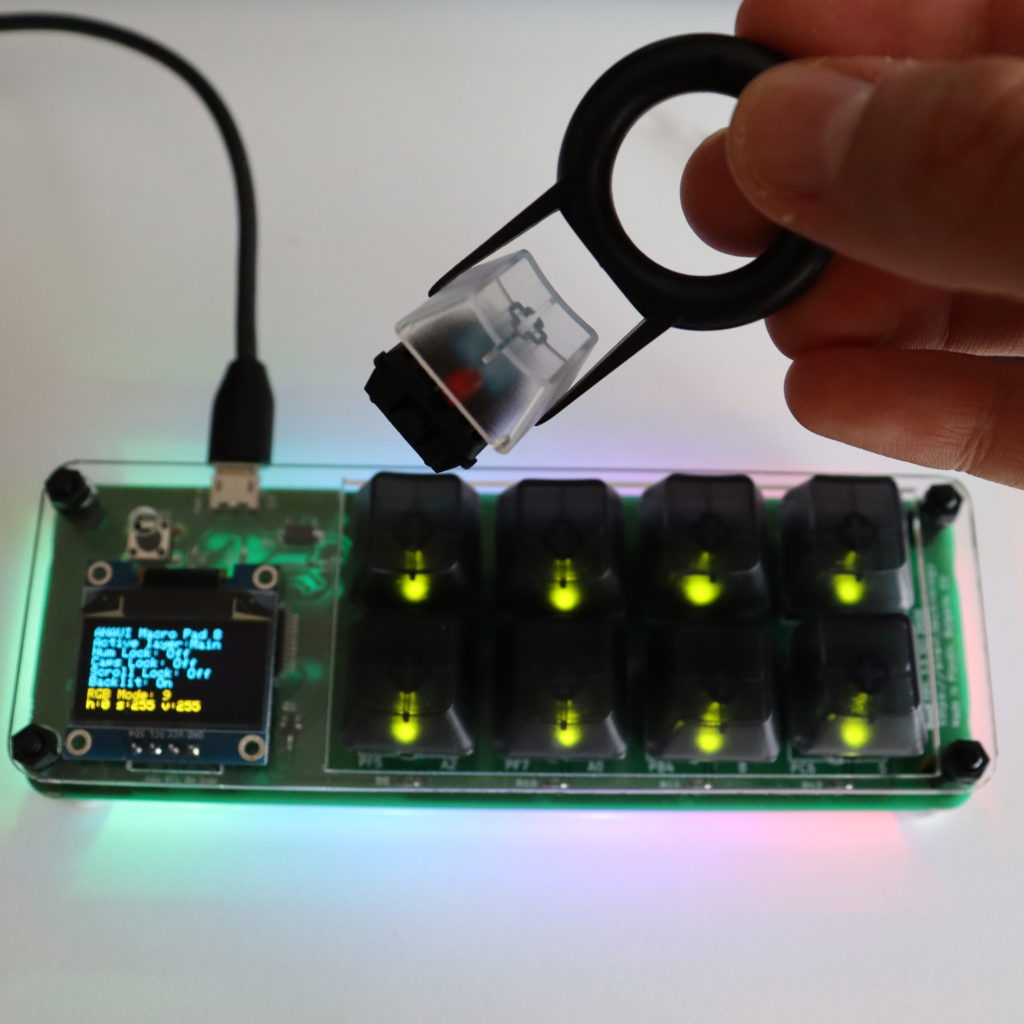
Hot-swappable mechanical keyboard allows you to replace switches and LEDs on the go without soldering and without even powering off the keyboard. In this short video tutorial I explain how to make hot-swappable any printed circuit board for a mechanical keyboard with footprints for Cherry MX plate switches. Other brands such as Gateron and Kaihl are compatible with the Cherry MX switches so this solutions is universal.
Hot-Swappable Sockets for DIY Mechanical Keyboard
The video has been created with a maker kit of the open source mechanical keypad ANAVI Macro Pad 8. I have customized it by adding holtite sockets to make it hot-swappable.
Required Hardware
Appropriate printed circuit board (for example for ANAVI Macro Pad 8 maker kit)
Mechanical switches
3mm LEDs which are optional depending on the type of the PCB and the switches
ANAVI Macro Pad 8 with holtite sockets for hot-swap of Cherry MX and Gategron mechanical switches
Step 1
Using the tweezers place the holtite sockets into the PCB. The sockets are small so be careful not to lose any of them. Turn on the soldering iron. Heat each socket and gently push it. So we are using a soldering iron but in this case not for soldering. We are just mounting the sockets using its heat.
It looks easier than it is. It took me some time to do it for all switches and LEDs. Each key has 2 holes for the switch and 2 holes for the LED so basically you need 4 sockets with appropriate sizes for each key.
Step 2
Next step is optional and specific for ANAVI Macro Pad 8. The maker kit includes WS2812B addressable LED strip which should be soldered on the back of side of the keyboard. Please note the arrow that indicates the direction of the LED strip and make sure you are placing it properly as shown in the video.
Step 3
Cut the legs of the 3mm LEDs to make sure they will fit well in the hot-swappable holtite sockets that we have already mounted.
Step 4
Assemble the switches, the LEDs and the key caps. Once you are done with steps 1 this is easy because you already have a hot-swappable printed circuit board for your mechanical keyboard.
Custom ANAVI Macro Pad 8 with blue Cherry MX switches and green 3mm LEDs for backlit
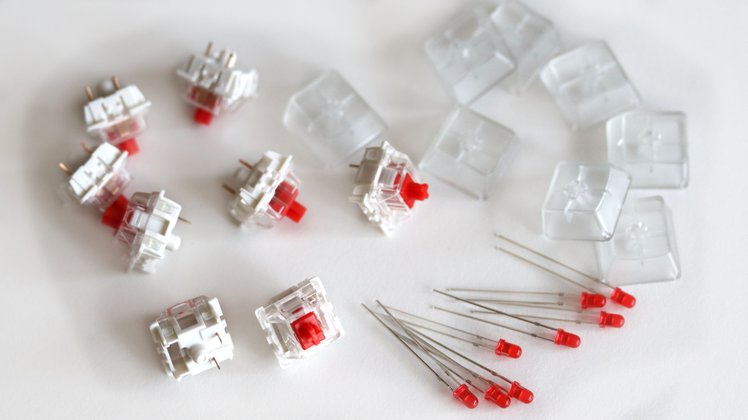
By default ANAVI Macro Pad 8 is with Gateron red switches, red LEDs and white translucent keycaps. However, in this case with the hot-swappable version I am experimenting primary with blue Cherry MX switches, green LEDs and dark translucent keycaps. I have purchased several different mechanical switches: Gateron Red, Cherry MX blue and Cherry MX brown. Please note that these particular Cherry MX brown switches in the video do not have slots for the 3mm LEDs.
Although in this video I am using the maker kit of ANAVI Macro Pad 8. The same approach with holtite sockets can be applied on any other PCB for mechanical keyboard with footprint for Cherry MX switches.
Have you already ordered our open source mechanical keypad ANAVI Macro Pad 8 from the recent crowdfunding campaign? It is powered by Microchip ATmega32U4: an 8-bit microcontroller with 32K bytes of ISP Flash, USB Controller and I2C. This microcontroller is part of the AVR family of microcontrollers developed since 1996 by Atmel and acquired by Microchip Technology in 2016.
Microchip ATmega32U4 on the open source mechanical keyboard ANAVI Macro Pad 8
Microchip ATmega32U4 is how ANAVI Macro Pad 8 connects to the USB port of a personal computer, shows graphics and text on the mini OLED display through I2C. Furthermore, this microcontroller has more than enough general-purpose input/output (GPIO) pins for the mechanical switches.
Photo of Microchip ATmega32U4 between microUSB connector and 4-pin slot for I2C mini OLED display on ANAVI Macro Pad 8
The popular open source Quantum Mechanical Keyboard (QMK) Firmware supports Microchip ATmega32U4 and therefore it is easy to use as the default firmware for ANAVI Macro Pad 8. However, it is technically also possible use ANAVI Macro Pad 8 as a development board and upload Arduino sketches compatible with Arduino Leonardo through Arduino IDE or PlatformIO. Many popular development boards such as Arduino Leonardo, SparkFun Pro Micro, Teensy 2.0, Olimex eduArdu also use ATmega32U4.
After the launch of the crowdfunding campaign we received a lot of positive feedback about ANAVI Macro Pad 8 and great ideas from the community. Based on the recommendations of several backers a new option has been recently added. Now you can order a maker kit with an extra add-on: Gateron red mechanical switches, translucent keycaps and 3mm red LEDs.
Gateron red mechanical switches with 3mm red LEDs and translucent keycaps
Basically with this optional add-on, you can get the same parts as in the developer kit, but not soldered. In some use cases, having all the parts in one package is a convenient option for advanced users with soldering skills. This way they don’t need to purchase separately the keycaps, the LEDs and the switches. Furthermore, they can still make advanced modifications before using them with ANAVI Macro Pad 8.
ANAVI Macro Pad 8 mechanical keyboard/keypad
As part of the stretch goals that the crowdfunding campaign has already met, all kits of ANAVI Macro Pad 8 will also include 32 transparent Emoji stickers to customize further the keycaps!
Translucent keycaps for mechanical keyboard with emoji stickers included in all ANAVI Macro Pad 8 kits