Control NeoPixel WS2812B LED Panels with WLED and ANAVI Miracle Emitter with XIAO ESP32C3

WLED is a powerful open-source firmware that makes managing NeoPixel WS2812B LED panels simple and efficient. Designed for ESP32 and ESP8266, it provides an intuitive interface for seamless LED control. Whether you’re a DIY enthusiast or a professional, WLED offers a highly customizable lighting experience.

Why Choose WLED for NeoPixel LED Panels?

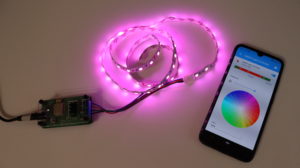
Our previous blog post shared the exact steps how to install WLED directly from a web browser. This firmware includes a built-in local HTTP server, allowing LED control from any device on the same network. It also integrates smoothly with Home Assistant, enabling smart home automation, voice control, and advanced lighting effects. WLED supports both LED strips and 2D LED matrices, making it a versatile choice for various lighting projects.

Demo: ANAVI Miracle Emitter + XIAO ESP32C3

In this tutorial, we will walk through the setup and configuration of NeoPixel WS2812B LED panels using WLED firmware. The demonstration features the open source hardware ANAVI Miracle Emitter, an open-source IoT board designed specifically for controlling NeoPixel LEDs.

Hardware & Accessories Used:

  • ANAVI Miracle Emitter – A small ESP32C3-based board, ideal for WLED applications.
  • NeoPixel WS2812B LED Panels – High-quality, customizable LED panels.
  • Wago Splicing Connectors – Secure and easy wiring connections.
  • DC Barrel Jack to Terminal Block Adapter – Simplifies power connections. For example AP364 or from Pololu.
  • External 5V Power Supply – Powers both the LED panels and the development board.

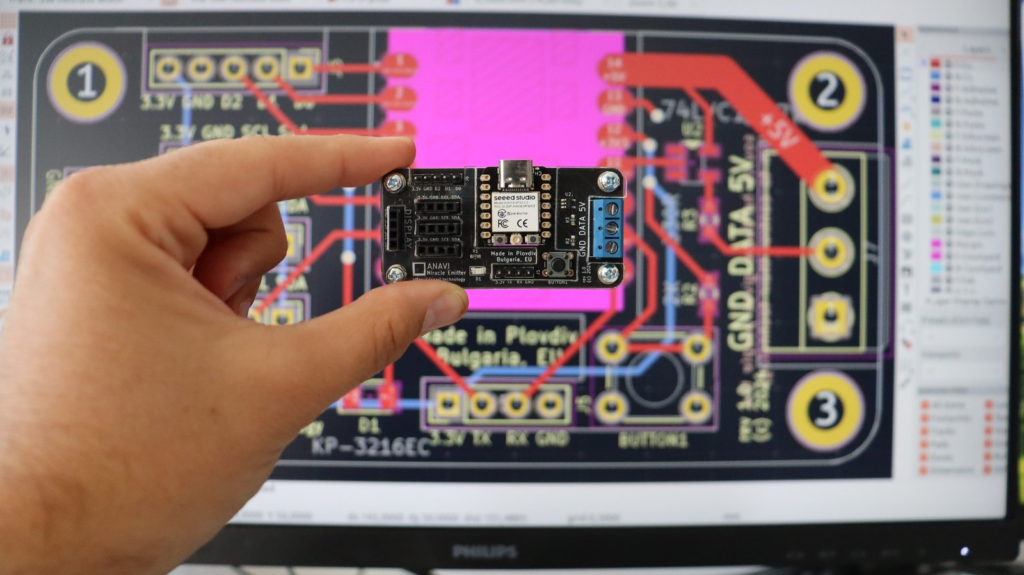
ANAVI Miracle Emitter: Open-Source LED Controller

ANAVI Miracle Emitter is a compact open-source IoT board built for NeoPixel LED control. It also supports I2C sensors and a mini OLED display, making it a great choice for interactive projects. Designed using KiCad, this board will soon be available through a Crowd Supply crowdfunding campaign. If you’re looking for a powerful and compact way to control NeoPixel WS2812B LED panels, the ANAVI Miracle Emitter with WLED is an excellent solution. The XIAO ESP32C3, with its 32-bit RISC-V core, delivers strong performance in a small package, making it ideal for compact LED projects. Stay tuned for more tutorials on maximizing WLED and the ANAVI Miracle Emitter for your next LED lighting setup.

You may also like

AI-Thinker – a Trusted Supplier During the Global Chip Shortage

AI-Thinker is a leading supplier of IoT wireless products and solutions, including antennas, modules and RF lab service. Since 2017 we have been using AI-Thinker ESP-12E modules with ESP8266 in many of our open source hardware products, including ANAVI Fume Extractor, ANAVI Gas Detector, ANAVI Thermometer, ANAVI Light Controller and ANAVI Miracle Controller.

AI Thinker modules with ESP8266

Now, despite the hard times of global chip shortage, AI-Thinker keeps manufacturing and delivering high-quality modules on time. As a trusted supplier through the years, recently we have purchased from AI Thinker enough ESP-12E modules do fulfill the demand and keep making our open source hardware products.

AI Thinker modules with RISC-V microcontroller

Furthermore we stocked ESP-C3-12F modules with Espressif Systems ESP32-C3 Wi-Fi microcontroller based on the open standard instruction set architecture (ISA) RISC-V. ESP-C3-12F are pin to pin compatible with ESP-12E.

AI Thinker ESP32

AI-Thinker is based in Shenzhen, China. The company was founded 10 years ago, in 2012. They also provide LoRaWAN, NB-IoT, Bluetooth and other Wi-Fi modules.

You may also like

Updating ANAVI Miracle Controller with esptool

ANAVI Miracle Controller is an ESP8266-powered, open source, Wi-Fi dev board to control two 5 V or two 12 V LED strips. To get all new features it is highly recommended to run the latest stable version of the free and open source firmware for ANAVI Miracle Controller. We have already explained how to do it with Arduino IDE. However, there is an easier way to flash the latest version with esptool!

ANAVI Miracle Controller connected with USB to UART cable to a personal computer

Esptool is a free and open source ESP8266 and ESP32 serial bootloader command-line utility. The source code is available at GitHub under GPLv2 license. It is written in Python therefore it is universal and runs on Microsoft Windows, Mac OS and any GNU/Linux distribution (Ubuntu, Debian, Linux Mint, Fedora, CentOS, OpenSUSE, etc). We have already cover it for our other projects in a previous blog post. Today we will focus on ANAVI Miracle Controller although in general the steps are the same.

Installation

As of today, esptool works fine with Python 2.7 or Python 3. Python 2 has been deprecated since January 1, 2020 therefore it is recommended to use esptool with Python 3.

The easiest way to install the latest stable version of esptool is from pypi via pip. The pre-requirements are to have Python and pip installed. Open a terminal and execute the following command:

pip install esptool

Using write_flash argument esptool flashes pre-compiled binary to devices with ESP8266 or ESP32. Here are the exact steps:

esptool.py --port /dev/ttyUSB0 --baud 460800 write_flash --flash_size=detect 0 anavi-miracle-controller-sw-100-20200527.bin

NOTE: As of the moment the latest stable version is anavi-miracle-controller-sw-100-20200527.bin. Over the time other version may be released so please make sure you are using the latest and replace the file name accordingly in the command above!

Pretty much the same approach can be used to flash the pre-compiled firmware to any of our dev boards with ESP8266, like ANAVI Fume ExtractorANAVI ThermometerANAVI Gas Detector, etc. Apart from flashing firmware to ESP8266 and ESP32 devices, esptool has a lot of other advanced features which I encourage you to explore. Have a look at the video tutorial and run esptool.py -h to learn more.

Last but not least, huge thanks to the contributors of the open source firmware of ANAVI Miracle Controller: Per CederqvistCODeRUS and Daniel Landau. Community always must be priority for any open source project and it is great to see more people involved with ANAVI Miracle Controller!

You may also like

Getting Started with esptool for flashing firmware on ESP8266 and ESP32

Esptool is a free and open source ESP8266 and ESP32 serial bootloader command-line utility. The source code is available at GitHub under GPLv2 license. It is written in Python therefore it is universal and runs on Microsoft Windows, Mac OS and any GNU/Linux distribution (Ubuntu, Debian, Linux Mint, Fedora, CentOS, OpenSUSE, etc).

Installation

As of today esptool works fine with Python 2.7 or Python 3. Python 2 has been deprecated since January 1, 2020 therefore it is recommended to use esptool with Python 3.

The easier way to install the latest stable version of esptool is from pypi via pip. Open a terminal and execute the following command:

pip install esptool

Flashing Firmware

Using write_flash argument esptool flashed pre-compiled binary to devices with ESP8266 or ESP32. Here are the exact steps:

  • Download an appropriate binary for your ESP8266/ESP32 device.
  • Connect your device to a computer. For example, for ANAVI Thermometer, ANAVI Gas Detector, ANAVI Light Controller and ANAVI Miracle Controller you must use UART to USB debug cable.
  • Turn on the device in boot mode. For example, on ANAVI Thermometer, ANAVI Gas Detector, ANAVI Light Controller and ANAVI Miracle Controller, press and hold the RESET button and plug the power supply.
  • In a terminal execute the following command:
esptool.py --port /dev/ttyUSB0 --baud 460800 write_flash --flash_size=detect 0 firmware.bin 

Finding the Right Firmware

All ANAVI Internet of Things with ESP8266/ESP32 combine free and open source software with open source hardware. The firmware is built using Arduino IDE and a pre-compiled binary file is available at GitHub. Follow the links below to identify your ANAVI device and download appropriate binary for the latest stable firmware:

Of course, alternatively, instead of using esptool you can build the firmware from source through Arduino IDE or PlatformIO.

You may also like