Thanks to open source it is possible to enjoy your favorite arcade, home-console, and classic PC games on a budget setup. In this video tutorial, we will transform an old netbook into a portable retro-gaming machine using Raspberry Pi OS and RetroPie.
RetroPie is a software package designed to enable the emulation of classic video game consoles that sits on top of a full OS. In this tutorial we will install it on top of a Linux distribution. RetroPie allows users to play games from a wide range of vintage systems by using emulators for platforms such as:
- Atari 2600, 5200, 7800, Lynx
- Commodore 64
- Nintendo Entertainment System (NES), Super NES (SNES), Nintendo 64 (N64), Game Boy, Game Boy Advance
- Sega Genesis/Mega Drive, Sega CD, Sega 32X, Sega Master System, Game Gear
- Sony PlayStation 1
Required Hardware
This is the required hardware for this tutorial:
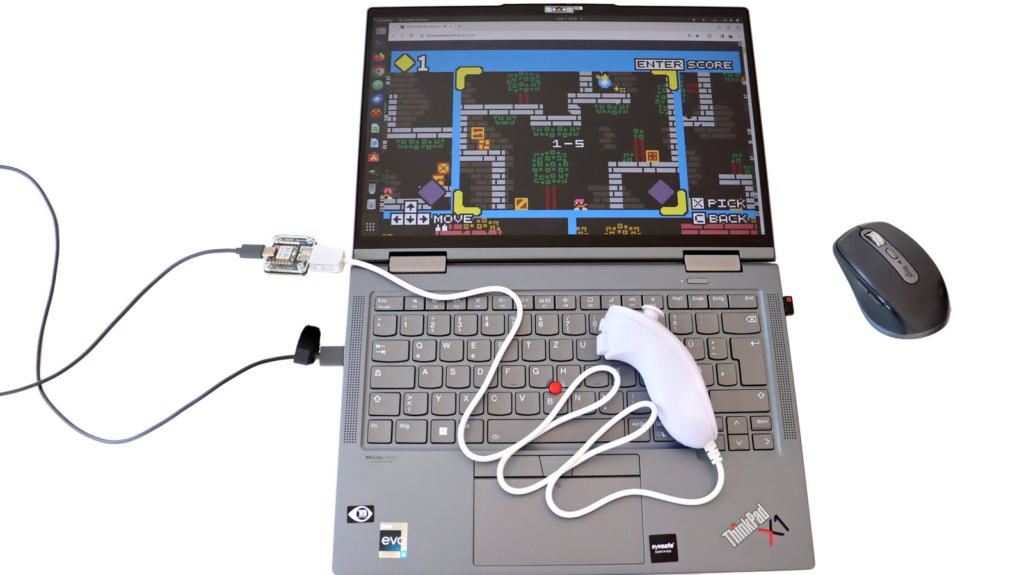
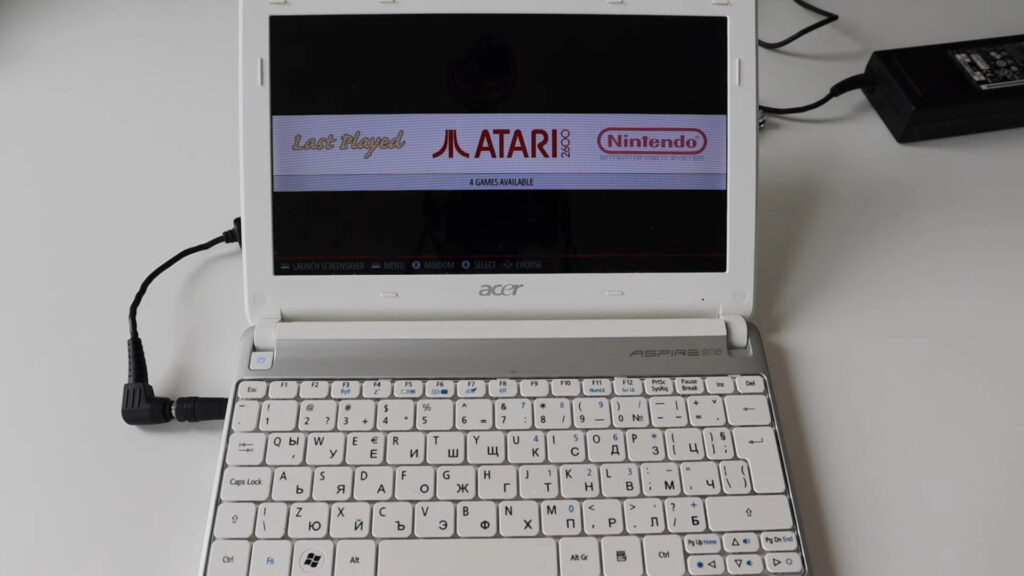
- Personal computer (PC). For example an old netbook like Acer Aspire One D257 or Asus EeePC (or similar) with an Intel Atom or AMD CPU is a great fit.
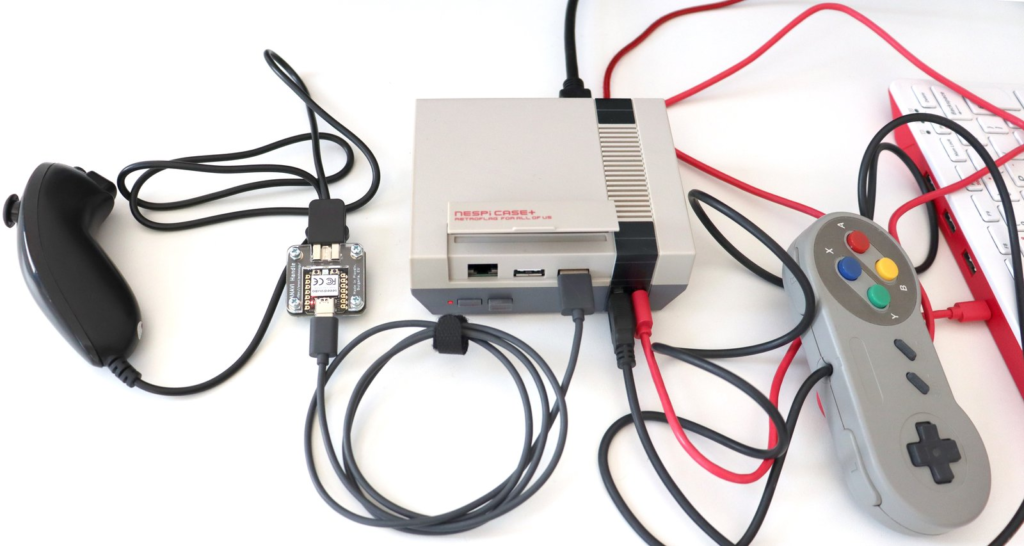
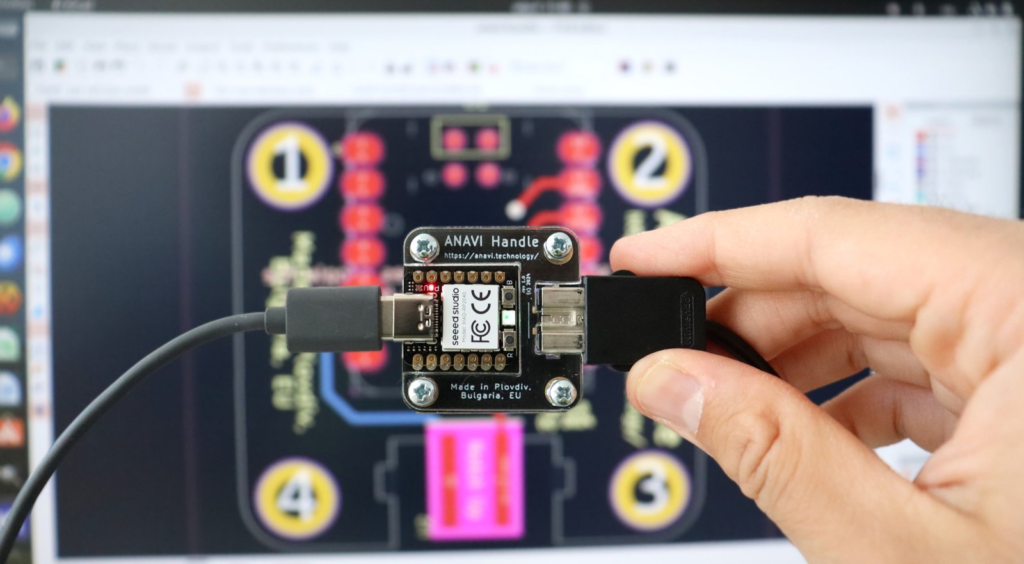
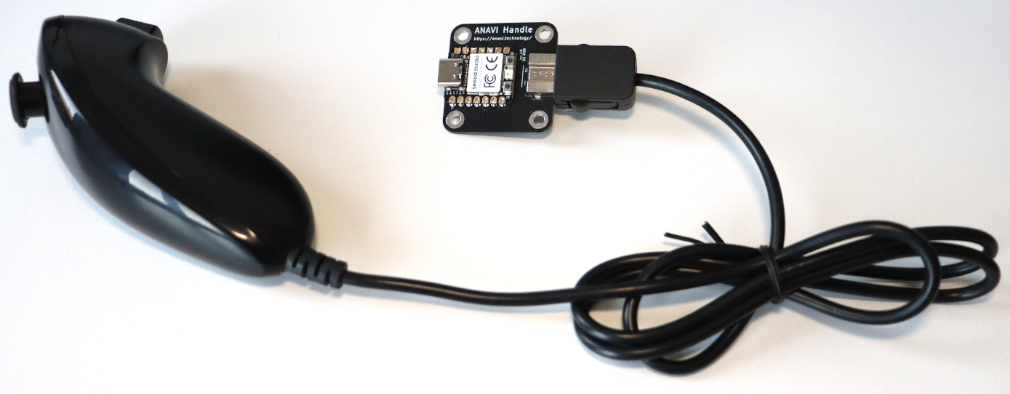
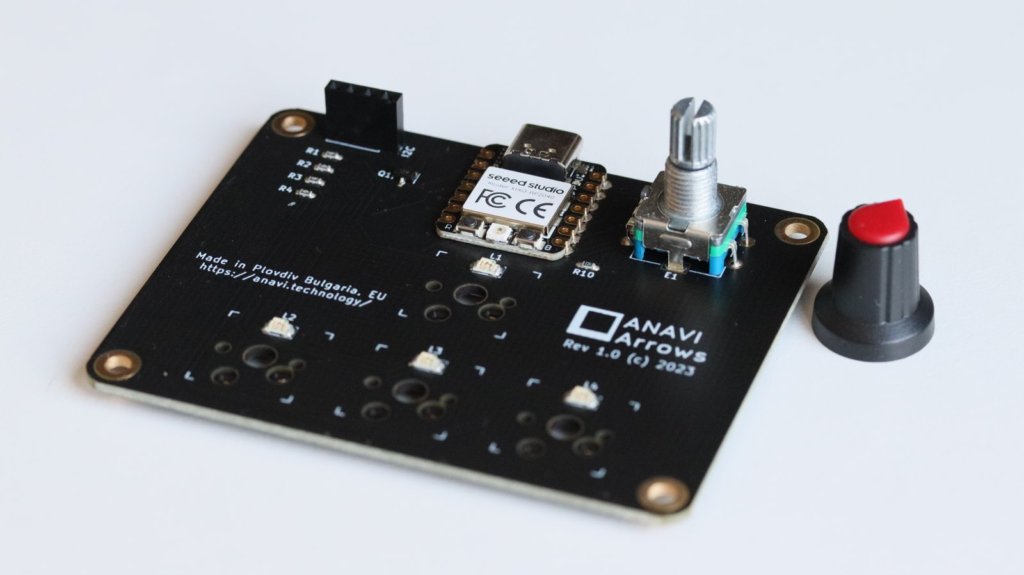
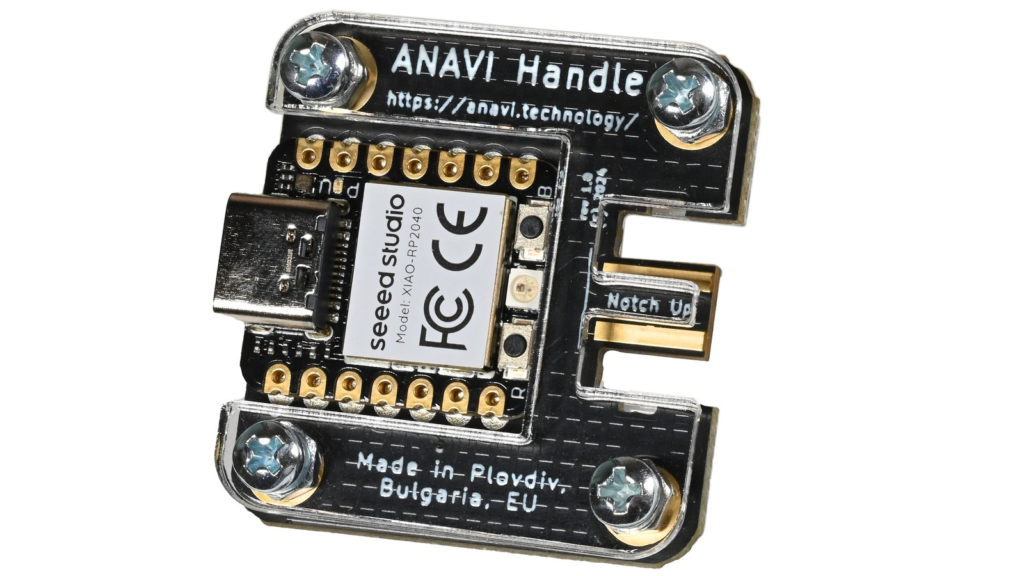
- ANAVI Handle open source hardware USB adapter for Wiimote attachments
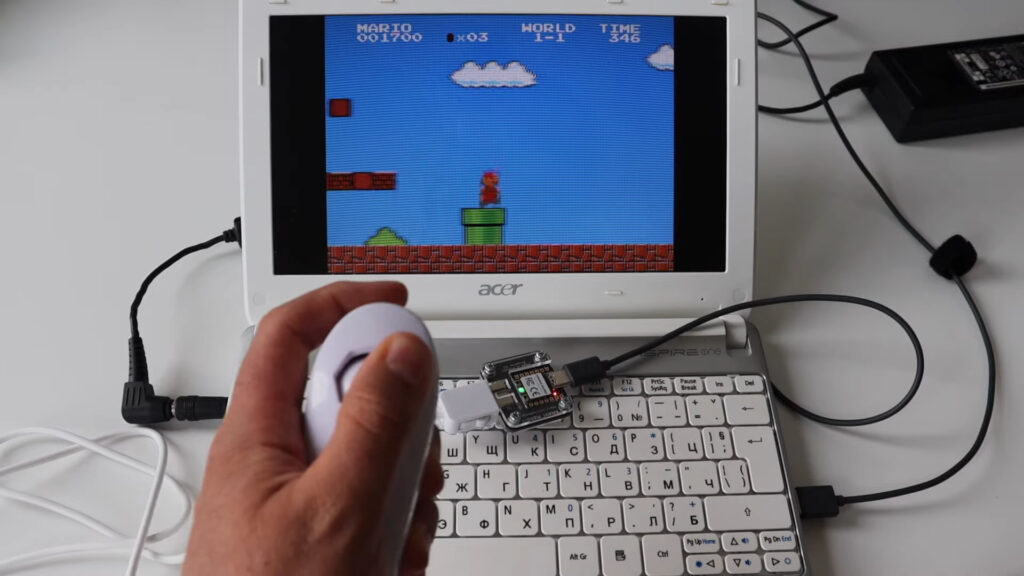
- Wii Nunchuk controller (or another compatible controller)
Software
Follow the steps below to install and configure all the required software on your computer.
Step 1: Install Raspberry Pi OS for Desktop
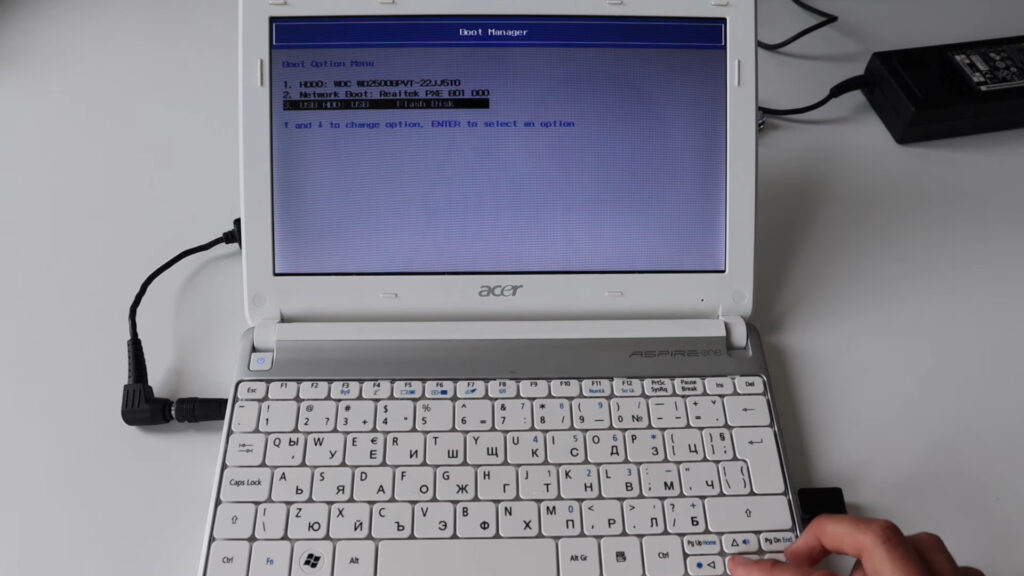
Raspberry Pi Desktop for PC and Mac is a 32-bit GNU/Linux operating system designed for older and less powerful computers. It’s based on Debian, a popular Linux distribution, and includes the Raspberry Pi OS desktop environment along with a set of recommended software. If you have an aging computer that can’t handle modern commercial operating systems, Raspberry Pi OS can revitalize it, making it usable again. To get started, download the OS, flash the ISO file onto a USB drive, boot from the USB on your computer, and proceed with the installation.
Step 2: Install RetroPie
Follow the official documentation for installing RetroPie on a PC running Debian or Ubuntu. Use the RetroPie setup script to perform a Basic Install.
Step 3: Transfer ROM files
After RetroPie is installed, you’ll need to move ROM files for your favorite games into the correct directories. If you followed the steps above, the main directory for all ROMs is located at ~/RetroPie/roms (or /home/pi/RetroPie/roms, which is the same). There are subdirectories for each supported emulated system, such as NES, SNES, and others.
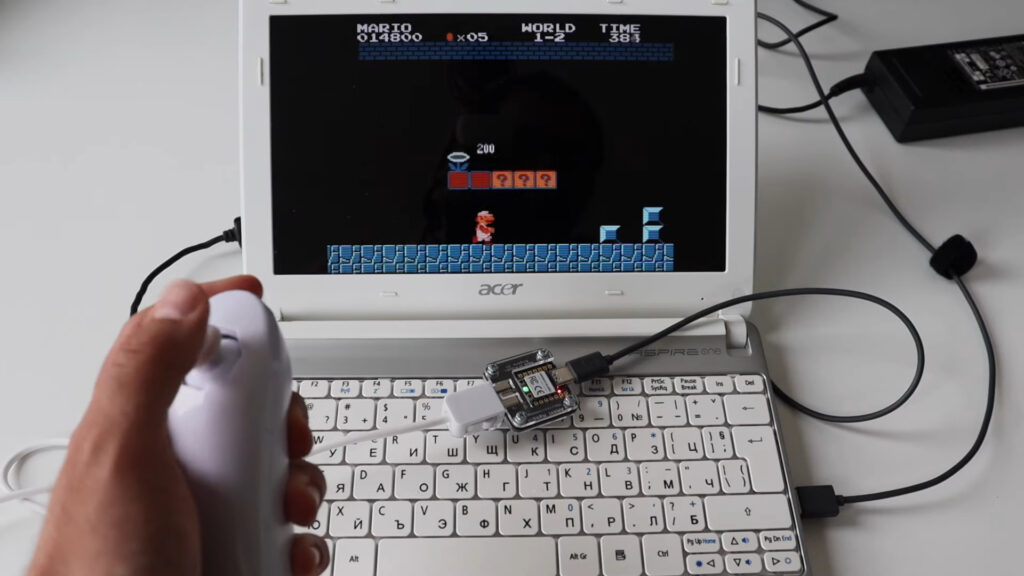
Step 4: Connect ANAVI Handle and Nunchuk
The next step is to connect a Wii Nunchuk controller to your computer using our open-source hardware adapter. Edit config.json and enable keyboard mode:
{
    "type": "keyboard"
}
ANAVI Handle comes with open source firmware written in CircuitPython. The keyboard mode includes a D-pad (directional pad, aka arrows), along with A and B keys. Save the changes to config.json. Ensure they take effect by disconnecting and then reconnecting the ANAVI Handle. After that configure the controls in RetroPie using the Nunchuk controller and ANAVI Handle.
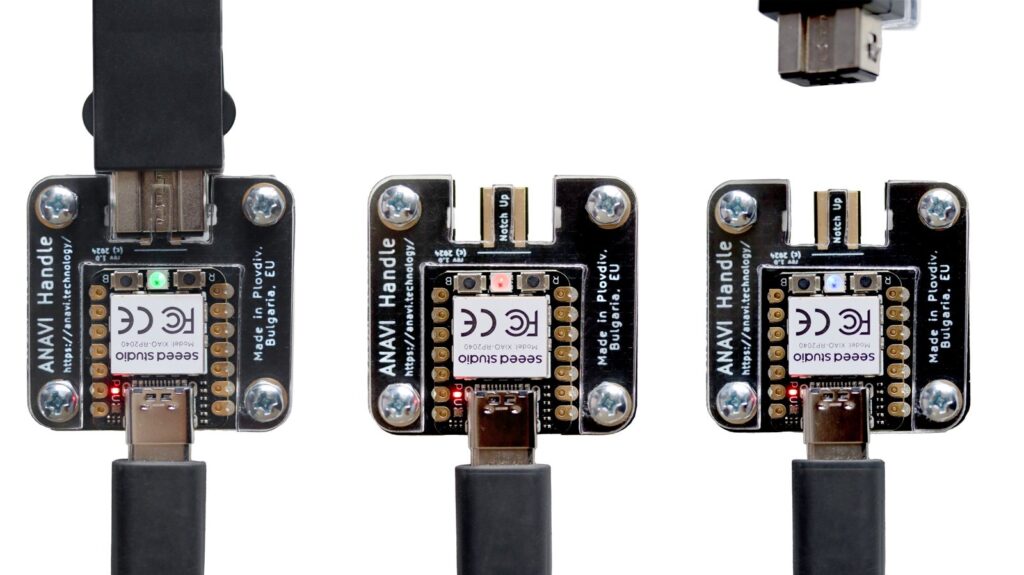
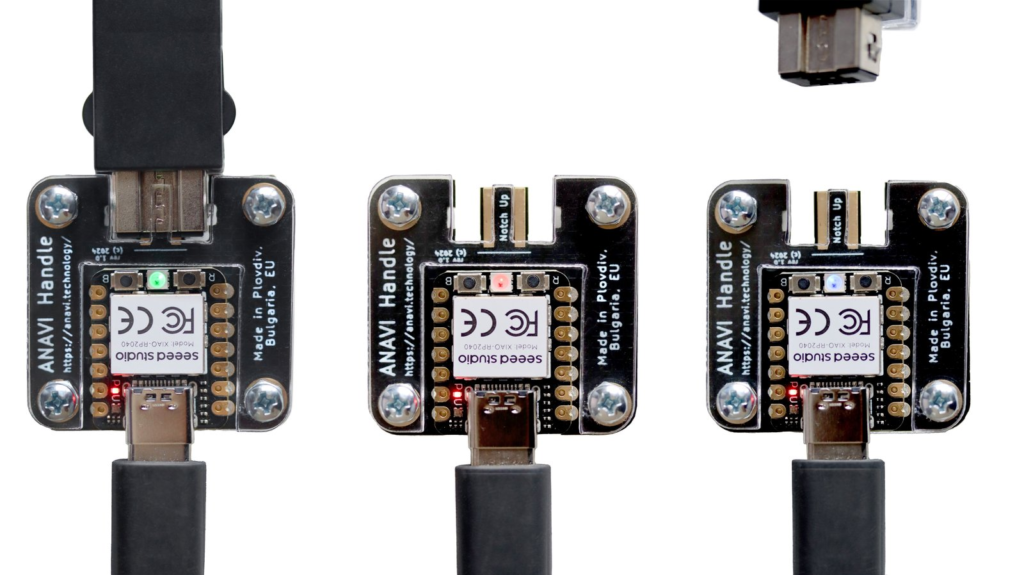
The RGB LED on ANAVI Handle indicates the connection state
Connection States Through RGB LED
The default open-source firmware uses the RGB LED to display three different connection states:
- A green light means the Nunchuk controller is properly connected.
- A blue light indicates the controller has been disconnected from the ANAVI Handle.
- A red light warns that the Nunchuk controller is missing or not connected correctly.
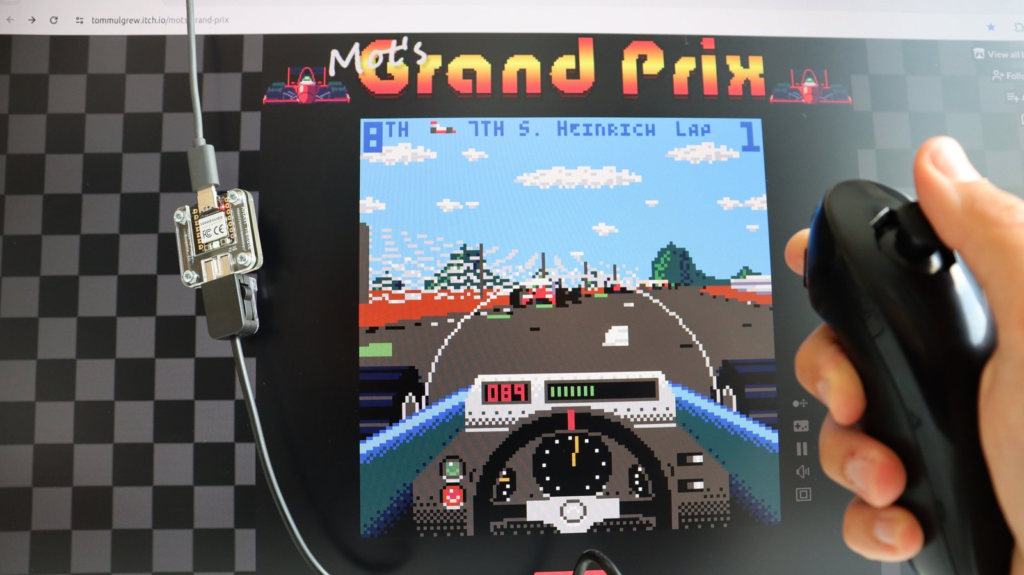
In the demo video, you’ll see the green light on, signaling that you’re ready to enjoy some classic games!
Enjoy Retro Gaming on the Go
Once everything is set up, you can begin your retro-gaming adventure! Power on your computer. RetroPie will start automatically (unless you’ve configured it differently), allowing you to dive into a world of classic arcade, home console, and homebrew games. Whether you’re fighting aliens or challenging a heavyweight champ, a whole world of gaming awaits you. heavyweight champ, a whole world of gaming is waiting for you.
If you have an old Netbook, give it a second chance as portable gaming machine! Get a Nunchuk controller and our open source ANAVI Handle, follow this tutorial, and get ready to relive the golden age of gaming!