ANAVI Fume Extractor Assembly Guide

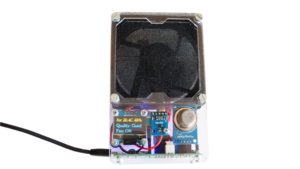
ANAVI Fume Extractor is an  open source smart solder smoke absorber useful for makers during soldering. It comes as a do-it-yourself kit. There are 3 types of kits with different sensor modules. ANAVI Fume Extractor is available at Crowd Supply, Mouser and Tindie.

ANAVI Fume Extractor video assembly guidelines

This tutorial explains the exact steps of how to assemble the ANAVI Fume Extractor developer kit which contains all supported peripherals. The whole process can take up to 30-40min. A screwdriver is required. It is highly recommended to watch the video with the assembly guidelines before you start.

Step 1: Peel off the protective films

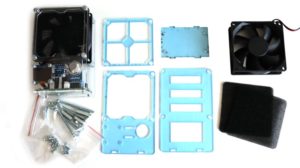
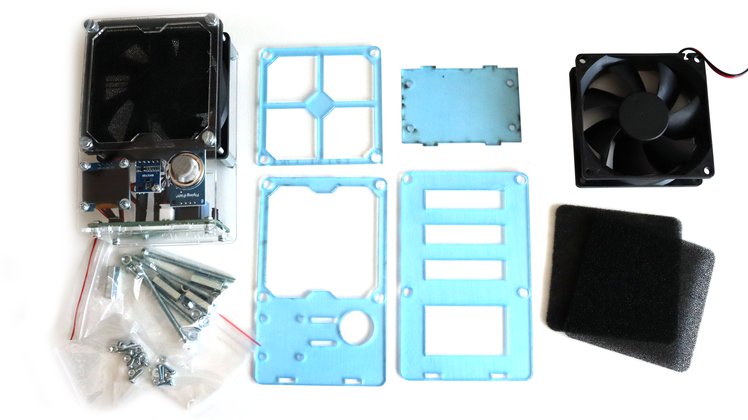
Each ANAVI Fume Extractor kit contains 4 acrylic enclosures. Peel off the protective films from both sides of all of them. The acrylic enclosure will be clear and transparent once the film is peeled off.

Step 2: PCB

Attach the ANAVI Fume Extractor printed circuit board to the bottom acrylic enclosure with 4 screws and 8 nuts. Add 4 nuts below and 4 nuts above the board.

Step 3: Mini OLED Display

The kit includes 4 M2 screws and nuts as well as appropriate washers. Remove the protective film from the mini I2C OLED display. Carefully attach the display to the front acrylic case as shown in the video. The display is fragile. Don’t fasten the screws too tight!

Step 4: Fan Filter

A couple of fan filters are included in each kit. Attach the 4 M4 screws to the front acrylic enclosure with 4 of the M4 nuts. Place one of the filters. Leave the other one as a replacement.

For long-term maintenance over time the filter must be regularly replaced. There is a huge variety of 80mm fan filters on the market. It is up to you to decide whether to buy carbon or HEPA filters. Various distributors offer appropriate filters, for example Mouser has 80 mm, 45 PPI foam media filters.

Step 5: Fan

Add the acrylic enclosure that separates the fan from the filter. On the side of the fan you will notice a label that indicates the direction of the air flow. Place the 80mm 5V DC fan so that the air will flow through the filter.

Screw the 4 M4 20mm stand-offs to firmly fix the position of the fan.

Step 6 (optional): Light Sensor Module

Owners of a developer kit should add the BH1750 light sensor module to the front acrylic enclosure and fix it with one M4 screw and a nut.

Step 7: Peripherals

Connect peripherals, like the fan and the mini OLED display, to the printed circuit board. There are dedicated connectors for both of them. Pay attention to the labels for I2C on the top of the mini OLED display.

Step 8 (optional): Sensors

Owners of advanced or developer kits should attach:

  • MQ-135 for indoor air quality
  • HTU21D I2C sensor module for temperature and humidity
  • BMP180 I2C sensor module for barometric pressure and temperature.

Step 9: Assemble all acrylic enclosures

Finally, assemble together all acrylic enclosures by fastening 4 M4 nuts on the back of ANAVI Fume Extractor.

On the right side of ANAVI Fume Extractor you will notice a jumper for the WiFi as well as a button to switch the filter on and off. By default the jumper for the WiFi is set to OFF. Move it to ON and power cycle the board if you want to connect ANAVI Fume Extractor to a MQTT broker and IoT platform such as the popular open source system Home Assistant.

To turn ANAVI Fume Extractor on, gently plug an appropriate cable and 5V power supply into the microUSB connector on the left side of the board. The microUSB connector is used only for providing power, no data is transferred. Power supply and microUSB cable are NOT included in any of the kits.

For advanced or developer kits, on the first boot, it is very important to do what is called the “burn-in” procedure for initial calibration of MQ-135 air quality sensor module:

  • Place ANAVI Fume Extractor with the attached MQ-135 in a room with clean air
  • Leave it running for at least 24 hours

This has to be done only once when the MQ-135 sensor module is used for the first time. After doing this procedure, on every next boot ANAVI Fume Extractor and MQ-135 will do a quick calibration in a couple of minutes and start working properly.

You may also like

ANAVI Fume Extractor on Batteries

Recently our crowdfunding campaign for ANAVI Fume Extractor ended successfully. Right now we are manufacturing the units. In the mean time we are often asked: is it possible to run ANAVI Fume Extractor on batteries?
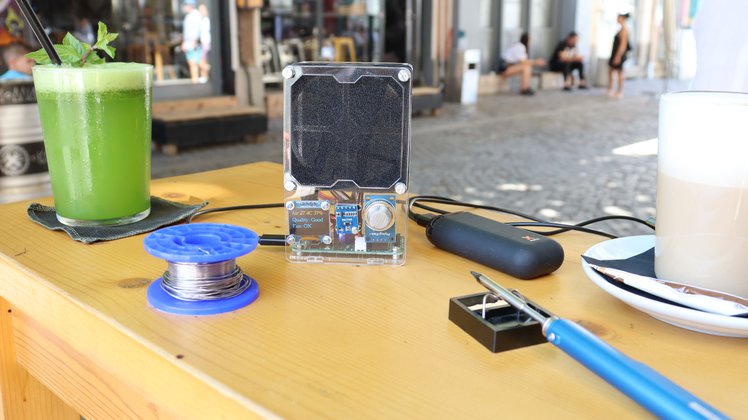
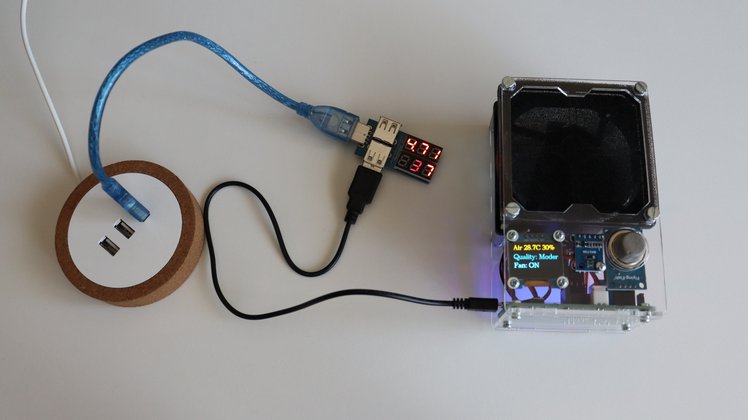
Yes, absolutely! Just use a USB power bank and connect it with an appropriate USB cable to the microUSB connector on the ANAVI Fume Extractor.

ANAVI Fume Extractor on Batteries

Yes, absolutely! Just use a USB power bank and connect it with an appropriate USB cable to the microUSB connector on the ANAVI Fume Extractor.

Measuring the power consumption of ANAVI Fume Extractor

The power consumption of the ANAVI Fume Extractor developer kit with the fan and all peripherals turned on is about 0.5A. The board operates at 5V. The 80mm fan consumes 0.25A. You can adjust the hardware jumper to turn off the WiFi and slightly reduce the overall power consumption.

For more details about ANAVI Fume Extractor visit the crowdfunding page at Crowd Supply!

ANAVI Fume Extractor with USB power bank spotted at neighborhood “Kapana” (The Trap), Plovdiv, Bulgaria

You may also like

ANAVI Fume Extractor Successfully Crowdfunded!

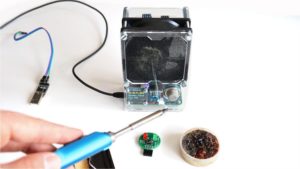
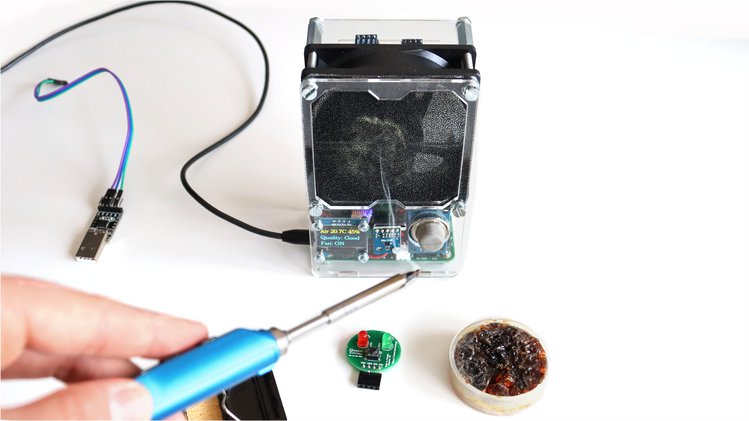
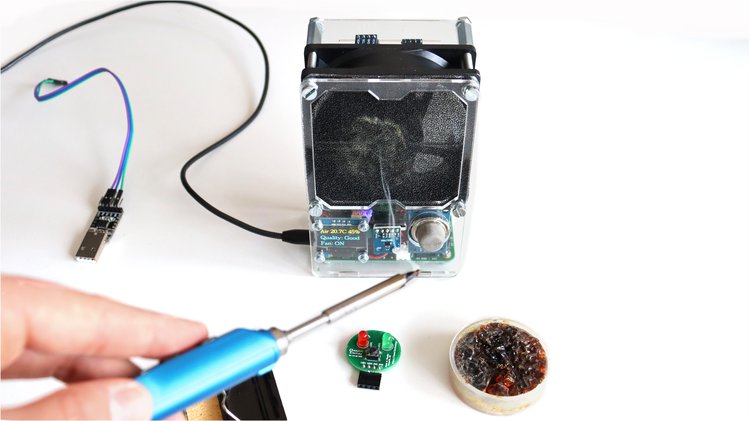
ANAVI Fume Extractor next to a soldering iron

Earlier this week the crowdfunding campaign for ANAVI Fume Extractor at Crowd Supply ended successfully! 83 backers from 16 countries all around the world ordered kits. With their generous help ANAVI Fume Extractor will go from prototype to mass-manufactured do-it-yourself kit for makers.

The printed circuit board of ANAVI Fume Extractor

We have already sourced most of the mechanical parts for the kits, so we proceed with manufacturing of the printed circuit boards in a small local factory in Plovdiv, Bulgaria. This is a long and time-consuming process. . The PCBs are expected by the end of July. After that the local factory has a scheduled summer vacation in weeks 32 and 33 so the assembly is planned for the end of August, and it will be done on several batches.
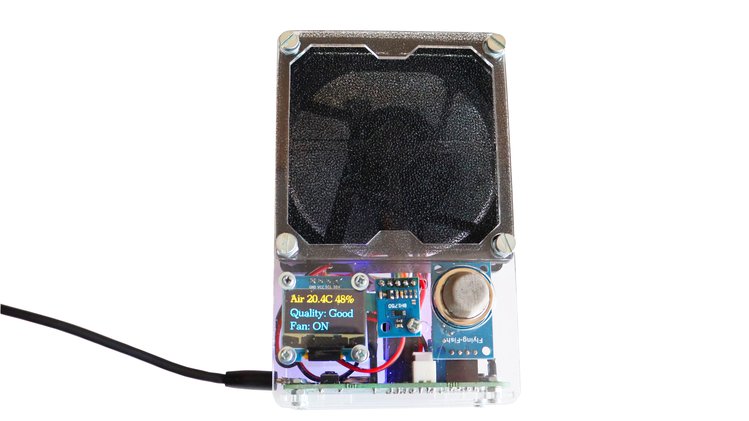
ANAVI Fume Extractor developer kit

Each ANAVI Fume Extractor kit will be flashed with the default open source firmware, packaged carefully and provided to the Crowd Supply team. They will ship the kits to their owners. The estimated shipping date remains Oct 29, 2020.

The whole world is gong through difficult times right now. Due to the COVID-19 outbreak the local factory is working with reduced capacity, so we will keep backers updated with the progress. So far everything is OK. Fingers crossed we will be able to carry on at the same pace.

To avoid any risks for backers, we have an agreement with Crowd Supply that they will keep all funds until ANAVI Technology Ltd provides them the kits. This way in the unexpected case of a complete inability to deliver, Crowd Supply will offer backers full refunds.

If you missed to place an order during the crowdfunding campaign you still have a chance do pre-order at Crowd Supply and to be among the first owners!

You may also like

Updating ANAVI Miracle Controller with esptool

ANAVI Miracle Controller is an ESP8266-powered, open source, Wi-Fi dev board to control two 5 V or two 12 V LED strips. To get all new features it is highly recommended to run the latest stable version of the free and open source firmware for ANAVI Miracle Controller. We have already explained how to do it with Arduino IDE. However, there is an easier way to flash the latest version with esptool!

ANAVI Miracle Controller connected with USB to UART cable to a personal computer

Esptool is a free and open source ESP8266 and ESP32 serial bootloader command-line utility. The source code is available at GitHub under GPLv2 license. It is written in Python therefore it is universal and runs on Microsoft Windows, Mac OS and any GNU/Linux distribution (Ubuntu, Debian, Linux Mint, Fedora, CentOS, OpenSUSE, etc). We have already cover it for our other projects in a previous blog post. Today we will focus on ANAVI Miracle Controller although in general the steps are the same.

Installation

As of today, esptool works fine with Python 2.7 or Python 3. Python 2 has been deprecated since January 1, 2020 therefore it is recommended to use esptool with Python 3.

The easiest way to install the latest stable version of esptool is from pypi via pip. The pre-requirements are to have Python and pip installed. Open a terminal and execute the following command:

pip install esptool

Using write_flash argument esptool flashes pre-compiled binary to devices with ESP8266 or ESP32. Here are the exact steps:

esptool.py --port /dev/ttyUSB0 --baud 460800 write_flash --flash_size=detect 0 anavi-miracle-controller-sw-100-20200527.bin

NOTE: As of the moment the latest stable version is anavi-miracle-controller-sw-100-20200527.bin. Over the time other version may be released so please make sure you are using the latest and replace the file name accordingly in the command above!

Pretty much the same approach can be used to flash the pre-compiled firmware to any of our dev boards with ESP8266, like ANAVI Fume ExtractorANAVI ThermometerANAVI Gas Detector, etc. Apart from flashing firmware to ESP8266 and ESP32 devices, esptool has a lot of other advanced features which I encourage you to explore. Have a look at the video tutorial and run esptool.py -h to learn more.

Last but not least, huge thanks to the contributors of the open source firmware of ANAVI Miracle Controller: Per CederqvistCODeRUS and Daniel Landau. Community always must be priority for any open source project and it is great to see more people involved with ANAVI Miracle Controller!

You may also like

ANAVI Fume Extractor Parts Sourcing

The crowdfunding campaign for ANAVI Fume Extractor in Crowd Supply has been very successfully so far so we have already contacted suppliers and started sourcing various components. Most of the mechanical parts have already been delivered and we can have a closer look at them.

As some of you know, we will make and assemble the printed circuit boards in my beautify hometown of Plovdiv, Bulgaria. One of our goals is to support local manufacturing and if possible purchase parts from local factories and suppliers even when their prices are not the best. Of course, ANAVI Fume Extractor contains a lot of parts and some are so specific that nobody manufactures them locally. Because of this the project also relies on trusted suppliers from the US, the UK, Germany, Poland and China.

Parts for ANAVI Fume Extractor

Transparent Acrylic Enclosures

Each kit of ANAVI Fume Extractor contains 4 transparent acrylic enclosures. They have been designed with the free and open source tool OpenSCAD. The source and the schematics are available in GitHub. For the laser cutting I rely on a local Bulgarian company from Stara Zagora.

There are protective films on both sides of each acrylic enclosure. You must carefully remove them before assembly your do-it-yourself kit with ANAVI Fume Extractor.

Screws, Nuts and Stand-offs

20mm M4 stands-offs

ANAVI Fume Extractor contains various screws, nuts and washers for attaching the printed circuit board, the fan, the display and the sensor modules. The most difficult-to-source part is the 20mm M4 metal stand-off. Each kit contains 4 of them. We couldn’t find anyone in Bulgaria making stand-offs with the required size, so through a local supplier we imported the “abstandsbolzen” from Germany.

80mm Fan

80mm 5V DC fan

The key part of ANAVI Fume Extractor is the 80mm 5V/0.25A brushless DC fan. This type of a fan is primarily used in personal computers which makes it relatively quite and compact. Unfortunately, this is another part that nowadays nobody makes in Bulgaria so we are importing it from China.

Packaging

All kits will come in an eco friendly recyclable cardboard box made in another Bulgarian town Lyaskovets. Although we do our best to reduce plastic packaging as much as I can, some small plastic bags made in Veliko Tarnovo, Bulgaria are still required to store the components in the kit. The stickers will be printed in Plovdiv.

Cardboard box with ANAVI Fume Extractor Advanced Kit

The next step is the manufacturing of the printed circuit boards. Numerous components from various suppliers all around the world have to be assembled on the PCB. We will make it in a small local factory in my hometown of Plovdiv, Bulgaria. The manufacturing is scheduled to start right after the end of the campaign when we know the exact quantities.

Thank you for supporting entirely open source projects like ANAVI Fume Extractor!

You may also like

ANAVI Fume Extractor

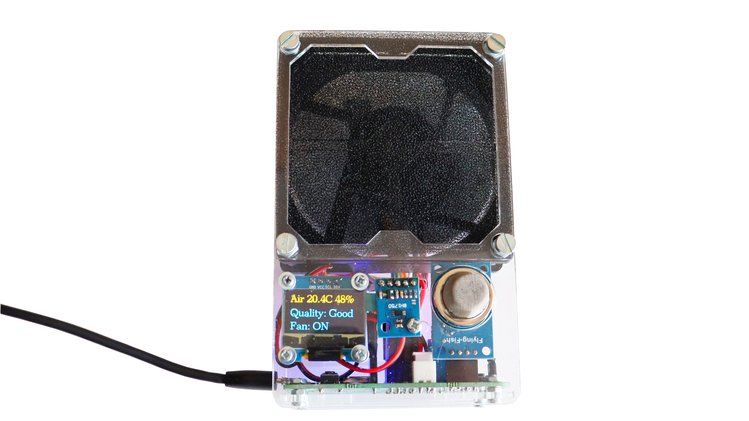
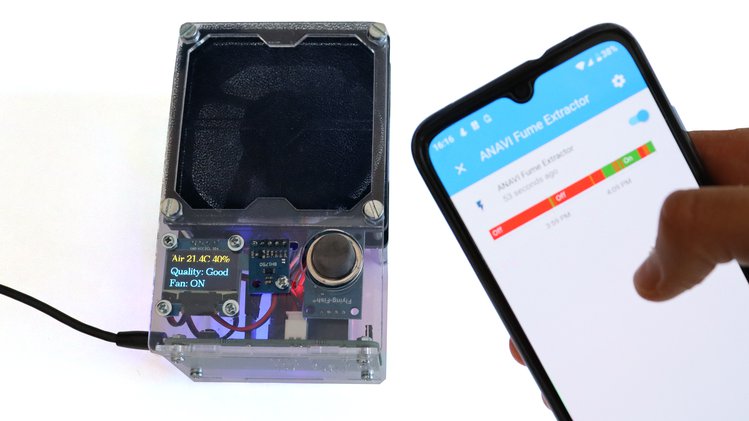
ANAVI Fume Extractor is a smart, open source, solder smoke absorber. It is powered by ESP8266 with WiFi, 80 mm fan and supports various peripherals: mini OLED display, MQ-135 analog gas sensor for air quality, sensors for temperature, humidity, barometric pressure and light. The filters are replaceable.

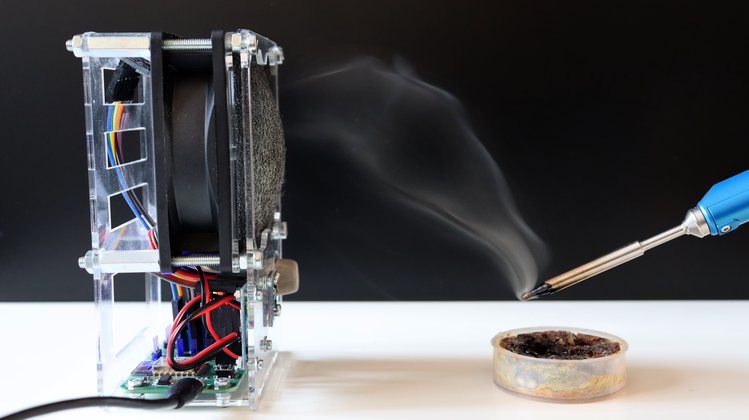
Soldering fumes are dangerous, keep them away with ANAVI Fume Extractor

Furthermore out the box the open source firmware of ANAVI Fume Extractor works with the popular IoT platform Home Assistant over the protocol MQTT. This means you can gather sensor data and control the fume extractor remotely using your smartphone, tablet or personal computer!

Turning on and off ANAVI Fume Extractor from a smartphone using Home Assistant

After more than 10 months of development we launched a crowd funding campaign at Crowd Supply! We are ready for manufacturing in Plovdiv, Bulgaria and now we need your support. We hope you’ll jump in and help us bring this entirely open source project to life!

ANAVI Fume Extractor is a must-have tool for any maker!

You may also like

Getting Started with esptool for flashing firmware on ESP8266 and ESP32

Esptool is a free and open source ESP8266 and ESP32 serial bootloader command-line utility. The source code is available at GitHub under GPLv2 license. It is written in Python therefore it is universal and runs on Microsoft Windows, Mac OS and any GNU/Linux distribution (Ubuntu, Debian, Linux Mint, Fedora, CentOS, OpenSUSE, etc).

Installation

As of today esptool works fine with Python 2.7 or Python 3. Python 2 has been deprecated since January 1, 2020 therefore it is recommended to use esptool with Python 3.

The easier way to install the latest stable version of esptool is from pypi via pip. Open a terminal and execute the following command:

pip install esptool

Flashing Firmware

Using write_flash argument esptool flashed pre-compiled binary to devices with ESP8266 or ESP32. Here are the exact steps:

  • Download an appropriate binary for your ESP8266/ESP32 device.
  • Connect your device to a computer. For example, for ANAVI Thermometer, ANAVI Gas Detector, ANAVI Light Controller and ANAVI Miracle Controller you must use UART to USB debug cable.
  • Turn on the device in boot mode. For example, on ANAVI Thermometer, ANAVI Gas Detector, ANAVI Light Controller and ANAVI Miracle Controller, press and hold the RESET button and plug the power supply.
  • In a terminal execute the following command:
esptool.py --port /dev/ttyUSB0 --baud 460800 write_flash --flash_size=detect 0 firmware.bin 

Finding the Right Firmware

All ANAVI Internet of Things with ESP8266/ESP32 combine free and open source software with open source hardware. The firmware is built using Arduino IDE and a pre-compiled binary file is available at GitHub. Follow the links below to identify your ANAVI device and download appropriate binary for the latest stable firmware:

Of course, alternatively, instead of using esptool you can build the firmware from source through Arduino IDE or PlatformIO.

You may also like

ANAVI Fume Extractor Is Coming Soon…

Stay safe while soldering with ANAVI Fume Extractor

ANAVI Fume Extractor is an entirely open source smart solder smoke absorber certified by the Open Source Hardware Association (OSHWA) with UID  BG000060. ANAVI Fume Extractor is powered by a Wi-Fi development board with ESP8266, 80mm fan and a replaceable carbon filter. It has a dedicated slots for a mini OLED I²C display and MQ-135 gas sensor module as well as slots up to 3 additional I²C sensor modules. Furthermore, there are UART pins for easy flashing of custom software and an extra GPIO for connecting external peripherals.

ANAVI Fume Extractor

We are preparing a crowdfunding campaign to support low-volume manufacturing in Plovdiv, Bulgaria. Learn more about ANAVI Fume Extractor and subscribe for updates at Crowd Supply.

You may also like