Earlier in January all ANAVI Gardening uHAT kits were delivered to the Crowd Supply warehouse and soon after that Crowd Supply team sent them to their final destination: our valuable and trusting crowdfunding backers! Thank you again for the support.
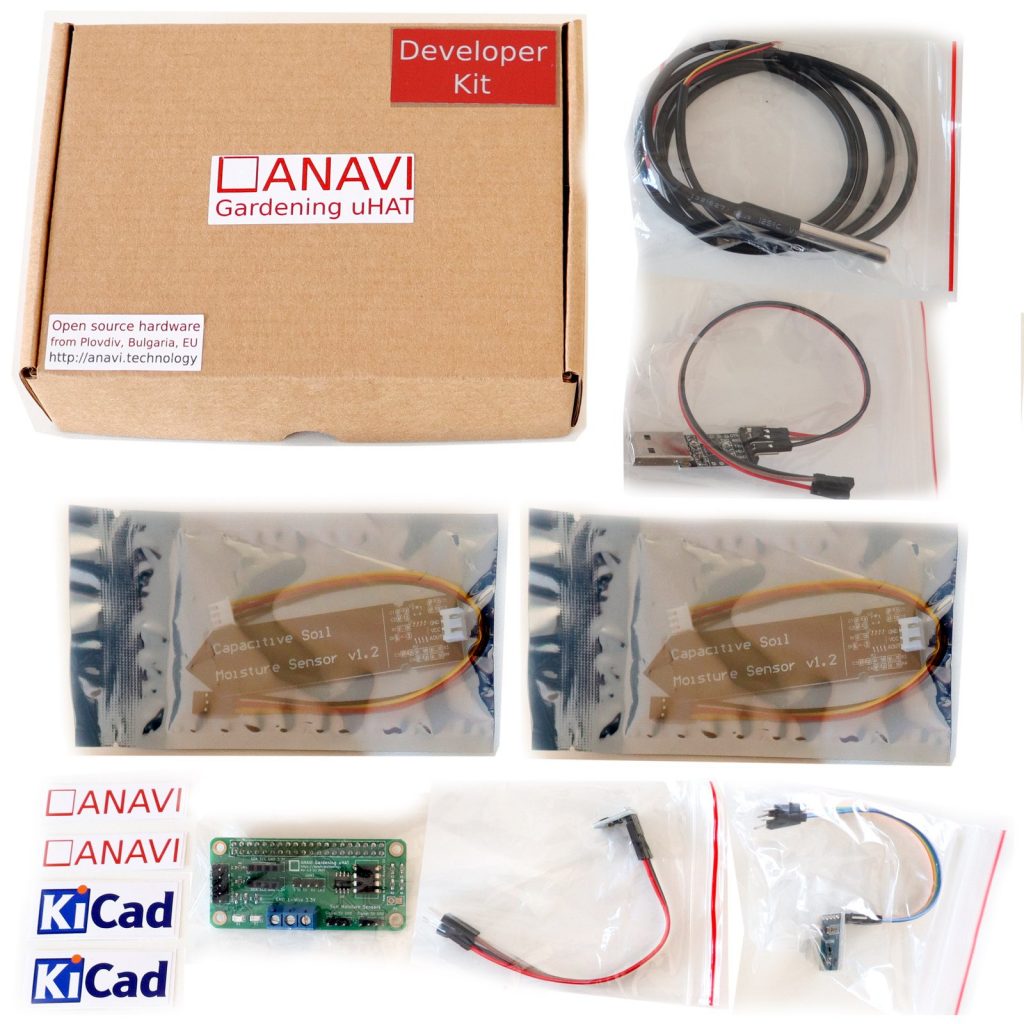
ANAVI Gardening uHAT Developer Kit
ANAVI Gardening uHAT is a versatile development board, so please follow the instructions below for safe use:
ANAVI Gardening uHAT should only be connected to a compatible Raspberry Pi with 40-pin header.
Do not expose it to water or moisture, and do not place it on a conductive surface whilst in operation.
Do not expose it to heat from any source; it is designed for reliable operation at normal room temperatures.
Take care while handling the board to avoid mechanical or electrical damage to the printed circuit board and connectors.
Avoid handling ANAVI Gardening uHAT while it is powered on. Only handle by the edges to minimize the risk of electrostatic discharge damage.
In the meantime, there is a work in progress going on the user’s manual which is available at GitHub. We will soon update it. As usual, GitHub pull requests with improvements and fixes to the documentation or the source code examples are always welcome.
We have good news regarding ANAVI Gardening uHAT! All boards have been received almost fully assembled from the local factory and we have sourced all required peripherals.
Recently, we received the last batch of assembled printed circuit boards from the local factory. As you can see on the photo, only the EEPROM is missing. We will flash and solder it in-house.
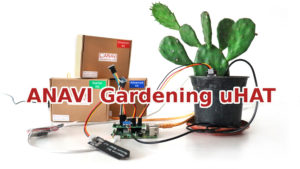
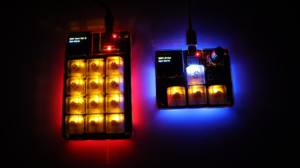
The winter is coming… Grab a ANAVI Gardening uHAT for your Raspberry Pi
We have also received additional peripherals, which will be included in ANAVI Gardening uHAT Starter, Advanced, and Developer kits. On the photo you can see the big packages with analog capacitive soil moisture sensor. Each kit will contain a couple of capacitive soil moisture sensors.
Capacitive Soil Moisture Sensor v1.2
The recyclable cardboard boxes for our eco-friendly packaging have also already been delivered. Another local company here in Plovdiv, Bulgaria will print all stickers for us. We expect them next week.
Our crowdfunding campaign recently ended very successfully but you can still order our open source Gardening uHAT for your Raspberry Pi and be among the very first owners!
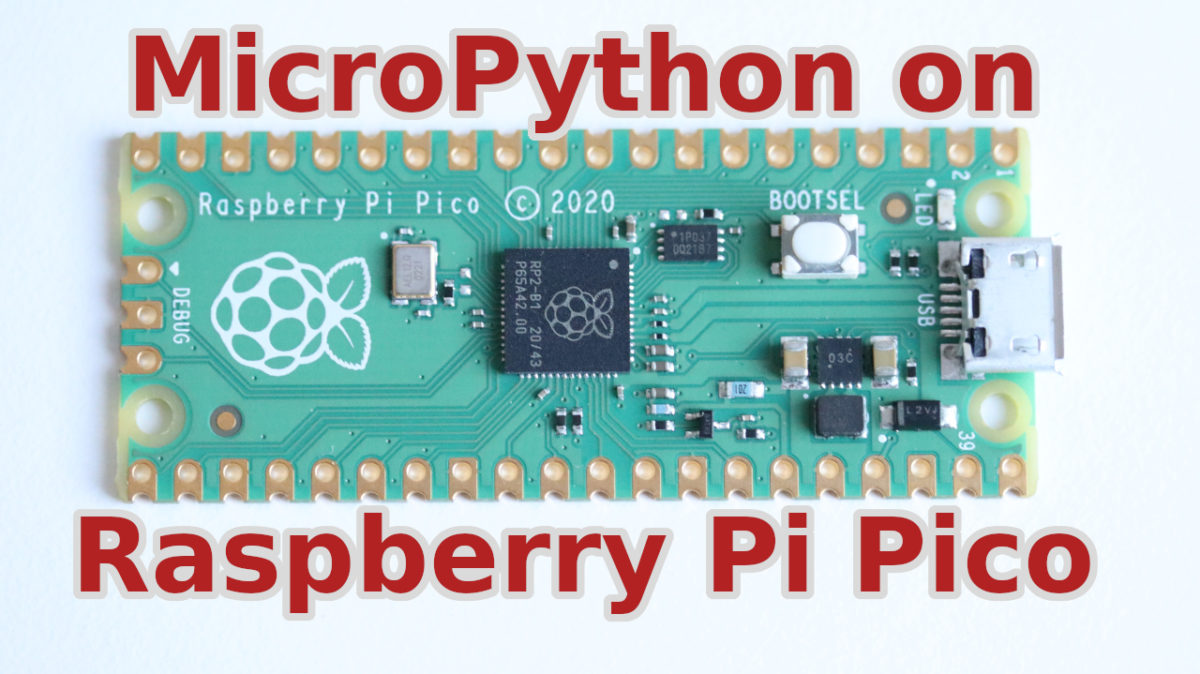
Raspberry Pi Pico is a tiny and fast development board by the Raspberry Pi Foundation built using the brand new RP2040 32-bit dual ARM Cortex-M0+ microcontroller. The major advantage of Raspberry Pi Pico is the affordable price as it is available for about $4 (without taxes and shipping).
In this video tutorial you will learn how to get started with MicroPython using the open source Thonny IDE on Raspberry Pi Pico. Thonny runs on Mac, Windows and Linux distributions, in the video it is used on Ubuntu. The video includes Pico unboxing, MicroPython installation guide, blinking LED example, MicroPython REPL demo and conclusions.
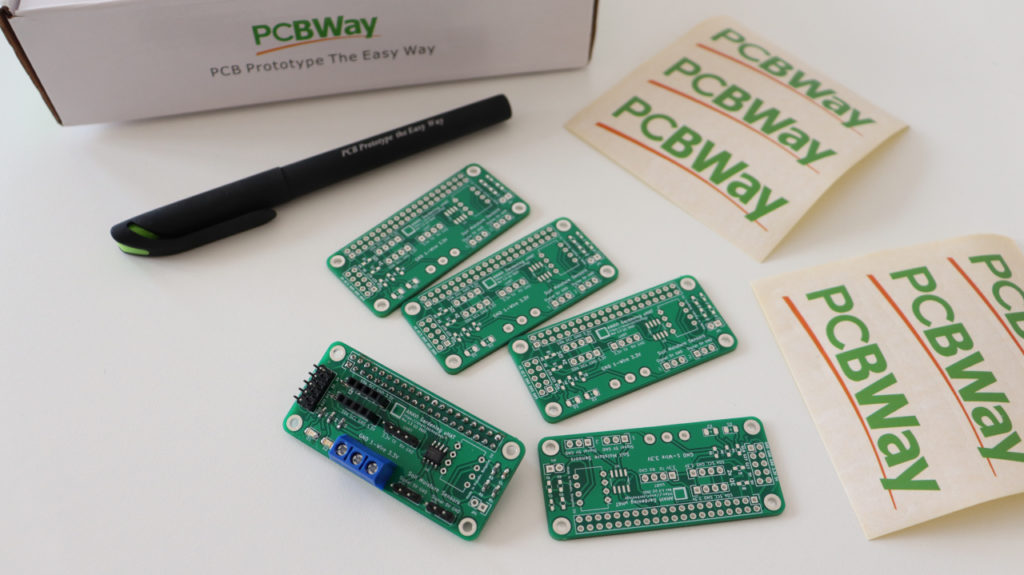
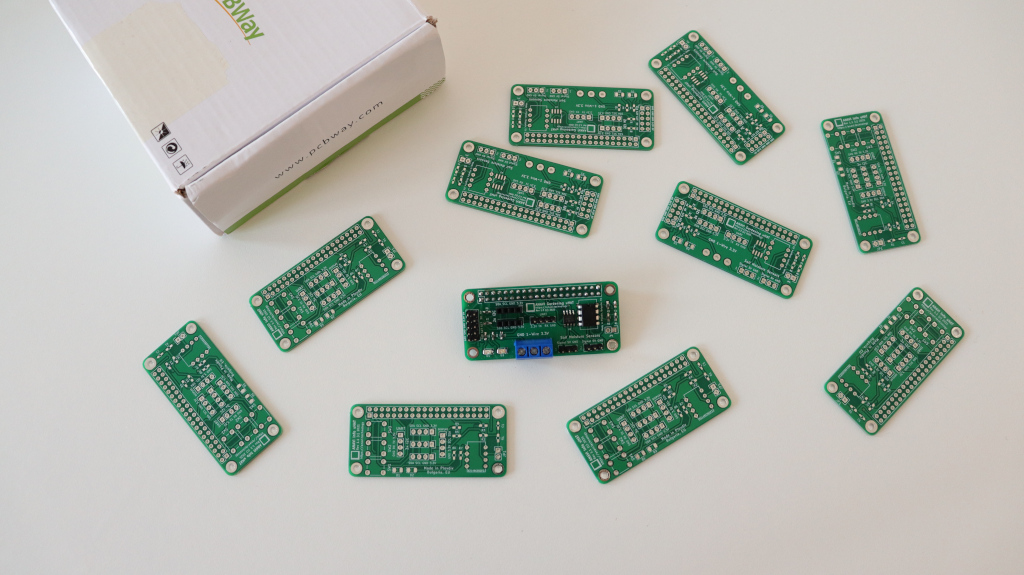
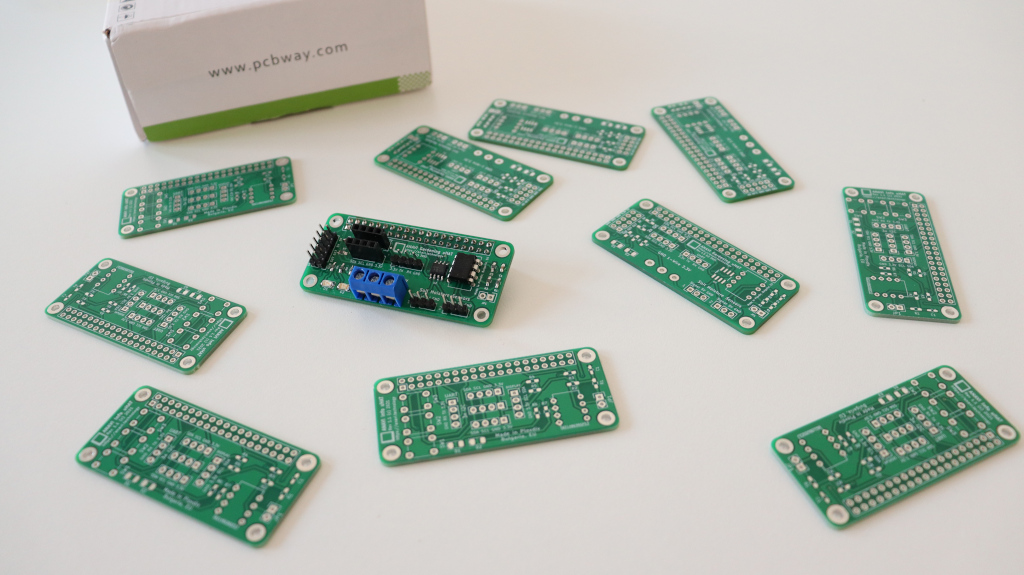
The video tutorial was sponsored by PCBway which provide high-quality prototyping services. On the photo you can see prototypes of green printed circuit boards with white silkscreen following Raspberry Pi specifications for micro Hardware Attached on Top (uHAT).
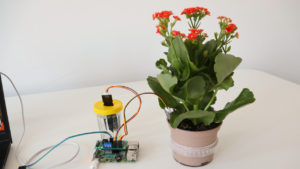
ANAVI Gardening uHAT is a low-cost, open source Raspberry Pi add-on board that helps you develop smart solutions for monitoring and growing plants.
ANAVI Gardening uHAT supports multiple sensors for soil moisture, temperature, humidity, barometric pressure, and light. Getting started is easy: just plug it into a Raspberry Pi with your bare hands and follow the instructions in the user manual. No soldering is necessary, and no tools are required.
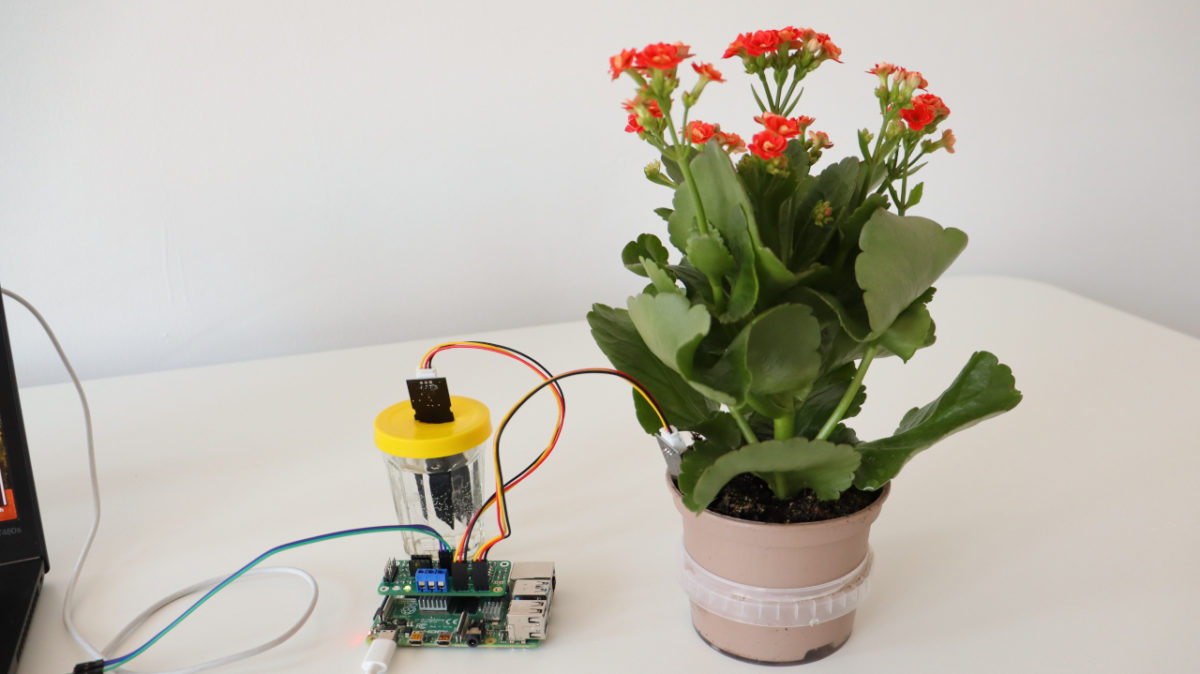
Raspberry Pi is a famous series of small single-board computers (SBCs) developed in the United Kingdom by the Raspberry Pi Foundation in cooperation with Broadcom. This is a step by step tutorial for using Raspberry Pi and capacitive soil moisture sensor with Microchip MCP3002 analog-to-digital converter (ADC) and a Python script for detecting the soil moisture in percentage.
Capacitive Soil Moisture Sensor
Capacitive Soil Moisture Sensor v1.2 and v2.0 measures the volumetric content of water inside the soil and retrieves the moisture level by capacitive sensing rather than resistive sensing like other sensors. The benefit of using a capacitive soil moisture sensor is the lack of corrosion and longer lifespan.
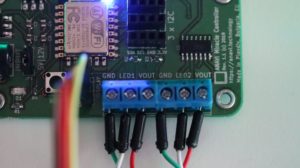
Wiring
Unlike Raspberry Pi Pico, the recently released microcontroller, all versions and models of the Raspberry Pi single-board computers do not include an analog-to-digital converter (ADC). This tutorial explains how to use Microchip MCP3002 with Raspberry Pi.
Microchip MCP3002 is a 10-bit resolution, dual channel ADC with SPI hardware bus. It can be connected to any Raspberry Pi single board computer version and model, including Raspberry Pi 4 and Raspberry Pi 0. However, this tutorial is not for Raspberry Pi Pico microcontroller. For more details about the wiring of Microchip MCP3002 a Raspberry Pi single-board computer have a look at my previous tutorial.
Prototypes for Raspberry Pi add-on boards
Alternatively, the easier option without a breadboard an a bunch of cables, is to use a dedicated Raspberry Pi add-on board with built-in ADC. Using the free and open source tool KiCad we designed ANAVI Gardening uHAT exactly for this purpose. It has dedicated pins for connecting a couple of capacitive soil moisture sensors. The prototype has been created thanks to PCBWay. This is a lead-free prototype printed circuit board with 2 layers, green solder mask and white silkscreen. PCBway offers a huge variety of colors and even flexible PCB.
Software
Flash Raspberry Pi OS, the official Debian based GNU Linux distribution by the Raspberry Pi, on microSD card and boot it. On the Raspberry Pi, open a terminal and using the raspi-config tool enable SPI as shown in the video. Reboot the Raspberry Pi.
Python3 script for reading data from a couple of capacitive soil moisture sensors through Microchip MCP3002 ADC is available at the anavi-examples repository in GitHub. The script relies on popular Python libraries spidev and RPi.GPIO. Open a terminal and run the following commands to clone anavi-examples and run the script:
git clone https://github.com/AnaviTechnology/anavi-examples.git
cd anavi-examples/anavi-gardening-uhat/soil-moistore-sensors/python/
python3 soil-moistore-sensors.py
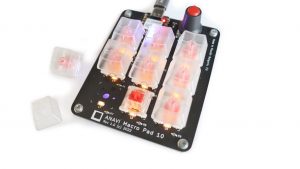
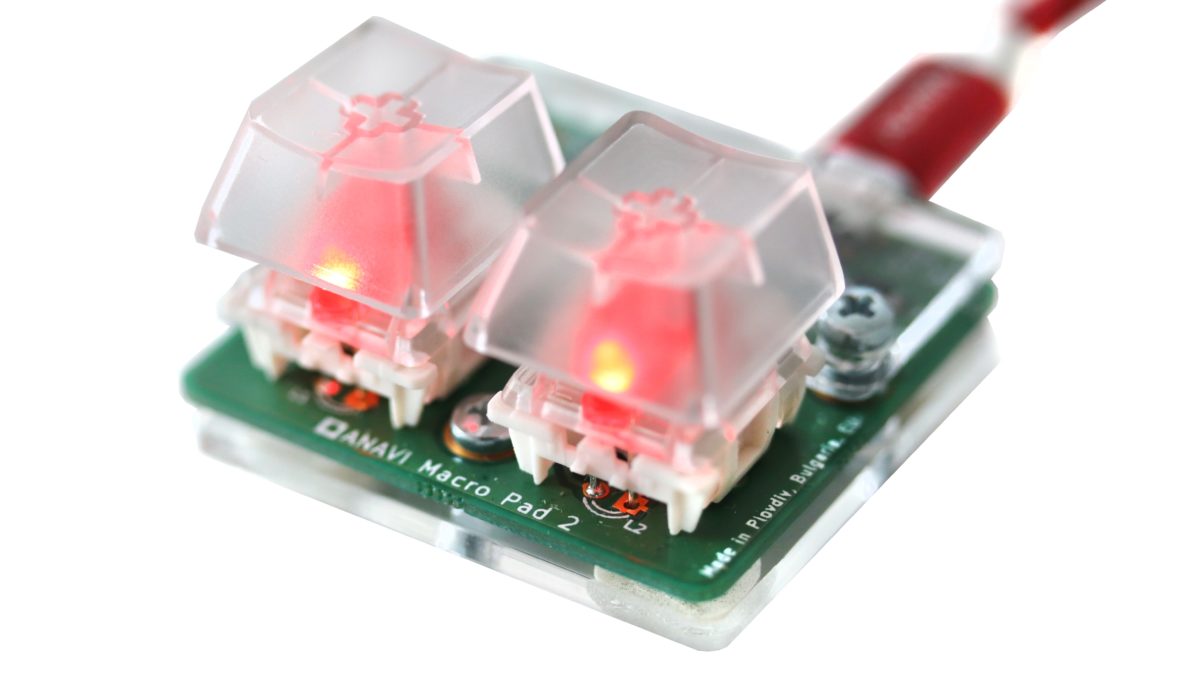
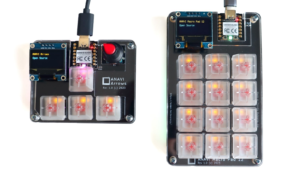
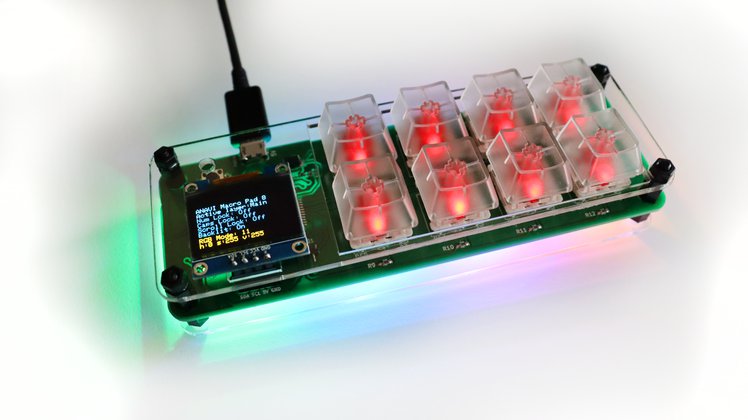
Meet ANAVI Macro Pad 2! It is an open source, programmable two-key mechanical keypad with backlighting. Each of the keys on ANAVI Macro Pad 2 can be reprogrammed for use as a macro or even as a dedicated shortcut key, making it perfect for a number of applications across various industries.
ANAVI Macro Pad 2
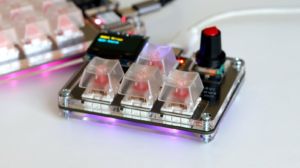
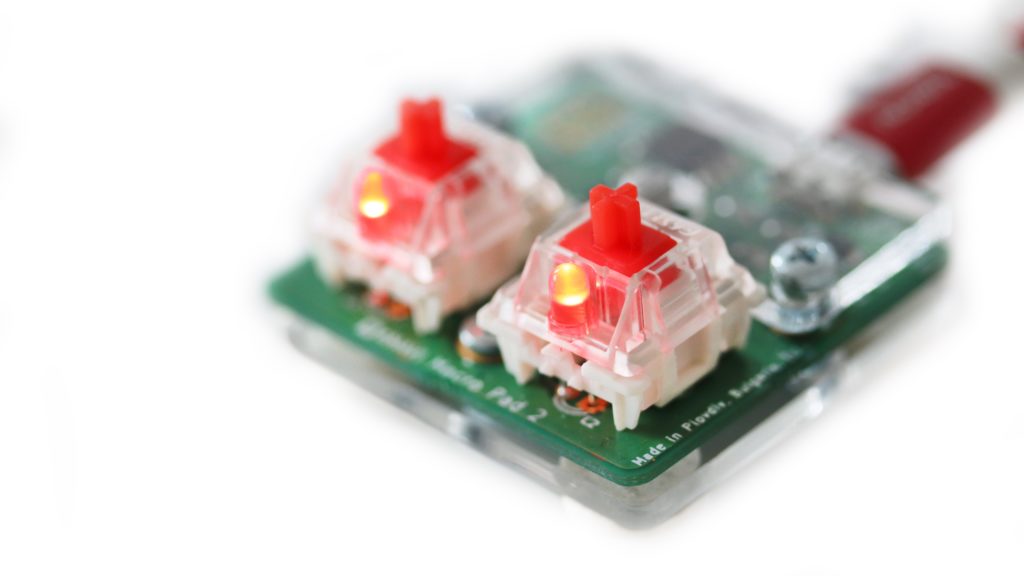
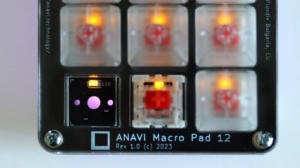
ANAVI Macro Pad 2 runs on a Microchip ATtiny85, which is a reliable, low-cost, 8-bit AVR RISC-based microcontroller. It has a gold-plated printed circuit board, Gateron red mechanical switches, 3mm red LEDs and translucent keycaps.
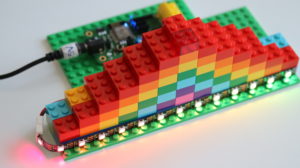
Gateron red mechanical switches with 3mm LEDs on ANAVI Macro Pad 2
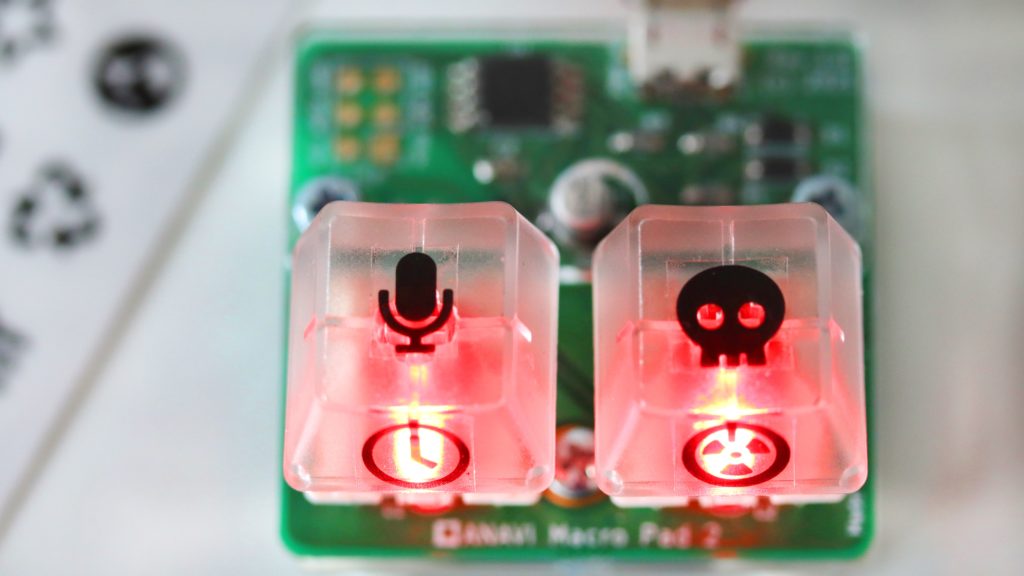
Only free and open source software tools like KiCad, OpenSCAD, and Inkscape were used to design ANAVI Macro Pad 2. Quantum Mechanical Keyboard (QMK) with V-USB is the default open source firmware. Source code and schematics are available on GitHub.
ANAVI Macro Pad 2 with stickers on the translucent keycaps of the mechanical switches
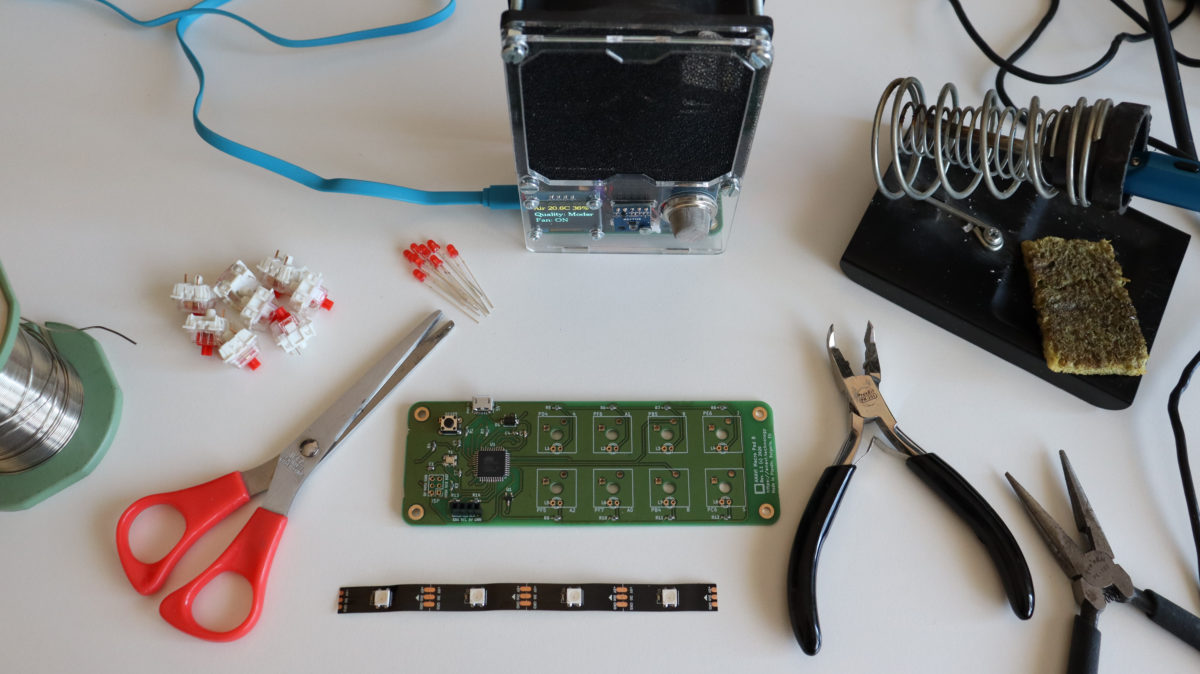
In a previous update we shared the exact steps how to assemble ANAVI Macro Pad 8 Developer Kit. Now let’s have a look at the Maker Kit.
ANAVI Macro Pad 8 Maker Kit Soldering and Assembly Video Tutorial
The maker kit provides the printed circuit board (PCB) and an addressable LED strip. There are also some nice stickers. Other accessories have to be purchased separately. You can use any mechanical switches compatible with Cherry MX plate footprint and 3mm LEDs.
ANAVI Macro Pad 8 Maker Kit Unboxing
Furthermore with the maker kit you can perform a hot-swap upgrade of ANAVI Macro 8. It requires a very specific procedure which was explained in a previous article. If you have this in mind don’t solder anything and have a look at the other video tutorial.
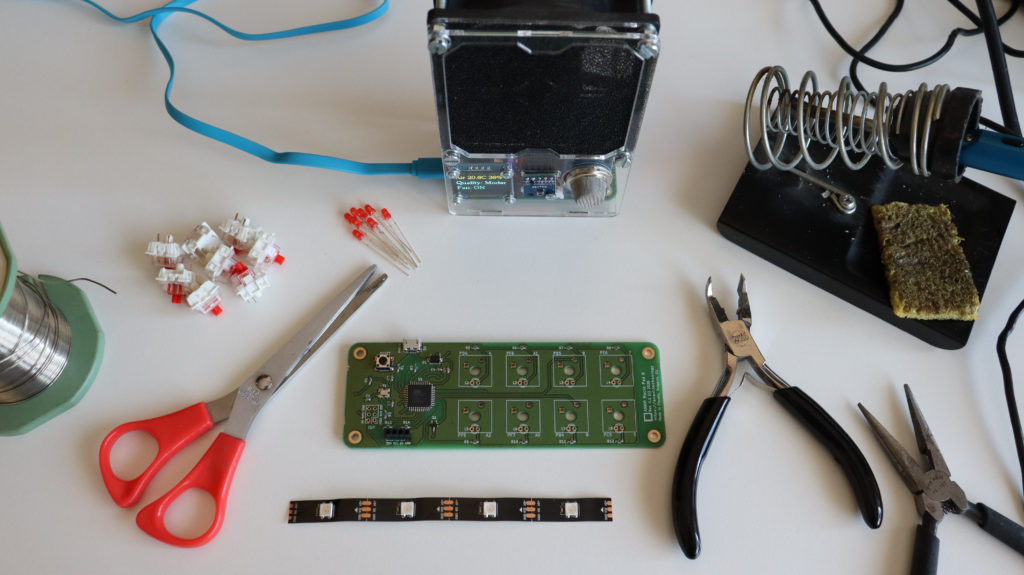
Required tools for soldering of ANAVI Macro Pad 8 Maker Kit
The assembly of ANAVI Macro Pad 8 Maker Kit requires soldering and advanced skills. The following tools are required:
Soldering iron
Scissors
Optionally: screwdriver, tweezers and a keycap puller
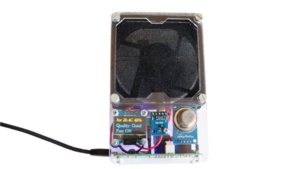
It is also a good idea to stay safe and get a smoke absorber while soldering, for example our open source ANAVI Fume Extractor.
Please have a look at the video and follow the steps below if you have ANAVI Macro Pad 8 Maker Kit.
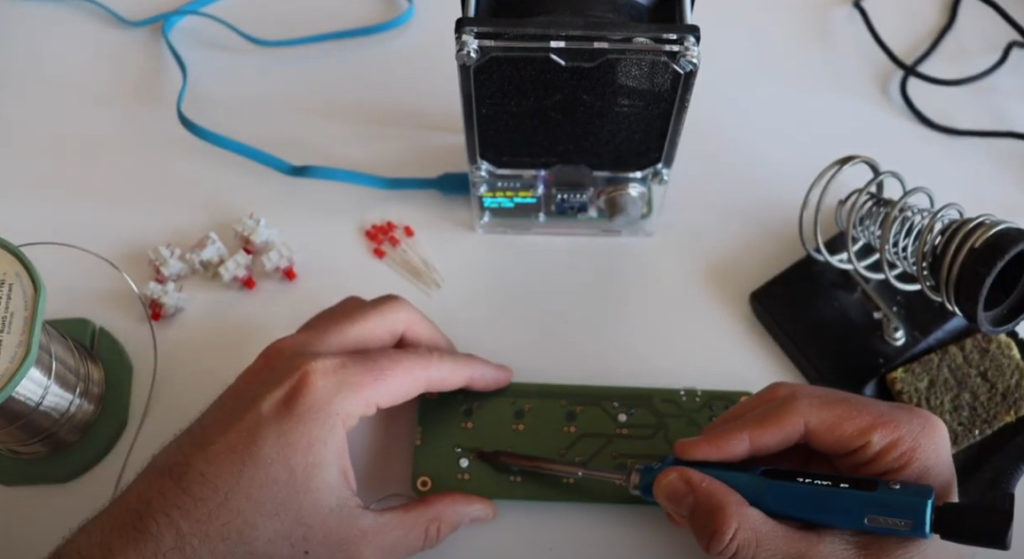
Solder mechanical switches to the PCB
Any type of mechanical switch compatible with Cherry MX plate footprint is suitable for ANAVI Macro Pad 8. The developer kit comes with Gateron mechanical switches. The maker kit allow you to use different brand and color.
Choosing the most appropriate switch for your needs and taste is a matter of personal preference. There are many different brands and colors. For example, the blue mechanical switches are more noisy which could be sometimes fun but also annoying during daily work. The red switches are fast and not very noisy therefore they are often proffered by gamers.
There are two pins on each mechanical switch that must be soldered to the printed circuit board. That makes 16 pins in total. The position of the each pin is very specific and the switch goes into the PCB. One of the pins is for the signal coming from the Microchip ATmega32U4 microcontroller, the other pin is for ground.
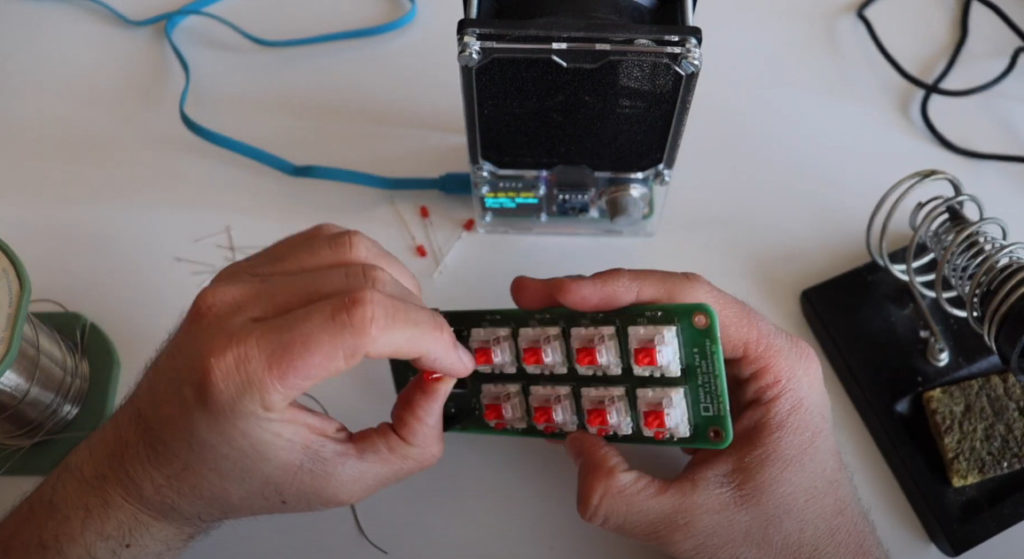
Solder 3mm LED
This step is actually optional depending on the the type of the mechanical switch. Some mechanical switches may not have a hole in the plastic enclosure for a 3mm LED.
Each 3mm LED for through-hole soldering has 2 legs. The longer leg is the positive terminal, also known as anode. The shorter leg is negative and also known as cathode.
The shorter leg that indicates the negative terminal must go into the square hole of the PCB. ANAVI Macro Pad 8 has 8 mechanical switches therefore 8 LEDs are required. If you want you can use different color of the LEDs. You can even mix colors.
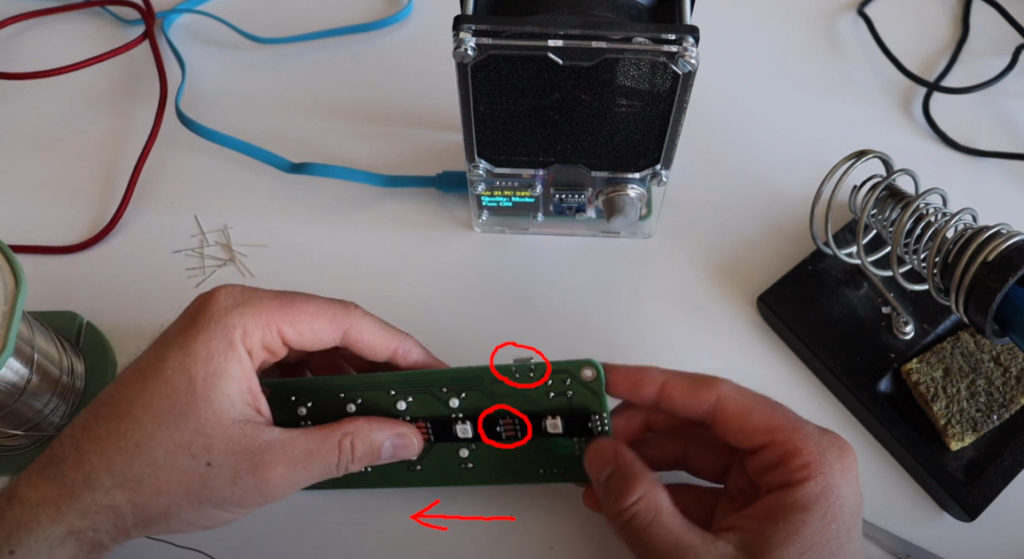
Solder WS2812B addressable LED strip to the back of the PCB
Using scissors cut a little bit from both ends of the LED strip to make sure it will stretched when placed on the board. However it is tricky, be careful and make sure enough from the pads are available to make a good contact after soldering them.
It is very important to properly set the direction of the WS2812B LED strip. On the LED strip you will notice small arrows indicating the direction. They should point from the microUSB connector towards the other end of the PCB as shown in the video.
If you have successfully completed these 3 steps your ANAVI Macro Pad 8 should look just like a developer kit having all accessories soldered. Therefore the next steps are the same as for both the developer and the maker kit. Explore them at our previous blog post as well as in the user’s manual.
Thank you for using ANAVI Macro Pad 8 and for supporting this entirely open source project!
Out of the box, all kits of ANAVI Macro Pad 8 are powered by the popular open source QMK firmware.
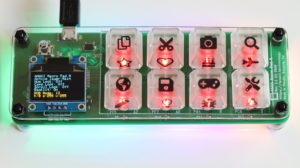
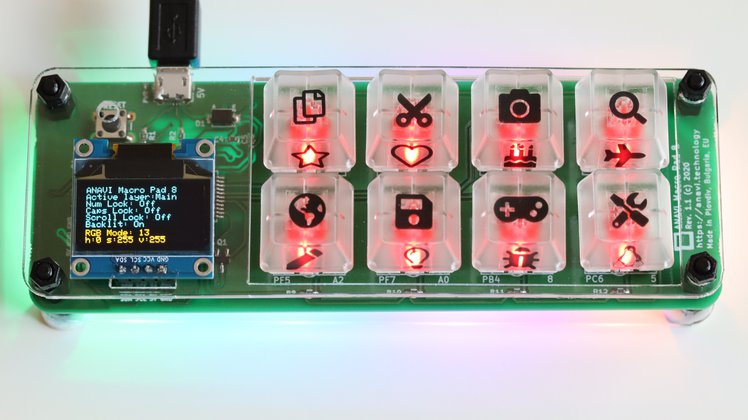
ANAVI Macro Pad 8
QMK stands for Quantum Mechanical Keyboard and it is an open source community centered around developing various computer input devices. The project is hosted in GitHub. More than 1700 developers contributed to this open source firmware over the years. QMK supports more than 2000 keyboards and keypads brands.
Although QMK is very powerful and flexible, it might be a challenge to get used to it if you haven’t used it before. Over the next weeks and months, as part of efforts for increasing the documentation related to ANAVI Macro Pad 8, we will be rolling out updates related to QMK.
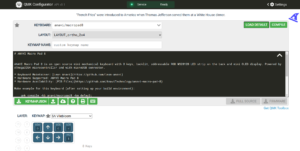
QMK Configurator loaded in a web browser with the default keymap for ANAVI Macro Pad 8
QMK offers several options to select, customize and flash a keymap for your keyboard:
Command-line interface – advanced but not very user friendly
QMK Toolbox – application for MacOS and Windows users
QMK Configurator – an online tool used for easily creating firmware files for keyboards supported by QMK.
You can use QMK on MS Windows, MacOS and GNU/Linux distributions. To get started with the QMK firmware please explore this tutorial from the official documentation and install all required software suitable for the operating system on your PC.
KiCad – free software suite for electronic design automation which as used to design ANAVI Macro Pad 8,
Kodi – for the free and open source media player application,
OBS – for the popular open source video recording and live streaming software,
Zoom – for the popular video communication software.
Over the time we plan to extend the list with keymaps for other popular software applications. Please feel free to submit your favorite keymaps for ANAVI Macro Pad 8 to the QMK repository in GitHub!
Compile QMK for ANAVI Macro Pad 8
After installing QMK software on your computer, from the command line you can compile QMK firmware with the default keymap for ANAVI Macro Pad 8 using the following command:
qmk compile -kb anavi/macropad8 -km default
Flash QMK on ANAVI Macro Pad 8
Follow the steps below to flash the compiled QMK firmware to ANAVI Macro Pad 8:
Connect ANAVI Macro Pad 8 to your personal computer with USB to micro USB cable
Execute the following command in a terminal to flash the default keymap:
qmk flash -kb anavi/macropad8 -km default
Press the RESET button on ANAVI Macro Pad 8 when asked:
Detecting USB port, reset your controller now.....
Wait until the firmware flashes successfully:
avrdude done. Thank you.
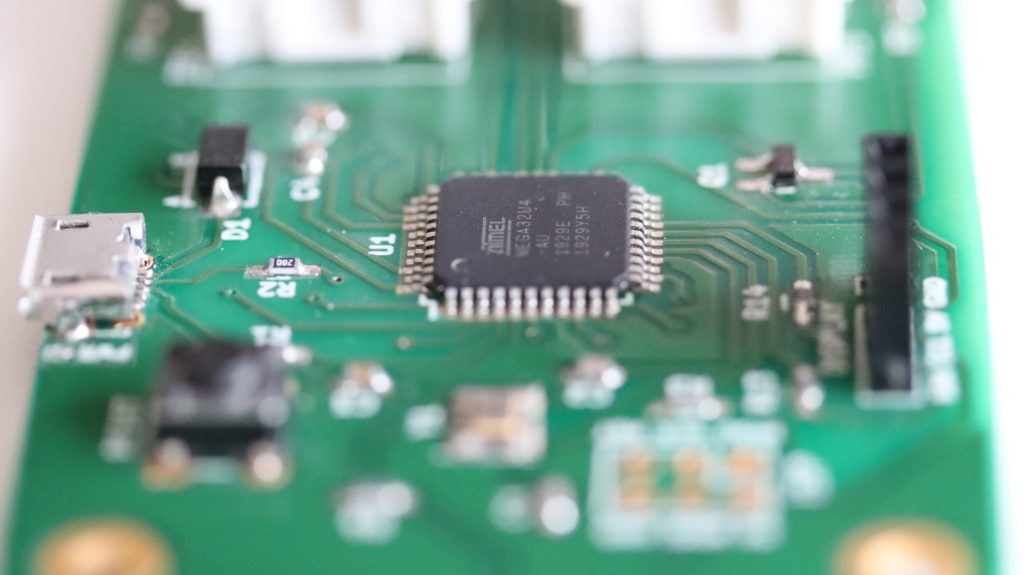
The heart of ANAVI Macro Pad 8 is Microchip ATmega32U4. It is an 8-bit microcontroller part of the AVR family. QMK relies on avrdude as the utility to download, upload and manipulate the firmware of these microcontroller.
Microchip ATmega32u4 on ANAVI Macro Pad 8
ANAVI Macro Pad 8 is available at our distributors Crowd Supply and Mouser. Please contact us if you are interested in wholesale orders or if you prefer shipping directly from the EU.
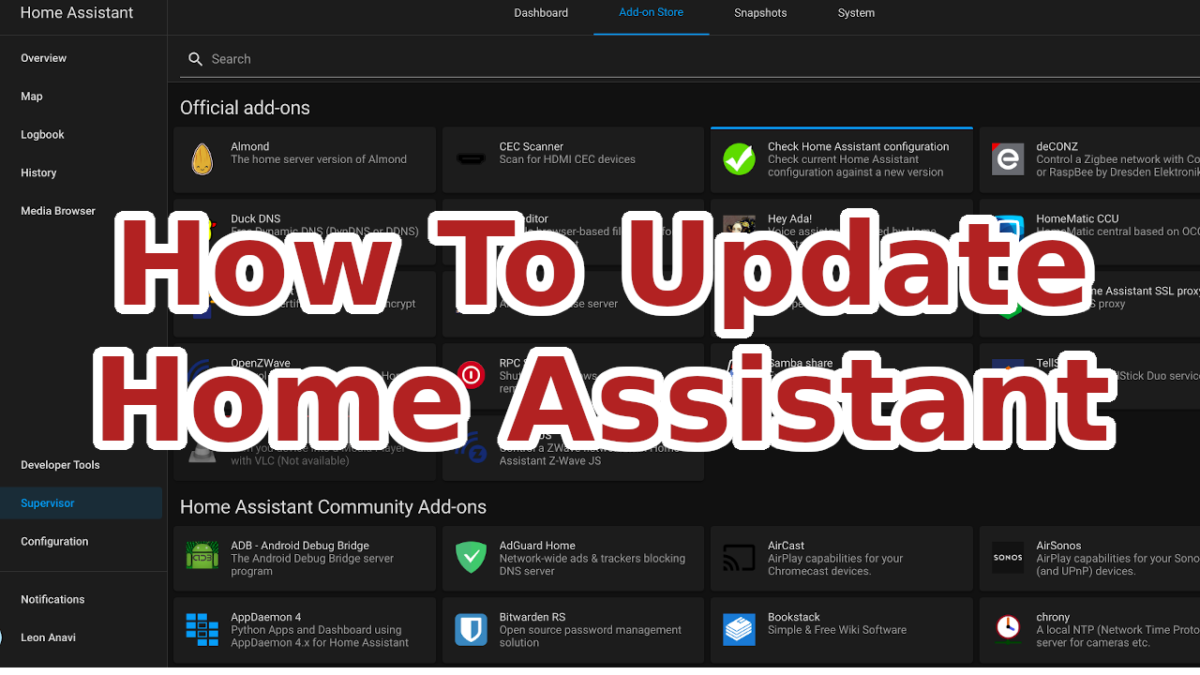
Home Assistant is a popular open source platform for home automation. The installation is still tricky and a bit annoying but the nowadays updates are straight-forward and super easy. This article and short video tutorial provide the exact steps how to update Home Assistant operating system and core following the best practices.
How to update Home Assistant?
Updates bring new features, bug fixes and security improvements. Home Assistant is a platform focused on privacy. There are regular updates. If are following the blog posts and the social media accounts you can often read news about critical security updates. It is recommended to install them as soon as possible.
Step 1: backup the existing Home Assistant installation by creating a snapshot of the whole system. From the left menu go to Supervisor. Click the Snapshots tab. Select full snapshot for type and optionally set a name. Click the CREATE button. Wait for a moment until the snapshot is ready.
Step 2: read the releases notes for breaking changes coming with the latest stable version. From the left menu go to Supervisor. Click RELEASE NOTES for any available updates. Check all release notes between the version you are running at the moment and the one you are upgrading to. Use the search function in your web browser to locate the chapter for Breaking Changes.
Step 3: check your configuration. This can be done with Check Home Assistant Configuration add-on. If you don’t have it please first install as shown in the video.
From the left menu go to Supervisor. Select tab Add-on Store. Search for Check Home Assistant configuration. It is an official add-on. Click INSTALL.
After successful installation, click START. Go to tab Log, periodically click the REFRESH button and observe the log output. On Raspberry Pi the check takes about 10 minutes so don’t hold your breath and patiently wait the check to finish. If there are no errors proceed to the next step.
Step 4: Apply an update for the operating system if such is available. From the left menu go to Supervisor. Click UPDATE.
The Home Assistant Operating System is a minimal image that runs containers and comes with Supervisor to manage Home Assistant Core and add-ons. Once you hit the update button in the web interface, depending on your system and Internet connection speed, it will take a while until the update downloads and installs. Just wait patiently. As part of the update Home Assistant will restart so you will temporary lose connection to it.
Step 5: Update Home Assistant Core. After ensuring that you are running the latest stable version of Home Assistant Operating System proceed with updating Home Assistant Core. From the web interface hit the update button and patiently wait. It will again take a while depending on your system’s hardware and Internet connection. As part of the update Home Assistant will restart so you will temporary lose connection to it. After that you will be asked to login again. Congratulations, this the whole update procedure from the user interface. As promised is straight-forward and easy!
One more thing, if are an advanced user and for one reason or another you don’t like graphical user interfaces, it is also possible to update Home Assistant through the command-line interface. Just run in a terminal: ha core update.
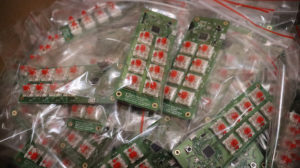
Recently we shipped ANAVI Macro Pad 8 kits to Crowd Supply warehouse. Crowd Supply team will start shipping them to you soon to backers of the crowdfunding campaign. Furthermore kits will be available on sale at both Crowd Supply and Mouser.
A fully loaded courier truck with huge quantity of ANAVI Macro Pad 8 kits travelling to the warehouse
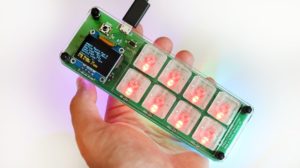
ANAVI Macro Pad 8 is an open source, custom-programmable, mini 8-key mechanical keyboard. Fully compatible and running the popular Quantum Mechanical Keyboard (QMK) open source firmware.
ANAVI Macro Pad 8 – the open source hardware 8% (8-key) mechanical keyboard
ANAVI Macro Pad 8 is made in Plovdiv, Bulgaria, EU. Here we write with a Cyrillic alphabet so if you are wondering what is the strange looking text on the parcel’s red labels – it is the word for fragile in Bulgarian 🙂
Fragile in both English and Bulgarian
Keep in mind ANAVI Macro Pad 8 is indeed fragile and please be gentle with the mini OLED display while assembling your kit.
USB to microUSB cable is not included in any of the kits. Pick a cable that suits you best or recycle a cable, for example from an old smartphone. Please be careful when plugging the cable and make sure it doesn’t bend as this may damage the microUSB connector on ANAVI Macro Pad 8.
Huge thanks to all people who supported the project by placing an order during the crowdfunding period at Crowd Supply. If you missed the crowdfunding campaign you can still order ANAVI Macro Pad 8 from our distributors right now!